
Shooting for Yourself: The Planning Process with Alissa Zimmerman
Never in a million years did I think I would find a job where I would have the luxury of traveling the world creating incredible images. I never thought I’d be tasked with finding some of the most unique places on earth to plan these photo shoots.
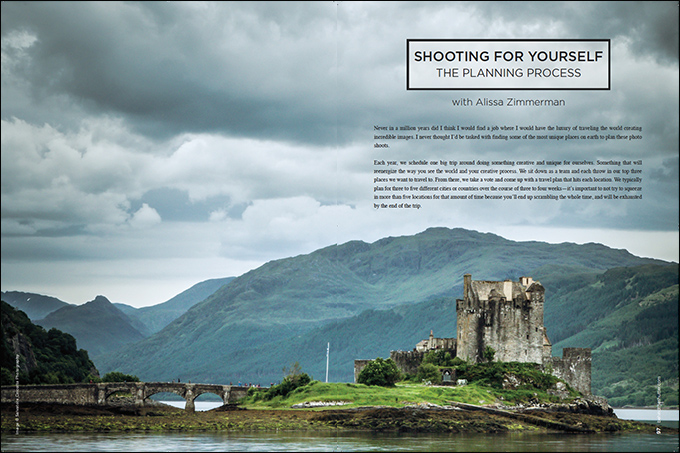
Each year, we schedule one big trip around doing something creative and unique for ourselves. Something that will reenergize the way you see the world and your creative process. We sit down as a team and each throw in our top three places we want to travel to. From there, we take a vote and come up with a travel plan that hits each location. We typically plan for three to five different cities or countries over the course of three to four weeks—it’s important to not try to squeeze in more than five locations for that amount of time because you’ll end up scrambling the whole time, and will be exhausted by the end of the trip.
Two years ago, our big trip was to London, Prague, Austria and Croatia. This was the first time we tried traveling and shooting internationally for ourselves. Because it was all new to us, we wanted to cram in as much as we could on each shoot. This time, it was only one shoot per city. Within each shoot, we thought we could squeeze in some filming for Shutter Network, film for a promo video and film for our sponsors, all while still managing to shoot for our portfolio.
Of course, all three of these shoots were complete failures. We ran into models flaking out at the last minute. Locations weren’t what they looked like online. We had wardrobe malfunctions. You name it. We came back from that trip with one or two images we could actually use in our portfolio. At that point, there was no way to justify bringing me on those trips if I wasn’t able to do my job.
This past year, Sal gave me the opportunity to redeem myself as we started planning for our 2015 trip overseas. This time, I knew I had one more shot to prove to him why I should be a part of these travel experiences. I started planning well in advance this time. We sat down and discussed what went right and what went wrong with the 2014 trip, and I took the reins from there. We went into the 2015 trip with 14 scheduled and very well-organized photo shoots (not to mention the additional impromptu shoots that happened along our road trips from city to city).
The number-one question I am asked by other photographers is, “How do you plan these portfolio shoots and all of the logistics that go into them?” Well, here’s a general overview of my process from start to finish.
- Start with an idea board.
I use Pinterest to get my initial ideas ready to present to Sal for the selection process. We’re creatives, meaning we’re all visual people. Seeing images is the best way to help you decide locations.
- Narrow down your ideas to your top three to five selections.
From here, I create individual Pinterest boards for my top selections and start adding specific locations for the next round of selections.
- In each country, select your top three locations you want to shoot.
I take every location I have pinned and map it out to see what’s realistic and what’s not. You’ll want to factor in drive time, shoot time, hair and makeup, lunch, etc. From there, you can decide if you need to stay overnight or if you can find a central location and make a bunch of day trips from there.
- Once your locations are finalized, map out your plan.
I present the overall itinerary to Sal with a map and walk him through how many days we will need to be in each place. I show him drive time versus flight time, and have multiple images of each location to support the itinerary I’m presenting. It’s important to have multiple variations of perspective of the locations because images online don’t always show the scene as it really is. To that point: Do your research before pitching any location idea or planning anything around it. There’s a ton of images floating around online of Photoshopped places that don’t actually exist. Spend the time upfront fact-checking, or you’ll just be setting yourself up for failure.
- Once I have everything approved, I start applying for permits for locations where they’re needed.
Again, invest the time upfront to make sure there will be no disasters the day of the shoots. Sometimes you may not need a permit even when they tell you do, but it’s better to be safe than sorry when you’re in a place you can’t easily come back to.
- Start building the travel around the itinerary.
For anyone who likes to travel in groups like we do, it’s really smart to look at vacation rental sites like Airbnb, VRBO and HomeAway as an alternative to booking multiple hotel rooms. You’ll end up paying a fraction of the cost and have the experience of living like a local for a few days. Always do your research about driving laws when planning road trips overseas. We all got international driver’s licenses, yet never ended up needing them. Yet again, better safe than sorry. I think they ended up being about $25 and were turned around in less than five business days.
- Book the models and hair and makeup artists.
Ah, the fun part. These people are notoriously the most unreliable part of the entire process. We didn’t want to run any risks on this trip by using Model Mayhem to book our models and makeup artists, so we made the executive decision to invest the money and book professionals through agencies in each city. Luckily, we were traveling to all mostly English-speaking countries, so the language barrier was an issue only when we were booking shoots in Iceland.
I present anywhere from five to 15 options to Sal for models to give him plenty of variety to choose from. Once everyone is confirmed, follow-up is key to success. Get their direct contact information and confirm a few days before as well as the night before the shoot.
- Plan the flow of the actual shoot.
I always determine the drive time to the location first, then fill in the rest, working backward from there. If you’re planning a specific shot at golden hour, figure out the exact time of sunset and plan around that. Give yourself plenty of time for traffic, lunch, hair and makeup touchups, wardrobe changes, etc. It’s smart to plan a few shots before the main shot you want so you can get your model warmed up and comfortable in front of the camera.
- Don’t forget to have fun and celebrate with your crew afterward.
We love working with a team full of personality and building lifelong friends from around the world. We take selfies, post videos making fun of each other and always share a celebratory drink at the end of the shoot. (Tip: Always pick up the cocktail tab, especially when it’s your idea to go.)
The planning process is extremely detail-oriented, but once your structure is solid, it becomes a fun part of the travel experience. Have fun with it, stay organized and, most importantly: Don’t let it overwhelm you. The second you start feeling overwhelmed, take a step back and revert to the three-part formula we use for every shoot: Book a model, find a location, determine the concept. The rest will fall into place.


