
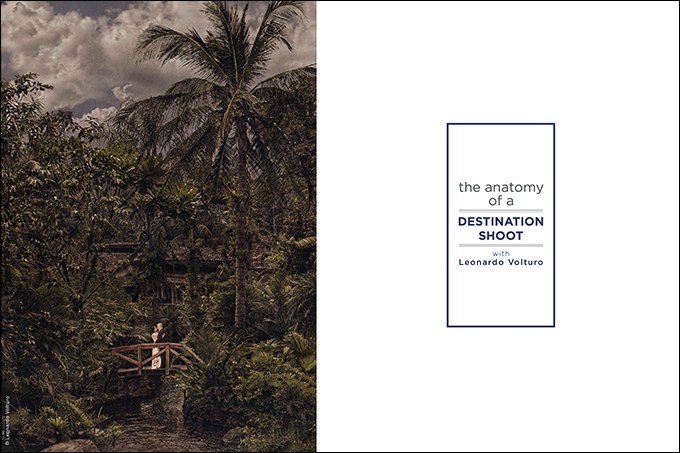
The Anatomy of a Destination Shoot
I know April was the travel issue of Shutter, but an experience we had last month on one of our destination shoots gave me an idea for an article. What follows is the anatomy of one of our destination engagement shoots that shows why you should be offering them, how to produce them and, especially important, how to overcome the challenges they present. Let’s break down what I think are the essential elements involved in putting together a successful destination engagement session.
Travel
We block out four days for destination engagement jobs: two for travel and two for scouting and shooting. I’ll detail below how this plays out day-by-day. In the past, we tried to make it work with only three days away from the studio, but given issues with flights and weather that can crop up, we found four days was a better fit. With engagements, you’ve got much more control and flexibility compared to weddings.
Weddings are often at the mercy of the weather. With our destination engagement sessions, we do our best to build in enough extra time and flexibility to account for unexpected flight and/or weather issues. Clients are spending a lot of money to get you and possibly your team to their destination, so you need to have a solid plan with contingencies in case things go off the rails. Remember, it’s your job to provide a great experience and deliver the images you were hired to produce.
Here’s what our typical destination engagement shoot schedule looks like:
Day 1
Arrive at the location early; allow ample time for location scouting and any additional onsite planning that’s needed.
We also try to have dinner with our clients on Day 1. We spend that time catching up, telling them what to expect on the shoot, and genuinely investing in them and building a great relationship. (Despite the good times, it’s equally important to keep in mind that you’re not there on vacation.)
Day 2
Shooting or partial scouting and shooting, depending on how much is accomplished on Day 1.
Day 3
Built-in bad-weather/travel-delay contingency day. This is our extra day of padding; it’s our safety net. If there were no issues on Day 2, then Day 3 can be a day to relax or do additional work with clients. We typically offer our clients extra time in front of the camera, giving them a wider diversity of images and a terrific overall experience. The added benefit is that more images and locations translate into more post-sales opportunities, so it’s a win-win.
Day 4
Travel home.
Gear
You want to be as compact and efficient as possible. You are going to be going through security checkpoints and trying to shove your gear in those little overhead bins. Do not check your camera gear—ever! The only things we check if we can’t carry them on are things like small light stands and inexpensive light modifiers.
The only time carry-on can present problems is if you are on a smaller plane, one that doesn’t have overhead compartments large enough to accommodate a typical camera bag. Do your research ahead of time so you can find out exactly what type of plane you will be on, and plan accordingly for carry-on measurements and weight requirements/limitations. This is a super-important step. If your bag ends up not fitting in the overhead, you may end up having to surrender it to a flight attendant so it can be checked (read: chucked) into the belly of the plane. And if the bag is over the stated weight limitations, you can easily get stung at the gate with hefty fees.
Don’t be surprised when they pull your bag aside at the gate and weigh it. You can either break it up into smaller bags or go with a bag that will fit under the seat in front of you. We carry on two bags with us (Lowepro x200 and Profoto Backpack M) that each fits in the overhead bins of major airlines but not those on regional jets. One has our cameras and lenses and the other has our lights.
Here is a list of what we bring. These are all of the essential items we use to produce our images. We bring the lenses we use on a regular basis, two camera bodies and enough lighting to overpower the sun and provide creative flexibility.
Canon 5D MkIII x 2
Canon 70–200 2.8L II
Canon 24–70 2.8L II
Canon 16–35 2.8L II
Sigma 1.4 Art Lens
Profoto B1 Location Kit
Profoto Air Remote TTL-C x 2
Profoto OCF Grid Kit
Profoto OCF 2′ Octa
MeFOTO RoadTrip travel tripod
Spider Holster with lens pouches and hand straps x2
Planning and styling your session
When planning sessions, you definitely want to go above and beyond what you normally do for your typical local session. For our latest shoot, we initially thought about heading to Europe with our couple. But we decided on Costa Rica, which was the location of their first trip together.
Locations matter. Choosing a destination that has meaning to your to clients is a surefire way to create an emotional bond with the experience and images. This results in stronger pictures and increased sales opportunities. Another great example of creating an emotional bond based on location was shooting one of our couples in New York City, where they first met. You don’t get a better backdrop than NYC.
For Costa Rica, we coordinated with our clients as well as the stylist to create several different looks. It’s important to have a well-thought-out concept, look and wardrobe. You don’t want to show up and find out your client only has Bermuda shorts and flip-flops. We always provide plenty of direction for clothing, and view client selections well in advance. This way, we can make sure everything is consistent with the vision for the shoot.
We give clients a clear idea of what pieces and styles they should be looking for when they’re shopping, and ask them to send pictures wearing the outfits they choose. Doing this assures us everything’s clicking, and provides an opportunity to make any necessary adjustments.
In Costa Rica, we knew we would be shooting around a volcano, beautiful tropical settings and thermal hot springs. With that in mind, we knew we wanted to start off with something casual. It was a great way get our clients comfortable and then move on to the more dressy looks and finally the swimwear you can see in the images. We had three solid looks to work with in advance. After arriving in Costa Rica and scouting our locations further, we were then able to re-review all the wardrobe options our client brought, and formalize our shooting plan. We also had the luxury of a talented stylist on our team who provided added variety with makeup and hairstyling for a total of five different looks.
We can’t stress enough the importance of planning and styling sessions in advance. It reinforces your position as trusted advisor for your clients, and also ensures that you will be able to deliver as promised.
Challenges & Tips
Now let’s run through some quick tips to help you avoid the challenges that can arise.
- Sign up for a trusted traveler program such as Global Entry. Customs and Border Patrol Trusted Traveler Programs provide expedited travel for preapproved, low-risk travelers through dedicated lanes and kiosks. Global entry provides you with quicker reentry to the U.S.A. It costs $100 per person and includes TSA PreCheck for your domestic travel. PreCheck gives you quicker transit through airport security screening and faster lines, and you don’t have to remove your shoes, belt or light jacket. You can keep your laptop and “3-1-1”-compliant bags in your carry-on.
- Always book your own travel. We learned this the hard way on our Costa Rica trip. After our first flight got canceled due to inclement weather there, our clients, who were already there, offered to book us a new flight. We thought we were in great shape until we tried to board seven hours later and were denied. It turned out the airline flagged our clients’ ticket purchase as fraudulent because it was made outside the U.S. We weren’t even allowed to pay our own way at that point; apparently it’s against airline policy. We ended up being forced to take a flight the next day. So book your own travel and schedule an itinerary you’re comfortable with. It’ll save you a lot of headaches.
- Pay for upgraded seating. The extra legroom is great, but the real bang for the buck comes with the priority boarding that’s usually included. This means first dibs on the limited overhead compartment space.
- Research your flight and plane to make sure you can carry on your gear. I use an app called SeatGuru. It allows you to book flights, but more importantly, it shows you your plane and a seat map, and provides details about each seat and the plane itself.
- Our final issue, which I’m sure you’re thinking about by now, is how to run your business while you’re away. In the U.S., it’s safe to assume you’ll have access to cellular and Wi-Fi service. Once you’re outside the county, it’s a different ballgame. Install WhatsApp and have your clients install it too. This app allows you to text and call over Wi-Fi for free. Purchasing a prepaid SIM card for your phone when you arrive at your destination is another good move. Check with your carrier for options.
It all comes down to doing your homework. Find out as much as you can about your destination, and make sure you have the ideal travel arrangements.
Why?
We’ve talked about traveling. We’ve talked about gear, some tips and how to overcome certain challenges. At some point, you may have asked yourself, “Why am I doing all this? Is it worth it?” Yes it is! Think about it. You’re offering your clients a unique experience. We’re all about standing out from the crowd. You’re offering them once-in-a-lifetime images.
It’s a win-win: The clients enjoy a sweet getaway and world-class experience, and you get amazing portfolio images and the opportunity for increased post-sales. People who are going to take time away from work, be out of town for several days, and spend their hard-earned cash on travel, wardrobe and your travel are going to make a significant purchase of the engagement images. Do your best to capitalize on that experience.
This is why I encourage everyone to offer destination engagement sessions. It won’t be the right fit for every client, but when it is, it’s an incredible experience for everyone involved.


