
Top 10 Tricks to Edit in Lightroom Faster with Dustin Lucas
You know that feeling you get when you finish a shoot and realize how many hours you now have to work in post? Wouldn’t it be nice to just import in Lightroom, click a few presets and export files? That’s the point of Lightroom’s efficiency, but there is some additional finessing required to ensure your images are consistent while maintaining your look and feel. Here are 10 tricks to help you get through this grueling season and edit faster.
We start with prep: smart previews, preferences and simplifying your workspace. Then we move into Develop and look at auto tools and sync settings. We will cover a lot of ground quickly. Match total exposure with shifting sequences of images along with the White Balance selector tool to get things started. Turn on white and black clipping to make sure you’ve got a nice dynamic range. The next best thing to auto tools is the Target Adjustment Tool for HSL and Tone Curve. We can get local with the Gradient Tool and toggle our Erase brush. Last but not least, I walk you through the Crop tool and how to navigate through multiple images faster than ever.
1. Edit smarter with smart previews and preferences.
First things first, you gotta work with smart previews and tweak your preferences. You can build smart previews at import or after; I recommend doing it at import so you can go have coffee and come back in an hour after 1,000 images finish. These are a fraction of the size of your Raw files, and you can quickly run through your images. I disconnect my Raws many times when doing my Color Corrective adjustments. Here are the preferences you need to tweak as well.
Working in Lightroom Classic, everything I need is under Performance. Here’s a Lightroom 101 tip. Turn off the setting Use Graphics Processor, which is likely the reason your catalog has been dragging. Set your Maximum Size for Camera Raw Cache Settings to around 100GB—you’ll thank me later. Most importantly, check the box next to Use Smart Previews instead of Originals to take full advantage of these once they’re built. Take this to the next step and ditch the Original by Updating File Location and choosing where the Raws aren’t saved. Now we are ready to simplify things when we edit.
2. Simplify your workspace.
When you are looking at an image or a grid of them, seeing all the panels can distract you and take up a lot of computer screen real estate. To rid yourself of these panels, simply hold Shift and strike the Tab key. Repeat this to bring them all back, or click any of the arrows to isolate a specific panel. This is useful when you want to edit on a laptop.
I also like the Lights Out tool when I want to zero in on an image. Tapping the L key in Library or Develop mode pushes away everything except the image. You can now check your exposures against a solid black background. I like to cull images in this mode to help keep me from being distracted with all the crap in Lightroom.
3. Use these quick-click auto develop tools.
I am not an auto person. I rarely use auto, but it’s important to know how to break the rules and utilize these features to save time. Auto Tone is garbage and I stay away from it, but I will hold Shift and click on the Basic Panel tools to get a quick glance.
Hold the Shift key and double-click any setting that would normally be adjusted during Auto Tone. These include temp, tint, exposure, contrast, highlights, shadows, whites, blacks, vibrance and saturation. (9) These adjustments are based on the histogram as well as Adobe Sensei, and don’t affect skin tones. These auto tools can be useful in some situations, but you can’t always depend on them.
I am terrible with tint adjustments. Instead of relying solely on my camera, I use my daylight rule. Daylight-balanced scenes should be +10 in tint and, when using auto, tend to go to 0. The process is similar for temp at 5,000K for direct sun and 5,500K for flash. I find myself playing with this range rather than trying to find the colorcast visually, if that makes sense. If you want auto white balance, hold Shift and Command and strike the U key. But this won’t solve all your problems.
4. Sync develop settings.
Many of us use presets, which are essential to editing fast in Lightroom. When you make individualized adjustments in Develop, you need to be able to quickly copy and paste these adjustments to images in the same scene. It’s simple to do—just edit the first image and select all the remaining images in a similar sequence. Then hold Shift and Command while striking the S key. This opens a menu where you choose which settings to sync. I recommend always unchecking Local Adjustments, Spot Removal and Crop.
Be sure that Auto Sync isn’t turned on. With Auto Sync, anything you select will automatically sync to the adjustments made after selecting images. So if you edited prior to selecting them, the images won’t be altered until a new adjustment is made.
Another great thing about Sync Settings is it remembers your last settings so you can fly through images without having to reselect settings.
5. Match total exposure.
This tool is helpful when shooting serially. If you shoot in manual mode and fire in large sequences, you will love this tool. It takes your target images and matches the overall exposure to the selected images. This can be done simply by editing the first images and dialing in the exposure. Then select the sequence of images and hold Shift, Option and Command while striking the M key. This little trick goes a long way for situations where the lighting shifts in a scene and you shoot manual exposures and they are off in sequence.
I have had success editing from images shot in aperture priority or Auto ISO to compensate for the changing light. Studio and flash-lit sessions are bound to find use for this tool as well.
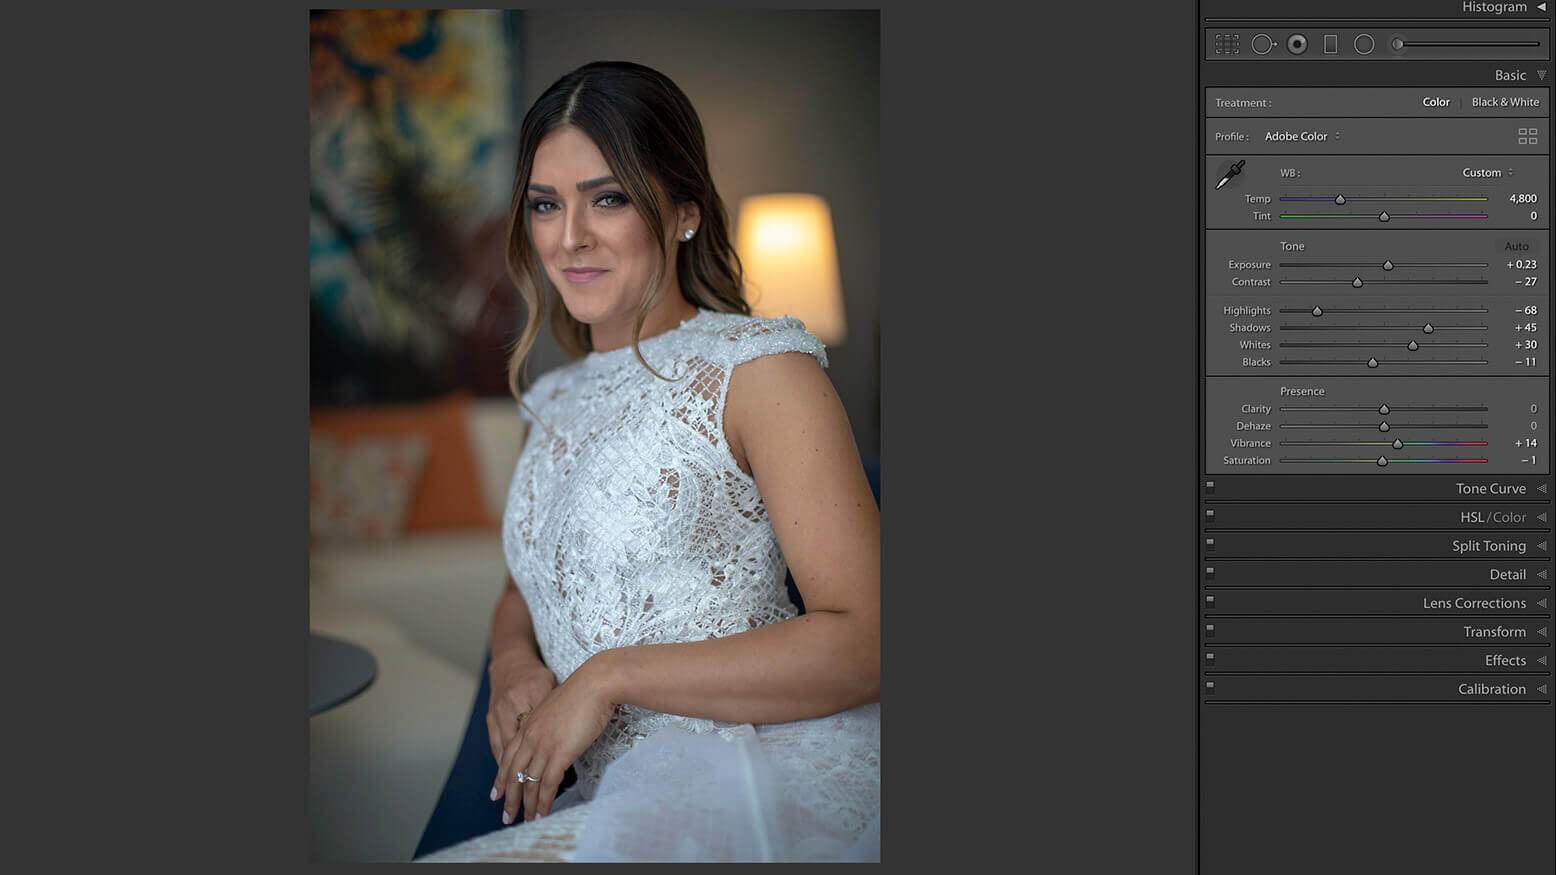
6. Use the white balance selector to find neutral.
To access this tool in Develop, strike the W key to turn your cursor into a color picker. For the best results, you’ll need to find a true neutral tone to click on. It’s easy to know when it’s not neutral because the entire image will shift yellow, blue, pink, green, etc. You can choose a wedding dress, but it will mislead you into thinking you’re done. A wedding dress is not typically white, and when you choose this, it becomes a starting point for white balance.
Clicking on a groom’s blazer is misleading because it usually has a shade of blue or is actually blue, as in this case. This tool is tricky and you must understand the limitations to use it successfully. Stick with neutrals and, when in doubt, grab the highlights on the bride’s dress.
7. Show highlight and shadow clipping.
You may have noticed the triangles in the upper corners of the histogram and how they relate to the edge of your histogram, looking like a wall. This is due to highlight and shadow clipping. (20) You can monitor clipping by striking the J key to see blue masked-over clipped shadows and red over the highlights. This can help you choose exposures and recover tones. Another shortcut is to hold the Option key while dragging the white and black sliders to see the clipping overlaid on your image.
With auto settings, hold Shift and double-click whites or blacks next to the slider to adjust them just to the point of clipping. This is the fastest way to manually adjust image to image with a proper amount of density.
8. Use the Target Adjustment tool for easy syncing.
This is a highly underused tool to quickly adjust HSL, Tone Curve and Black & White mixing. To access it, hold Shift, Option and Command while striking the H, S, L, T or G key. Then click in an area and drag the cursor up or down to adjust the image. This makes it simple to pull blue tones out of the dress or drop the saturation in the grass. Then you can sync the Color Adjustment settings to images in the same sequence.
9. Use the Gradient tool with the Erase Brush for easier adjustments.
Local adjustments can add a lot to your image, especially when applying a Gradient Filter to darken skies, windows and other bright areas of an image. (24) Strike the M key to use this tool. Efficiency is in the hotkeys, and toggling with the brushes is important to erase the effect from the faces of the subjects. Hold Shift and strike the T key to access the brushes, and then hold Option to access the Erase Brush. You can sync these settings and move the Gradient Filter with the pins. This tip will save you a lot of time per image for those outdoor formal shots.
10. Crop and straighten.
Access the Crop tool by striking the R key. You can adjust the image with the tool in the panel and quickly toggle the orientation of the crop by hitting the X key. Cycle between images by holding the Command button and arrowing right/left. To straighten, hold Command and click and drag to level the image.
The Results
These tips can make the difference between 10 hours of editing and two. Implement them into your day-to-day editing to see if they can shave some time. You don’t have to fear wedding season. Own it with better editing.


