Top 3 Tips For the New Masking Tool in Lightroom Classic v11 with Dustin Lucas
It’s busy season for most of us and what better time for Adobe to drop a new version of Lightroom Classic, right? Not only that, but Apple released Mac OS Monterey and silicon chips for creatives. With Adobe’s recent release of Lightroom Classic version 11, we are finally seeing a huge overhaul well overdue. Masking in Lightroom Classic just became game-changing due to its pairing with AI. You can now quickly add a mask to select specific subject(s) and sky, and even refine masks to a whole new level.
Of course, if you haven’t updated to Lightroom Classic v11, I encourage you to take advantage of the new masking feature. Also, be sure to install the latest 11.0.1 patch update to reduce bugs like presets not syncing and other reported issues. It also helps if you create a brand new catalog in the new version instead of upgrading catalogs. Just a few extra tips before getting started. With the new masking tool comes a learning curve. Let’s dive into the new interface.
1. Quickly select subject
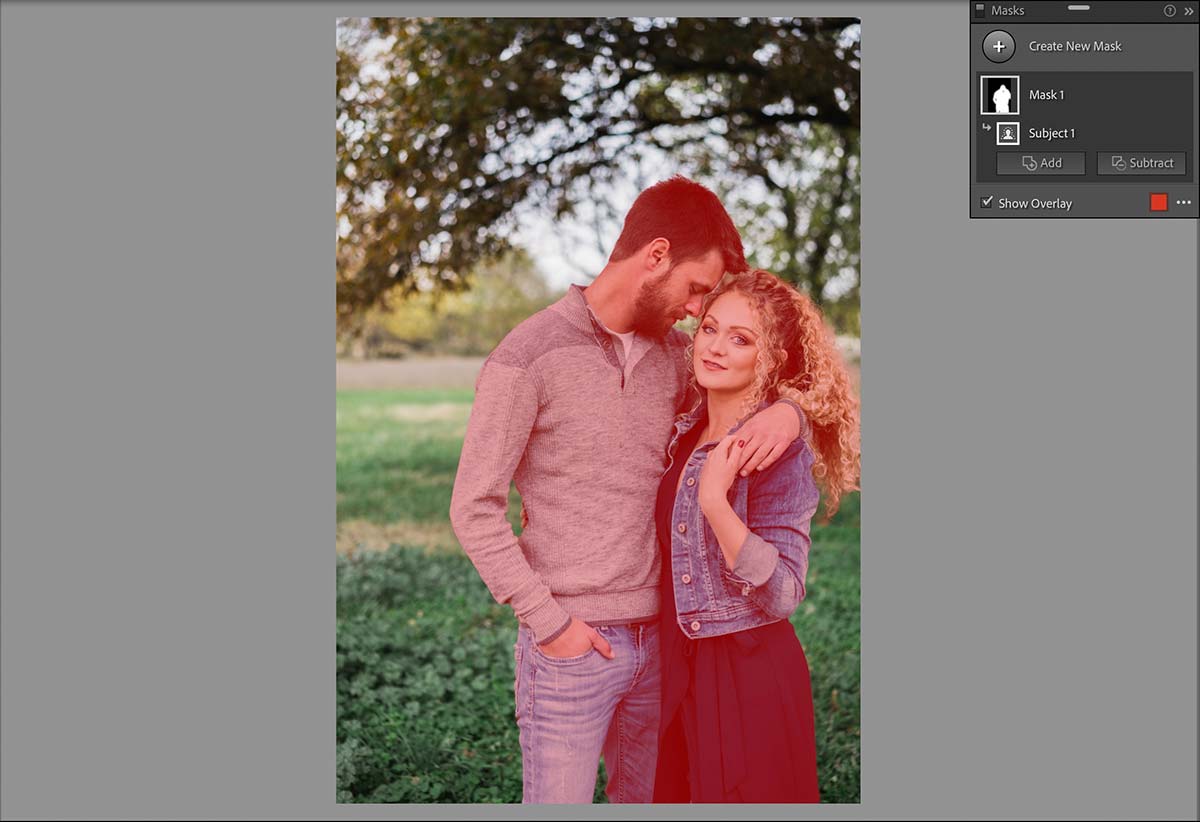
With a new interface in Develop, you’ll notice your crop, spot removal, red eye, graduated and radial filter and adjustment brush tools have changed in look. If you strike the “k” key you still get to the adjustment brush but you’ll notice a new panel pop up with what looks like layers. Now that masking has evolved, we must rewire our brains to use it efficiently. So instead of using your hotkeys, just simply click the masking tool to the far right and you’ll see quick options to choose: Select Subject, Select Sky which uses AI to automate selections. Along with this, the Auto Mask tool has gotten more accurate as well. After choosing the Select Subject option, within a few seconds the couple is painted in red where the Develop effects can be applied. Once I raise the exposure the red mask falls off and we can see the changes take effect.