
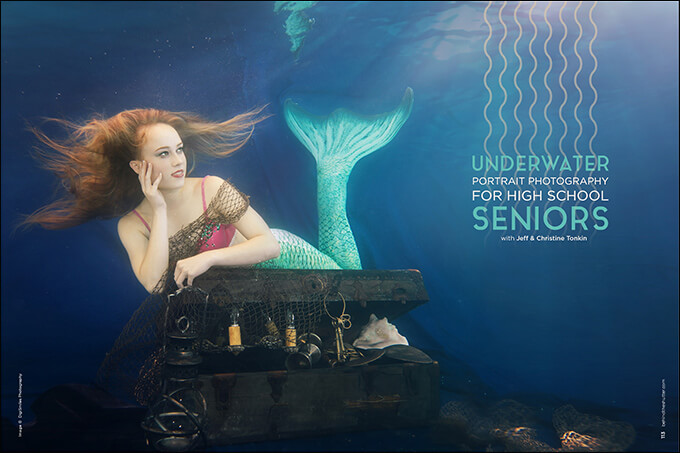
Underwater Portrait Photography for High School Seniors with Jeff & Christine Tonkin
Want more information on this article? Get access to video content and additional supporting images. Launch the March issue of the magazine by logging in or signing up for a free account by clicking here. Shutter Magazine is the industry’s leading professional photography magazine.
Thriving photography businesses adapt to the changes in the market they specialize in. We wanted to do something different within our senior market that would create a lot of buzz and momentum for client referrals. After many hours of brainstorming and deliberation, DigiSmiles Splash Week was born.
Our idea was to shoot underwater with all our senior reps as well as any prebooked clients who were interested in participating. They would share their experiences with their peers heading into their senior year. We had never attempted a promotional shoot so far out of the box to attract new clients, so we set everyone’s expectation that they will have fun during the experience, but we weren’t sure how many quality images we would be able to deliver.
We felt strongly that being transparent with our clients was going to be appreciated. If we did succeed, it would be a massive boost for our business. We thought that boost alone was worth the risk of failure. In a few short weeks, we researched all that we could to make DigiSmiles Splash Week a success. We are so excited to share with you all the tips we learned from our experience during 150-plus hours shooting under the surface. This includes session planning, the gear you’ll need, posing in an underwater environment, makeup, props, editing and several tips that you must know to maximize your underwater productivity.
Planning
The most important hurdle to overcome when hosting an underwater event is everyone’s safety. Delegate a responsible individual, an assistant or parent, to monitor the body of water like a lifeguard, ensuring that no one enters the water unauthorized. Additionally, if a model wears a costume in the water, it will weigh them down when saturated, and one or two assistants will need to be in the water to help the model return to the surface. Creative minds seeking out-of-the-box results may overlook the dangers of their craft and forget these life-saving details. Planning for these details will add to the value of the experience you are providing your clients.
Our first goal was to find a pool that would accommodate our creative scenery. Not all pools are the same. We wanted a pool that was not too blue or overly chlorinated. We learned that a “salt pool” would possibly be gentler on the eyes, allowing us to stay in the water longer without getting prune-like skin. We also wanted a private pool to avoid interruptions and distractions. Because we already planned for safety measures to maintain everyone’s safety, we did not want to deal with the rules or liabilities of public pools.
We don’t do anything minimalistic. So, we quickly realized all the supplies and props required would be more of an investment than we originally expected. At one point in the early planning stages, we actually called the whole thing off because of the initial budget requirements. After a few days of deliberation, we took a deep breath and decided the investment and risk were worth the potential payoff.
As with most on-location shoots, you will need to plan for whatever will make the experience exciting and memorable for your clients. There may be some downtime for your clients while they wait their turn to get in the water; providing poolside snacks, drinks, seating, extra towels and music are some important considerations you’ll want to address if their entire experience is going to be a positive one. Taking care of your models in this manner will add value to their overall experience, and they will promote your business to their friends because of how much fun they had throughout their session. But giving your clients a schedule of the session day is particularly important to keep progressing along your workflow and prevent prolonged downtime for your clients and yourself.
Gear
If you’re reading this, then you are already doing your homework to prepare yourself with the right equipment. Investing in the best underwater camera housing is highly recommended to keep peace of mind about the safety of your most valuable gear, your camera. By investing, we mean renting. With technology changing every year or two, owning this equipment was not the right fit for our business. We rented an Ikelite camera housing with underwater strobes. Ikelite’s website offers video tutorials and support articles. Our online research found too many reviews on several different sites about underwater camera bags that leaked; water-damaged equipment was simply not a risk we wanted to stress about.
We also recommend using a wide-angle lens. Shooting at short distances
underwater helps prevent distracting floating particles in your shot and allows the strobe lights to properly expose your subject and minimize the “bluing” that occurs when shooting distances over 10 feet through water. Don’t forget your GoPro or other action camera that can capture behind-the-scenes footage both above and below the surface. Even a flying drone camera can capture a unique view overhead of the fun experience out of the water.
Under the surface, we used a scuba diver’s weight belt to keep the shooter from floating uncontrollably out of the perfect shooting angle. If you want to change the background color of your underwater shot, simply hang a heavy nonreflective black fabric over the side of the pool and turn a baby blue wall into a deep, vast ocean black. Have several bricks or iron weights around to hold the fabric on the pool bottom and the edge above the water. Other items we recommend having on hand are safety pins, heavy-duty paper clasps (not paperclips) and fishing line to suspend props at different depths.
Posing
Consider your environment. Everything is different underwater. Think s–l–o-w.
Underwater movement can be a serious challenge. It can make your subject look as graceful as a mermaid or awkward as a newborn giraffe. Coach your models before getting in the water and again just before dipping below the surface. Models need to understand how to move underwater. We asked our models to spend several minutes submersing themselves while working on staying as calm and relaxed as possible, and to keep their eyes open as if they were in a normal environment.
Instruct your models to descend slightly deeper than your shooting depth; as they rise, their hair and loose-fitting wardrobe will flow downward and appear as if they’re in above-water gravity. If you shoot during descent, hair and loose-fitting wardrobes will awkwardly and chaotically be floating out of place. The model’s face should be leading the rest of the body’s directional movements to keep the flow of hair out of the face.
If a model is having difficulty looking relaxed underwater, take artistic shots where the model is not looking directly at the camera. To maintain a graceful, floating look, point the toes so that the feet don’t look like they are standing on flat ground. Releasing a small amount of breath during descent allows the model to stay under the surface without floating upward and keep air bubbles from escaping out of the nostrils, thus ruining a beautiful shot.
Each dive lasts, on average, 30 seconds or less, depending on your model’s ability to hold her breath without looking like it’s her last. That feels like eternity when beneath the surface, but you’ll easily click the shutter button 10 to 12 times per dive.
Seniors who are on a swim team are much more skilled at looking calm underwater, staying submerged for longer periods, and changing poses for multiple looks during each dive. Swimmers are also skilled at breathing techniques, keeping them well below the surface without the tendency to unintentionally float back up before getting into position.
Shooting up at the model floating underwater near the surface makes an excellent backdrop with varying textures and reflections. Splashing the surface adds a unique effect that may enhance the backdrop if it fits the look you’re going for. Don’t forget that shooting from several angles gives you more vantage points you may find creatively useful.
Makeup
Waterproof makeup is a must. Highly pigmented oil- or wax-based makeup works best. Application should be heavier and a bit more dramatic to showcase a brighter, more impactful look underwater. We found several great options to choose from. Sephora’s Makeup For Ever aqua line was designed for the Parisian Underwater Ballet. MAC offers an aqua line that does not smudge. Maybelline Color Tattoo pods offer an inexpensive and effective way to build many colors at about $6 per color. These pods come in eyeliner, shadow and blush.
Editing
Don’t be alarmed when all your images have a blue or green colorcast from the pool water, walls, reflections, etc. Image editing workflow will primarily consist of correcting colorcast, popping color, sharpening and removing distracting objects (pool drain, filter box, tile edges, bubbles). Correcting colorcasts can be done using many methods. Adding more magenta and red using the curves tool is very effective. You might create composites in Photoshop to change the background environment to add your artistic skills to your underwater portfolio, inventing different underwater worlds to pose your clients in.
Other Tips
Water clarity variances significantly impact image quality. Consider whether it is more beneficial to have the pool filters running during the session, or only during breaks. Limit the occupants entering the pool, as more contaminants from sunscreen and other particles will cloud the water. A high-flow filtration system can create a subtle current that disrupts suspended props or backdrops.
Even a heavy downpour did not slow us down, but your available light does change significantly throughout the day as the sun treks across the sky. If you spend several hours in the water shooting as we did, you’ll notice changes in shadows, “tiger striping” on the surface and ambient light fluctuations from clouds or structures.
For us, an extension ladder and some plywood made convenient scaffolding across the pool to stand on and hang larger props from.
The experience is pure fun for seniors who get to play in the water while you get to make your own splash in your senior market.
Want more information on this article? Get access to video content and additional supporting images. Launch the March issue of the magazine by logging in or signing up for a free account by clicking here. Shutter Magazine is the industry’s leading professional photography magazine.


