
3 Ways to Nail Bridal Prep with Vanessa Joy
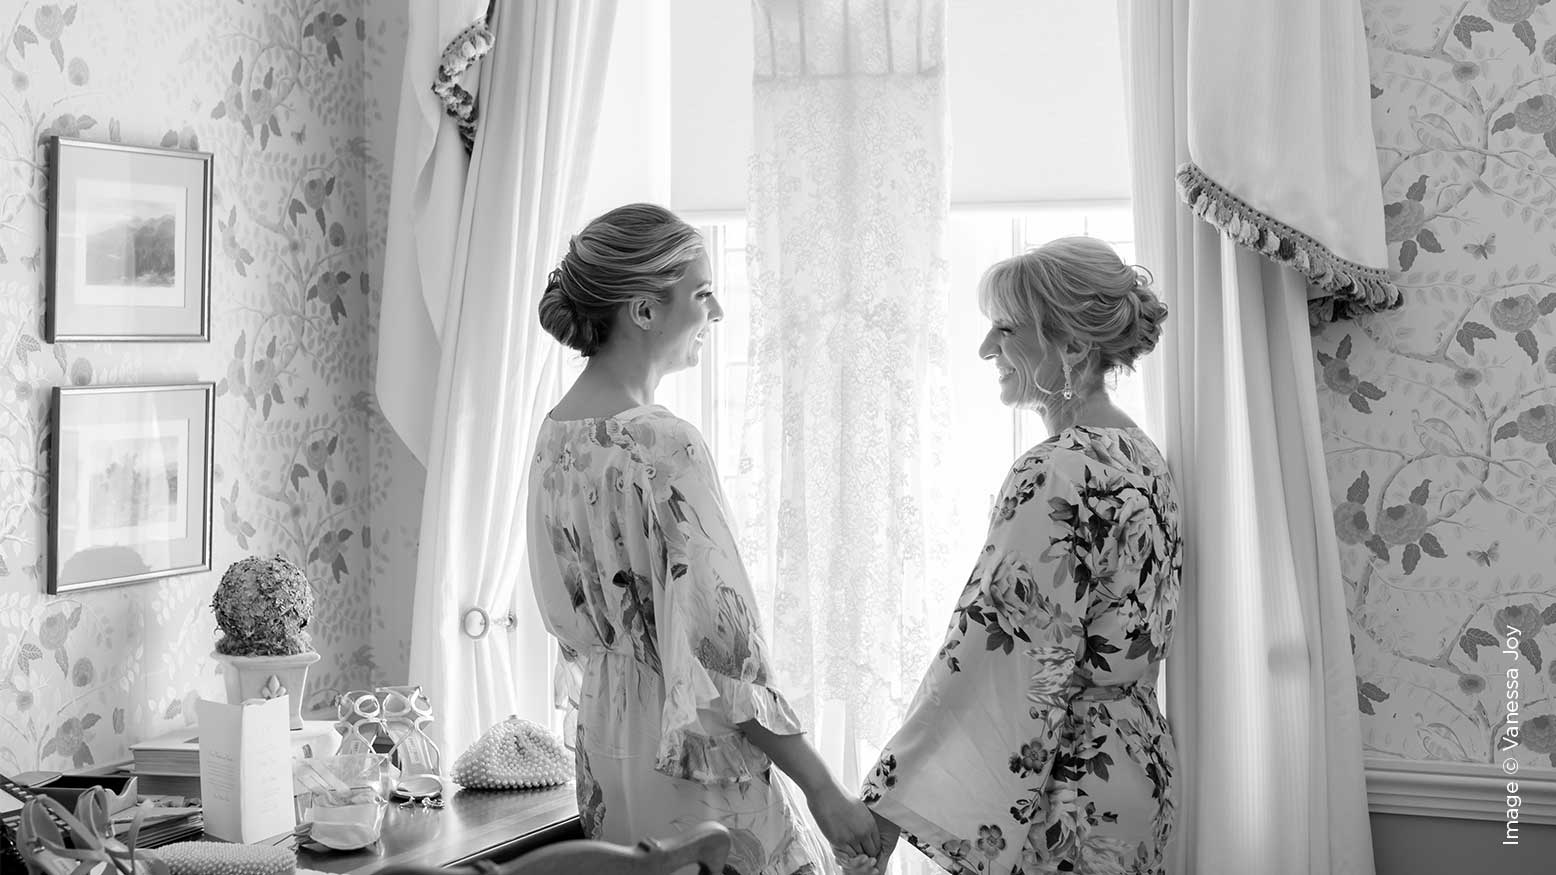
Taking pictures of the bride as she gets ready for the wedding ceremony on her special day is a time-honored tradition in wedding photography, but it can require a different set of skills from the traditional photos of the ceremony. I personally love the close, intimate setting and the candid shots that can be captured during bridal prep.
Of course, it does take a little planning, a good deal of forethought, and the right mindset to bring out the best in the bride, the bridesmaids, and the hair and makeup artists. Here are three keys to photographing bridal preps that I’ve found to be extremely helpful:
1. Be Empathetic
Even if they want you to take pictures of their wedding prep, not all brides will naturally feel at ease with a photographer snapping shots of them in such a private setting. What I like to do to help the bride feel more comfortable is to arrive early at the prep venue, and start by photographing details first: the bride’s shoes, her dress, the bridal bouquets, and other things that don’t actually require the bride to be there. Typically, I’m using a Canon 50mm1.2 lens along with a 100mm 2.8 macro lens for the rings.
A lot of times, the bride and her bridesmaids are almost completely finished with their hair and makeup by the time I begin snapping pictures of them. If some of the makeup artists are putting on finishing touches, I make sure to stay out of the way, and focus on taking long-distance shots instead of close-ups, especially if the venue is unique or eye-catching. For the most part, I use my Canon 135mm 2.0 lens to stay inconspicuous while still catching the action.
Every once in a while, I may sneak in a close-up shot, but only if I’m not being intrusive or overbearing by doing so. This attitude also carries over to when the bride actually gets into her dress—some brides have no problem with me staying beside them as they get ready, while others are a little shy, and prefer me to wait until they’re already done.
The bottom line is, I’ve found that I can get better shots (and feel more comfortable doing so) when I approach the bridal prep shoot from a standpoint of empathy, letting the bride’s feelings guide what I do and don’t try to do. If the bride is at ease, it really carries through to the photos.
2. Focus on Details and Lighting
As I mentioned above, I like to start out a bridal prep photo shoot with a focus on the material details, such as the flowers and shoes. I try to carry this attention to detail over to my pictures of the bride and bridesmaids.
One big factor in almost all bridal prep shoots is lighting. Some rooms offer great natural light from big, well-positioned windows, whereas others are a little darker and less roomy. Whatever the case may be, I always try to get as much light as I can in these photos.
Whether I’m photographing the bride as she’s getting ready, staging a “getting ready” shot, or snapping pictures of her in her dress, I usually position the bride’s face toward the room’s natural light source to capture the softest images. I generally prefer a large window for this purpose (who wouldn’t?). Once I have my lighting and subjects set up, I can even play around with it by shooting directly into the light, or having the light come into the image frame from the sides. I tend to run circles around them during this time to get a variety of images with different lighting patterns.
When the bride is in her dress but not completely zipped (or buttoned) up, I tend to focus on a combination of details and lighting. As the bride stands in that perfect lighting area, I often photograph subtle things like her hands, the buttons on her dress, her face full of anticipation, or the moment when a friend or a parent zips up the dress. A lot of times I’ll use the Canon 50mm or 35mm for this portion of the bridal prep. I usually need to be a little closer to the action here to get what I need.
3. Direct as Needed
This point really comes down to style. I know that most pure photojournalists take a hands-off approach to staging shots, preferring to stay in the background as observers and recorders, rather than directors. When it comes to staged shots versus candid shots, I personally have a “hybrid” take on wedding photography: I direct as needed to get the best possible shot, while still keeping things mostly candid and undisturbed.
For a large portion of the bridal prep shoot, I don’t need to stage anything. I’m absorbed in long-distance shots of the bridesmaids getting their hair done, or focused on details of the room and bride, for example.
However, there are some situations in which I’ve found staged shots to be quite useful. For instance, once the bride is done with her hair and makeup, I often ask the bride and makeup artist to come over to a better-lit spot for a couple of fake “getting ready” shots. By doing this, the bride doesn’t feel uncomfortable, as she’s actually getting ready, and I can capture a more flattering shot with better lighting. It’s also nice for the makeup artist for me to capture a shot of their completed work rather than a half-done face.
When it comes time to photograph the bride in her dress, I direct her to stand where there’s good lighting, and sometimes ask her to strike a simple pose, turn her head one way or another, or maybe hold a prop (like her engagement ring) in her hands. Sometimes I’ll re-do some of the detail shots I took earlier and I’ll ask the bride to hold her shoes or flowers in her hands as a friend is buttoning up the back of her dress.
I also try to snap a few shots of the bride once she’s completely dressed, but before anyone else sees her. I’m looking for headshots, creative portraits, and even full-length shots if there’s room.
Again, for the most part I stay focused on candid shots. Of course, I am always willing to oblige any request from the bride or bridesmaids, such as taking a group picture, or another staged shot.
Photographing bridal preps can be a lot of fun, both for the photographer and for the bride and bridesmaids. If you’d like to learn more about how to get the best photographs from bridal preps, or any other aspect of wedding photography, explore my tutorials at youtube.com/vanessajoy, and be sure to check out the video on Behind the Shutter this month as well.


