
6 Tips for Capturing Authentic Images on a Wedding Day with Phillip Blume
Want more information on this article? Get access to video content and additional supporting images. Launch the September 2017 issue of the magazine by logging in or signing up for a free account. Shutter Magazine is the industry’s leading professional photography magazine.
“Where’s the authenticity in this photograph?” I’ve probably asked myself that question 100,000 times since my wife Eileen and I opened our studio, Blume Photography, almost 10 years ago. Our pursuit of authenticity has remained our North Star, steering us toward a lot of success in art, business and life.
If I can identify authenticity in one of my images, I know that no matter what technical imperfections it may have, I’ve found a keeper—an image that is a real contender for my portfolio, website or a publication. Authentic images are the ones our clients want to buy. Never underestimate that. You could say authenticity puts bread (and sometimes even steak) on our family’s table.
So how do you learn to recognize authenticity in a photograph? Even more challenging, how do you then re-create authenticity in image after image for your many clients? It’s a hugely important question for your business. So let’s talk about six ways Eileen and I capture authentic moments.
Stay Alert
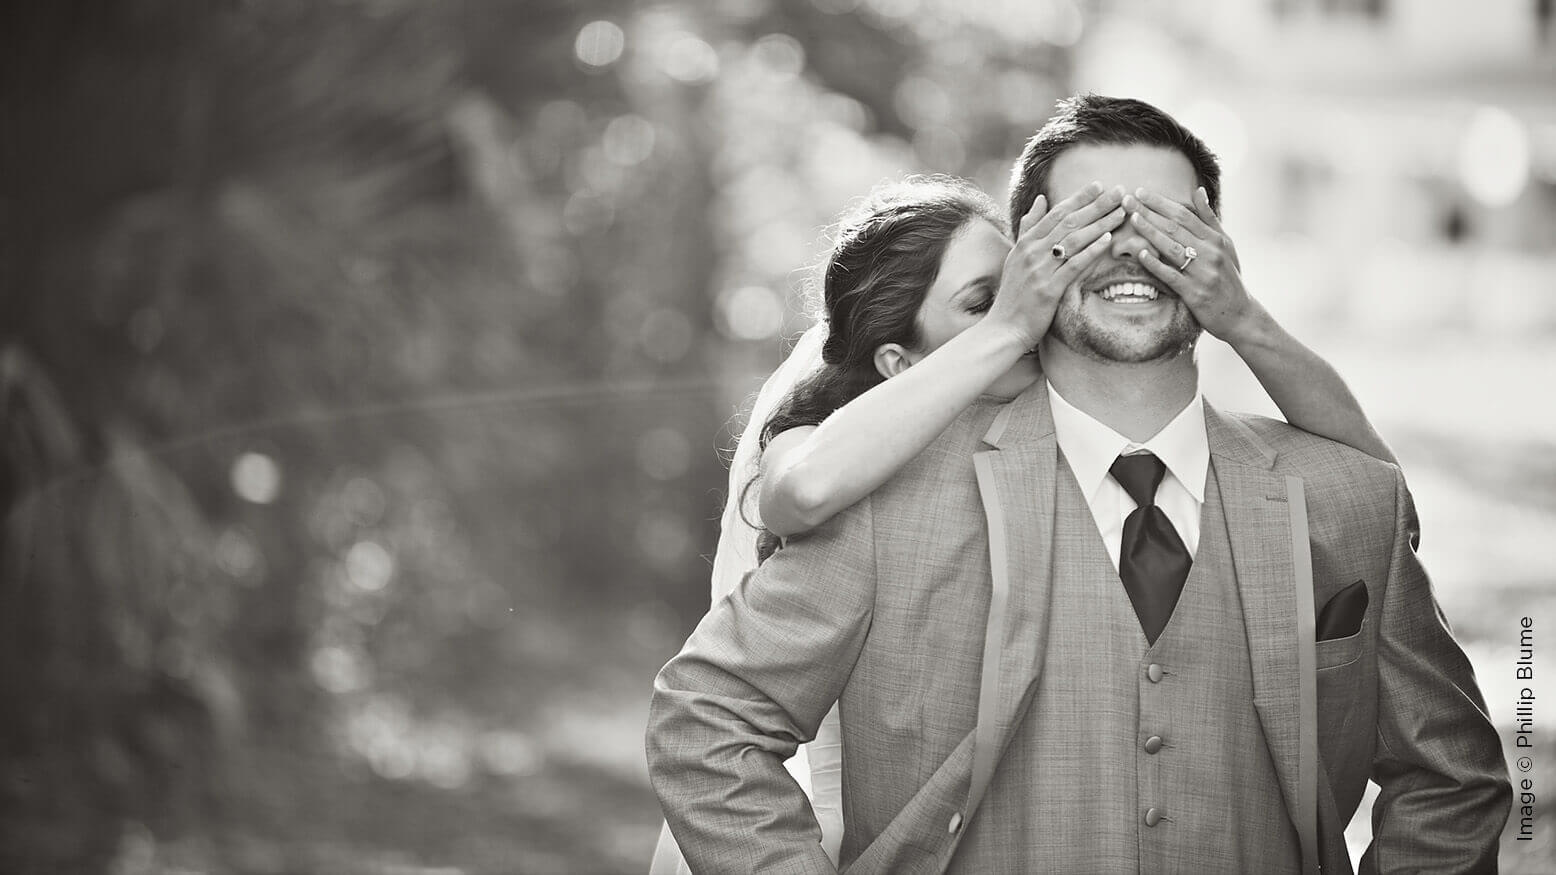
For me, authenticity means that an image invokes an emotional response in the viewer. The viewer sees real emotion being expressed somewhere in the image, and then reacts by experiencing that same emotion. This is why I love photography. Authentic images act as reverse mirrors—we reflect what we see in the frame.
To capture authentic candid moments inside a bigger composition, think ahead. When you see perfect moments taking place within perfectly composed images, it may look too good to be true. Surely that shot was set up, we assume. But it really just takes a little forethought.
For example, I always take at least an hour to scout locations before shooting a wedding. I find as many good compositions as I can, not just the spots I’ll eventually use for portraits. Later in the day, as events begin to unfold in these locations, I reframe for the compositions I already planned. Now it’s just a waiting game. Wait for a guest to walk through the frame laughing. Wait for the bride to pass by escorted by her father. Wait for the dance floor to clear enough so the couple is framed by the crowd. Oh no, the bride sneezed just as the crowd cleared. Don’t panic. This takes patience. But no rule says you must take 10 images a minute. Slow down, and the goods will come.
Curiously, humans have a tendency to repeat themselves—a lot. If you saw a moment pass by but your camera was down, get ready and hope it will happen again. Did you just miss the flower girl making hilarious faces at herself in the mirror? Yes, she already ran away, but she’ll be right back to do it again. Did the groom just wipe away a perfect tear at the altar? Quick—frame up your storytelling shot, and get ready. He will probably wipe away the next tear more dramatically and with better expression.
Most human communication is nonverbal, done via subconscious body language. Luckily for photographers, humans repeat nonverbal communication to gain more “listeners,” and we do it almost as frequently as we retell life stories and bad jokes. Understanding human behavior allows you to capture more fleeting moments than you thought possible.
Inject Emotion
If you stop here, you might mistakenly believe authentic photography is synonymous with candid photography. Nothing is further from the truth. Candid photos can turn out completely bland and emotionless. (Just look at any of my early work as a photojournalist. Those random bystanders, sidelined athletes and frowning farmers never should have made the printed page.)
On the other hand, you can inject authenticity into portraits that you take the time to pose. That’s the signature technique we’ve taught to workshop students around the world for years (and we’ve felt flattered to see those lessons imitated a few times since). When you stop posing and start playing, you make sessions fast and fluid, and full of authentic emotion your clients will feel deeply—and remember fondly when it’s time to order prints.
There isn’t nearly enough space here to describe our complete “Posed to Playful” system. But that’s why we wrote it all down for you in our Posed to Playful eBook. Feel free to download all 34 interactive pages of our best tips and favorite role-playing scenarios now. Take a moment to bookmark it at http://bit.ly/dontbeaposer. Enjoy it now before it goes up on our paid store this fall.
Put Your Subject at Ease
Most of us don’t shoot professional models. But I actually prefer it that way. What’s the biggest difference between an experienced model and a first-time portrait subject? Confidence. That’s all. Spoil your clients by instilling confidence, and they’ll surprise you with their performance.
Confidence is never created with false flattery. “Wow, that dress makes you look so skinny” comes off as an insult to a heavyset subject, for example.
Instead, explain to your clients what you’re doing behind the lens. Direct her by saying, “Stretch your spine up and twist your shoulder toward me. Wonderful. That’s perfect. Now keep that stellar posture, and just break at the waist like Betty Boop. When you lean toward me, it’s super flattering and really brings your gorgeous eyes into focus.”
See? You’ve allowed her to feel that you’re in control, that you know what you’re doing. You’ve complimented her posture and playfully compared her to Betty Boop, which begins to replace a person’s often negative self-perception with a more positive mental picture of herself. You might even model the Betty Boop pose yourself. The goofier you’re willing to be, the more your subject will loosen up.
To create an instant connection with any subject, your smile is your most disarming and powerful tool. A slightly bashful smile is my nuclear option. I don’t have time to compliment and direct all 200 guests on a wedding day. But I can make ole-sour-face Grandma my best friend by grinning at her from across the room. There’s psychology to it. When I catch her gaze, I raise my eyebrows shyly and keep smiling. She now views me as a fellow human who will thoughtfully defer to her, rather than a prodding pro who’s there to boss her around. I lift my camera as if offering it to her, and she approvingly smiles like no one has seen her smile all day. It works like a charm on anyone, even the grumpy church lady, whom I always make a point to smile at before I walk down the aisle beyond the permitted distance.
Minimize Your Gear
I lust over the newest piece of shiny camera gear just as much as the next guy. But through the years, I’ve realized I can create more authentic work with less gear. There’s no sacrifice in quality. I carry all my gear in a single shoulder bag and in the Spider Holster around my waist. I feel liberated when I walk into a conference with just a small bag while my fellow photographers are pushing their equipment around on pallets.
At a wedding, bounce flash is your best friend. I use it through 80 percent of the day. Bounce flash is a basic on-camera flash technique that gives you similar results as off-camera flash.
This minimal setup helps me capture more authentic moments because it allows me to remain less conspicuous among the camera-shy. It never keeps me disengaged while I’m setting up off-camera lights (which I reserve mostly for posed portraits).
Here are two pro tips for bounce flash. First, use a bounce card—but not in the way most photographers use it. You’ll typically see photographers Velcro a white rectangle of paper or plastic behind the flash head. The idea is that the card reflects some light into the subject’s face to fill in shadows. Most of the light comes from whatever object the flash is directly bouncing into. Oddly, I often see amateurs firing their flashes into the air outdoors, using a bounce card as the only source of light. Don’t do this. This drains your batteries and has no desirable effect in any scenario (and makes you look silly).
Instead, attach your bounce card to the front of your flash head, between your light and the subject. You get great results partly underexposed indoors. Bounce cards usually provide too much fill light on your subject, which can look similar to flat, on-camera flash lighting.
But if the only keylight comes from a more dramatic 90-degree angle, its “shaping” effect will be more three-dimensional and beautiful.
My second tip is to generally point your flash in whichever direction your subject turns his nose. It’s easy enough to swivel your flash head left-right, back and forth throughout the day. I feel as free as if I’m shooting natural light, but with much more consistent, professional results. To light a big group evenly with the same effect as a giant softbox, just point it back over your shoulder toward the ceiling. You won’t miss a moment.
Finally, I can’t recommend Spider Holster gear highly enough. A lot of companies send me gear to review, but I’ve never been so impressed by the design and functionality of equipment before—it has made my entire shooting workflow quicker, and helps me stay present in the moment. Goodbye, bags.
Refine Your Style
Style is defined largely by the camera and flash settings you become comfortable with. For authenticity, consider long “compressing” lenses to create intimate photographs without getting in your client’s face. If you like to use wider lenses, that’s fine. I often shoot a 24mm lens, which creates a fun distortion effect up close, almost like a funhouse mirror. Within this range, I almost always want my subject laughing or at least smiling big to suit the visual mood. Make sure your clients are comfortable with you, because you will need to get in close to crop out the distractions in wider compositions.
Black-and-white photography lends itself to authentic imagery. That’s why we often peg all deeply emotional photos we come across for black-and-white processing. It removes distractions and allows the viewer to soak in the feeling.
Be Crazy
This last technique is my favorite. It involves chasing cars, climbing trees and talking to strangers. Click my video this month to hear this bonus tip, and I’ll see you inside.
It’s also the first and most important question I ask myself when judging images for print competitions.


This Post Has One Comment
A couple of photos demonstrating the techniques described would have gone a long way helping us understand the concept…
A reflective card between the flash and the subject, for instance…
How far away from the flash…? Turning 90 degrees…? Follow subject’s nose…?
Understood. . . photos would help greatly…
* * *
Until that time. . .