
Building the Right Workflow from Lightroom to Photoshop with Dustin Lucas
To build the right post-production workflow, we have to look at what we want to accomplish as an end result and where we can save the most time. As a Lightroom user, I feel like I’ve milked as much efficiency out of this program as I can, but because of the back and forth with Photoshop, I have to create different workflows. Within these workflows, I have to rely on Photoshop Actions to streamline each edit, but what about large batches of images? We’re in wedding season and I’ve got over a thousand images ready to export out of Lightroom!
Photoshop has automation tools for batch editing and processing images to create copies. These allow you to apply actions directly to your edited images. This is great if you’ve already exported your edits out of Lightroom. To export and apply actions in one fell swoop, you can use Photoshop droplets during export from Lightroom. Droplets are a script that work with Lightroom-to-Photoshop workflows to run an action on multiple images. For batch processing, there is no better time-saving workflow. For your creative edits, you can set yourself up to quickly dodge and burn, custom-tone and mask skin-softening effects instantly.
Now you can export your wedding images and get them ready to deliver in no time.
Setting Up Lightroom-to-Photoshop Workflows
First, create an arsenal of actions or just a few handy ones. Open an image in Photoshop. Access the Actions panel by clicking on Window in the top menu bar and choosing Actions. If this is your first time creating Actions, you only have a default set available. Click the folder icon at the bottom of the panel to create an Action Set. This organizes all your actions in one place. Once you make one, click the Create an Action icon to the right. We can name the action to recall later; add to a preexisting set or create a new one; assign a function key to quickly apply it through a combination of keystrokes; and color-label it for easier visibility.
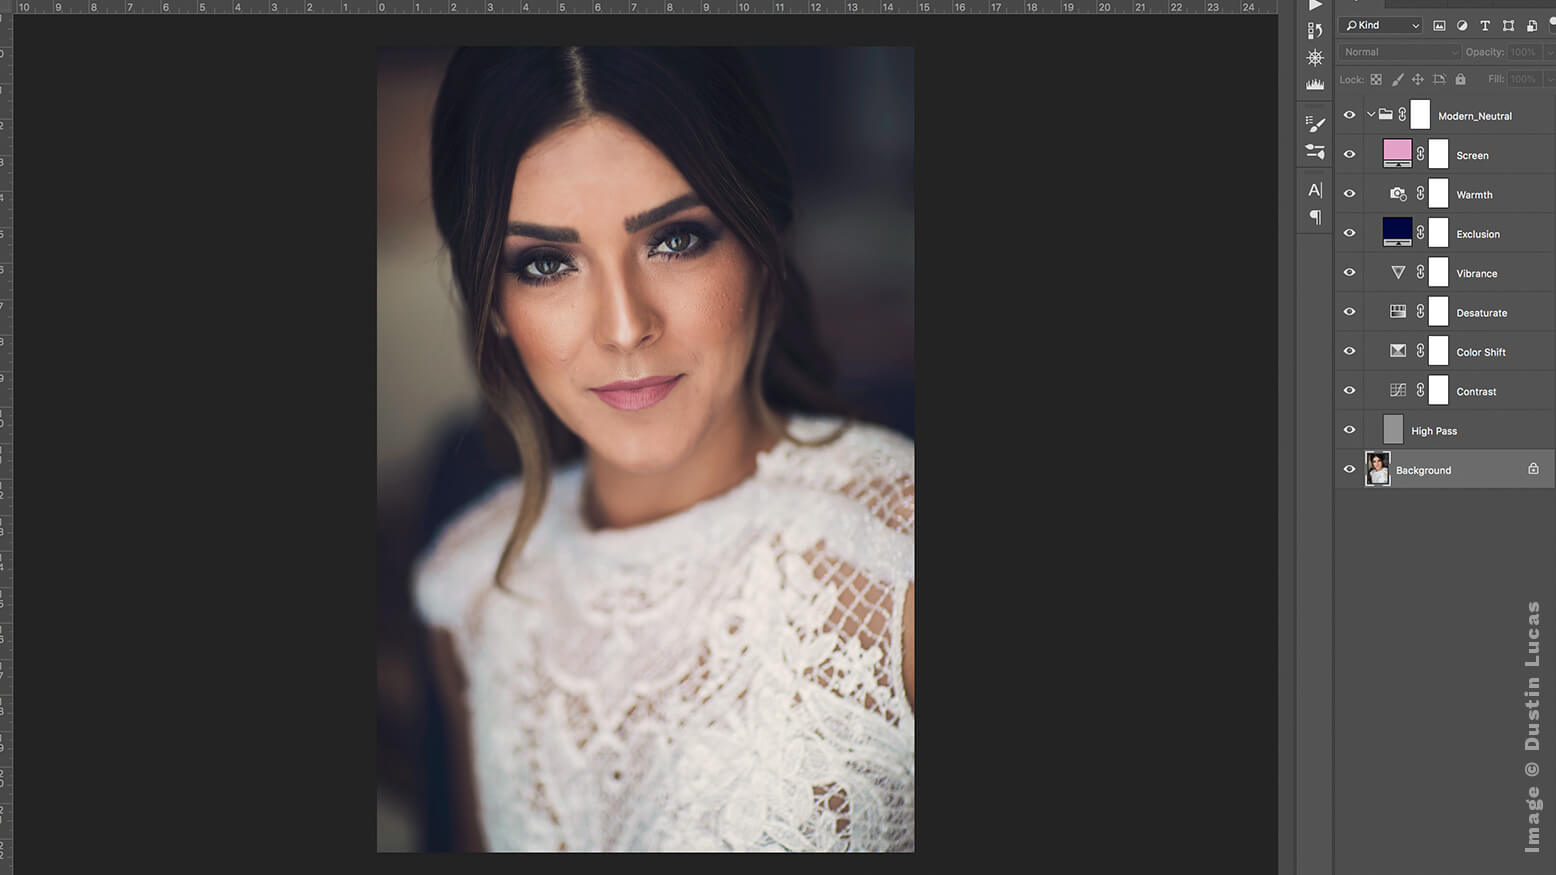
Once we click Record, everything we do will be logged in our action. You can add adjustment layers, invert masks and build multiple prep actions ready for you to paint on effects. For creative effects, it can get really heavy-handed, so you will want to adjust layer opacity, blend modes, fill opacity, etc. by editing the layer style versus adjusting in the layers panel. To access the current layer style, just double-click on the one you want to fine-tune. This saves yourself multiple steps in your action in the base you need to edit later. Group layer adjustments together and create a layer mask so you can quickly mask out the entire grouping of layer adjustments later.
Create single-step actions first like skin smoothing, dodge and burn, flatten and save, sharpening, white recovery, B&W conversion and convert to 300ppi. These can be included in certain creative actions, so it’s good to have them separated in case you need to apply simple adjustments. I typically combine my skin softening, dodge and burn, and recovery adjustments layers into a single action as a creative starting point. This would be applied to 20 to 30 of the best images I plan to apply creative toning actions to. Since I dodge and burn, mask skin smoothing and recover hotspots, I keep the creative actions separate. (8) This keeps my creative workflow organized and achieves better results.
Now that we have some of our favorite actions set up, we’re ready to put them in action.
Workflow A: Edit in Photoshop
We are back in Lightroom ready to edit in Photoshop. Hold Command and strike the “E” key. This converts our Raw file into a Tiff file and opens immediately into Photoshop to apply our actions. If you want to change your preferences, go to the preferences External Editing tab to change file type, color space, bit depth, resolution and compression. I prefer using Adobe’s suggested settings of 16-bit ProPhoto RGB. That’s not a bad option because you can work one image at a time from Develop or select multiple images from Library. This requires us to apply the action manually for each image.
We can use the Automate Batch processor to apply an action to the opened images instantly. Under the Play settings, choose the set and action to apply. For source, we want to click in the box and select Opened Files. Lastly, set the destination setting to None so it leaves the images open; otherwise, it saves and closes your edits. Save and close would make sense if you were batch-applying an effect and wanted them to close and load back into Lightroom.
Once we save our edit, the newly created files are loaded into Lightroom next to the original Raw file. This allows your workflow to be built on organization. Another preference you can choose is to have the exported copy stacked with the original. This allows you to collapse all stacks after you save edits in Photoshop and the Raw file is hidden. That’s useful so that when you’re exporting images for a client, you don’t have duplicate color-corrected files following the creatives.
This workflow is great for quick edits and small batches of images. But we need to export a thousand images with some simple adjustments that Lightroom can’t handle. This is not a viable option here. This is exactly what Photoshop droplets are for.
Workflow B: Export With Droplets
Just as with creating actions, we need to build an arsenal of droplets for each action we want to apply. Remember, you can apply only one action per droplet, so we want to combine any actions we’d like to batch together. Applying skin smoothing to all the exported images is a major time saver. I can now apply Portraiture to all my images right out of Lightroom without waiting for the export to complete and run another batch process.
Let’s create an action and droplet for Portraiture and fine-tune our process. Some things to consider are file type, creating duplicate background layers, flattening layers and saving the image. These can all cause the droplet to fail or run improperly and save over the exported version. We get only one shot to make this run correctly, so test it on a handful of files once it’s built.
For a batch export, choose file type JPEG rather than PSD because we need the file to flatten and save automatically. Using another file type tends to complicate the process and requires another conversion to deliver to the client. After creating and beginning to record the Portraiture Light action, we need to duplicate the background layer. Then set the opacity to 40% by double-clicking the layer to open Layer Styles. Open the Portraiture filter, adjust settings to our liking and click OK. The last step is to flatten the file and click the Stop Recording icon in the action panel.
Droplets are accessible in the file menu under Automate. Choose the location to save to—I recommend the Adobe folder saved in Documents. Create a new subfolder for Droplets and choose the Portraiture Lite action we created. You will want these to Save and Close, so choose this option for Destination so every file doesn’t open in Photoshop. Now we are ready to create our Lightroom Export preset to perform this script.
After selecting our images to export, choose JPEG and sRGB color space so the files are ready to deliver after the script is done. Under Post-Processing, choose After Export: Open in Other Application. Click Choose and select the Portraiture Lite droplet. These settings can be saved as a preset to quickly recall in the future. These shortcuts mean the difference between a workflow that saves time and one that creates more work.
Test this on a handful of images to ensure no errors happen after export. Trust me: There is nothing worse than a thousand files exporting and corrupting in Photoshop due to script errors. It’s time to start over at that point.
The Results
It’s all in the details and the prep to build the right workflow, especially for Lightroom to Photoshop. Just as presets are the essence of Lightroom, actions and droplets are integral to Photoshop. Embrace efficiency and build your arsenal of actions to streamline your editing. Next time you run an export, build a droplet and see the difference it can make. You can now batch your next set of skin smoothing.


