How To Deliver Your Images Faster with Publish Services in Lightroom Classic with Dustin Lucas
When it’s time to upload your images to your client proofing gallery, you want the effort to be minimal. Just as you imported your raw images into Lightroom, you now have to export the edited JPGs to get them online for your customers. Many use plug-ins to run the effects on images after or [1] use a droplet for Photoshop to run things like skin softening. However, if you are ready to load your images directly from Lightroom, there is a better way. Publish Services is the tool to save you time exporting and uploading. This does it all at once.
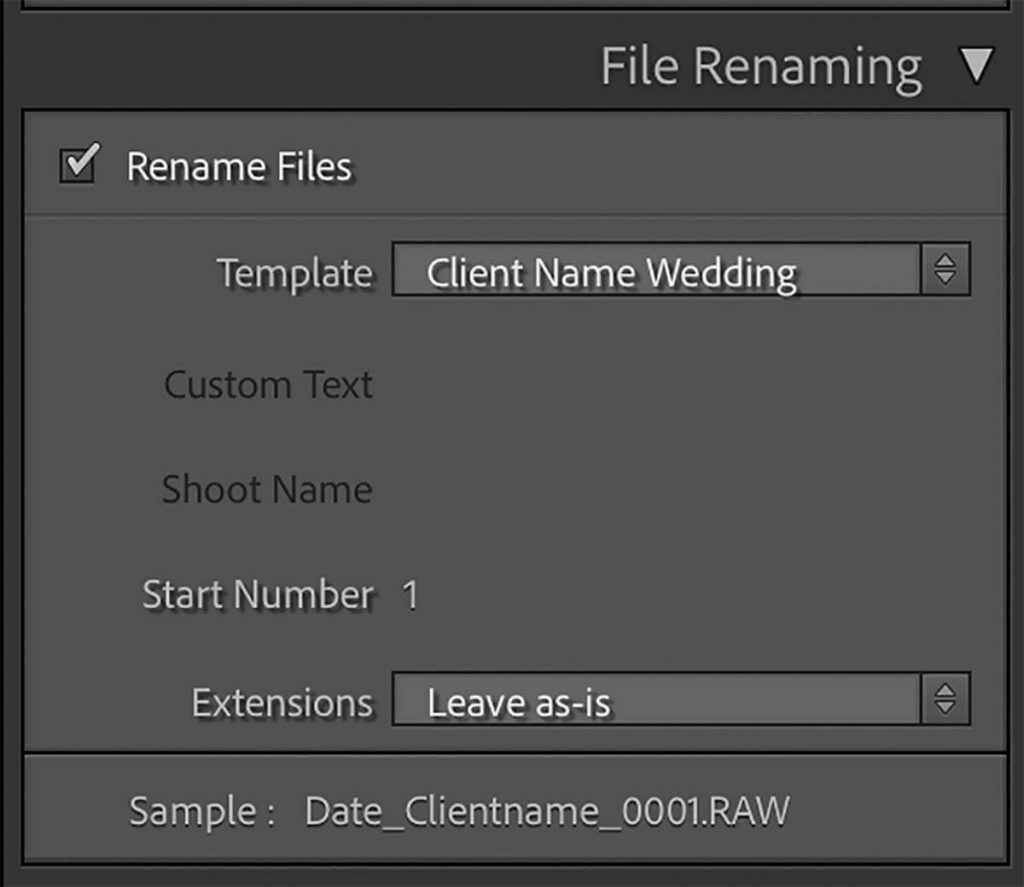
Setting up Publish Services is simple but you will want to rename your images before you publish them online. This can also be done in Lightroom and is a best practice for file management. Let’s dive into renaming in Lightroom first as many Publish Services don’t offer this feature.
Rename Your Raws
There are multiple ways to rename files. For instance, at import and export or right inside Lightroom. I prefer to rename my raw files after importing and culling images in Lightroom for two reasons: I want the raw files to change on my external storage and I want the published files to match the raw files for reference later. Keep in mind, this method helps to prevent a client from asking for the file name in the online gallery and you having to match it up visually because the raw files are the original name. That is completely avoidable.
Once you are ready to rename the raw files in Lightroom, you need to go to the Library and select all images you wish to rename. Then, on the right side panel you can drop down the Metadata tab, find File Name and click the button to the left to batch rename. In the popup menu, you can click the File Naming drop-down option to select Edit. This is where you can custom type the file name and insert sequence numbering. I typically use this format: last name_event type_year and then insert a three-digit sequence numbering, something like this: Brussatti_Family_2021-001. I can also save a preset to quickly recall this formatting for future events. This can be quite handy to keep things organized. Once I hit done, it’s going to show the example file name and we can click OK as everything looks good.