
Planning and Executing Stylized Commercial Shoots with Alissa Zimmerman
Stylized commercial shoots offer a great way to collaborate with vendors to create something over the top for your portfolio, as well as theirs. You earn goodwill and build relationships that become mutually beneficial over time. We like to put together two or three of these shoots every year to keep images fresh and relationships alive.
The planning process can be a bit overwhelming, especially if you’re thinking you can do it alone. Here are the key elements of planning and executing a stylized commercial shoot.
Mood Boards
Mood boards are the heart and soul of all successful photo shoots. We used to plan photo shoots without them, and always ended up scrambling on the day of the shoot. Mood boards are the foundation, but you can always tweak in real time during the shoot.
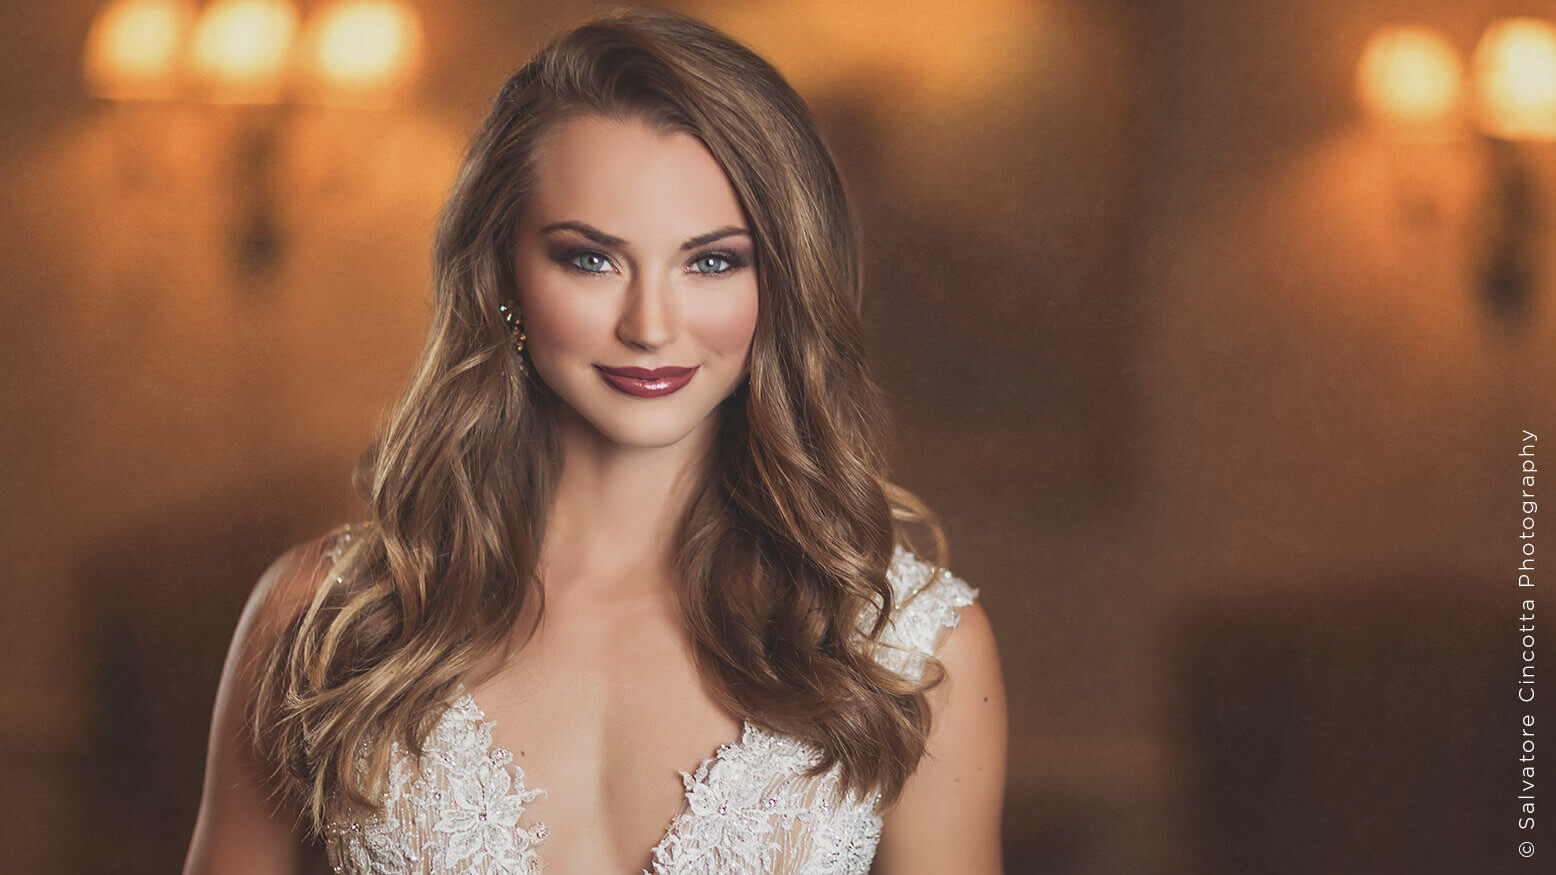
I use Adobe InDesign to lay out my mood boards, and I keep them as clean as possible. I create an opening title page with the details to make sure I don’t get all of my mood boards mixed up. Big and visual is the way I like to create them. What’s the point of a mood board if the images being used to inspire are too small for the details to be seen? Some people argue that having to scroll through a multipage PDF is a nuisance and having all the details on one page is better. I disagree—especially if you’re trying to convey a complete thought and a vision while still getting the people involved excited. See below for screen shots of the mood board I put together for the most recent stylized commercial shoot we did in St. Louis with a group of local vendors.
Timeline
Once the mood board is final and all the vendors and models are confirmed, you can start working on the timeline. I attach the final timeline to the last page of the mood board when sending out final emails to the vendors before the shoot.
What I’m about to say is going to sound like a contradiction, but hear me out: Your timeline for the shoot should be somewhat loose, but also as detailed as possible. You need to be realistic with time between each vignette to allow for setup and teardown, and give yourself some wiggle room in case something goes wrong or a shot takes longer to set up than anticipated.
And in a situation like the recent shoot we did, where the timeline was six-plus hours, you have to remember to allow yourself a break. No one wants to work with a hangry photographer.
Being diligent putting together the timeline is so important. You’re controlling the day and the outcome of the final images. If you plan on taking your very first shot at 3 p.m., you need to set the timeline to have the hair and makeup artists arrive at 1 p.m., and the models arrive at 1:30 p.m. This allows the crew 30 minutes to set up before the models arrive so they aren’t sitting around waiting and wasting hours that you’re paying for. Strategically thinking through every part of the shoot (before, during, after) ensures your day runs as smoothly as possible.
Taking the Lead
A lot of photographers and assistants have a difficult time stepping up and running the show. This is your moment to shine. This is your shoot—not the florist’s, the dress designer’s or the venue’s. Own it. From vision to execution, step up and take the lead.
Collaboration is a beautiful thing, but only when it’s done right. Establishing roles from the beginning is key so no one is stepping all over you and your vision throughout the process. This is established from the very beginning when you reach out to the vendors you want to be involved. It all comes down to communication and how you start the process.
Communication
Ah, communication, the bane of every artist’s existence. There is nothing wrong with being a strong voice to establish dominance from the beginning—and I mean that in the nicest way possible. Again, we are all creative minds, and when you bring five to 10 different types of creatives together to plan and execute one single vision, ideas and communication will inevitably be all over the place.
As the lead, it is your job to dial everyone in and keep the circus focused. And it all starts with the first email.
This concept came together with one email about 10 months ago. A St. Louis venue we work with, the Missouri Athletic Club, reached out to us about advertising in its quarterly magazine for its members. We had previously run two ads with them and hadn’t seen any return or received any contact from potential brides. So that’s when we started to get creative.
After agreeing that the single print ads were not working for us, here is how I approached them:
Hi Emma. I want to do something bigger with you guys. I spoke with Sal and we want to do a stylized shoot, hire models, etc. We would Facebook Live the whole shoot, tagging MAC. We would sponsor the post after it’s live, throw some money behind it and target brides in the STL area.
Are you the right person to talk to about this? We would love to come downtown and take you and whoever else would need to be involved to lunch to discuss more details.
We want to get as creative as possible—advertising to the MAC membership list is not something we are seeing success with. Let’s do this right for both of us.
Being aggressive and rude are two different things. You have to understand that if you are reaching out to a venue, bridal shop or any other type of vendor with an idea you want to create, there has to be something in it for the other party. Would you give up your time and resources for free if there were nothing in it for you?
Communication throughout the process is crucial, but don’t send a million email updates. Don’t overcommunicate. Be clear and concise when sending your emails and do so in an organized way. I can’t stand it when people start new threads every time they send an email, especially if it’s an email pertaining to something that’s relevant in another thread. Don’t start littering everyone’s email inboxes—that’s the quickest way to ensure each party will not read the details and will ultimately end up frustrated with you when things don’t go according to plan.
Delegate Tasks
This is one of the most difficult parts for me. I do not let go of tasks because I want to be in control of everything.
The only way these things are successful is if you have a team (or at least one other person) that can take some of the tasks off your plate so you can focus on the bigger-picture items—like making sure everyone has been communicated with properly.
I make a list of every key piece that goes into the shoot: venue, models, wardrobe, staff, flowers. From there, I break out all the tasks that need to be done to secure and finalize each piece.
Here’s an example.
Venue
- Lock in venue
- Finalize shooting locations
- Get access to balcony across the street for window shot
- Confirm venue point person for day of shoot
- Put each location into timeline based on time of day and type of light needed
Models
- Select models with Sal
- Confirm models with agency
- Send male model measurements to tux rental company
- Send call sheet to agency for each model
- Get contact info for each model
- Assign models to locations
Once I have everything broken out into subtasks, I start delegating the smaller items to someone else to make sure things continue moving at a quick pace.
We use Asana to track internal tasks like these with bigger projects so we are all in the loop on what’s getting done (and, more importantly, what’s not). This has been a game-changer for our planning process. It holds you accountable once you take the time in the beginning to do a brain dump and get everything laid out for what needs to get done.


