
Self Portrait Composites in Quarantine with Kristina Sherk
Kids. Don’t get me wrong… we love them, but good Lord they are a lot of work. And whoever thought it was a good idea to lock everyone in their homes in the middle of a pandemic, didn’t think about those of us with toddlers… Climbing the walls has become a daily occurrence in our house.
Before Covid-19 hit, I was coasting on a well-oiled, churn and burn headshot photography business. I was doing multiple headshot sessions a day at my studio and barely making it home in time for dinner and then, in what felt like the blink of an eye, all that changed. So I’ve had to pivot and somehow take my frustrations out in other creative ways.
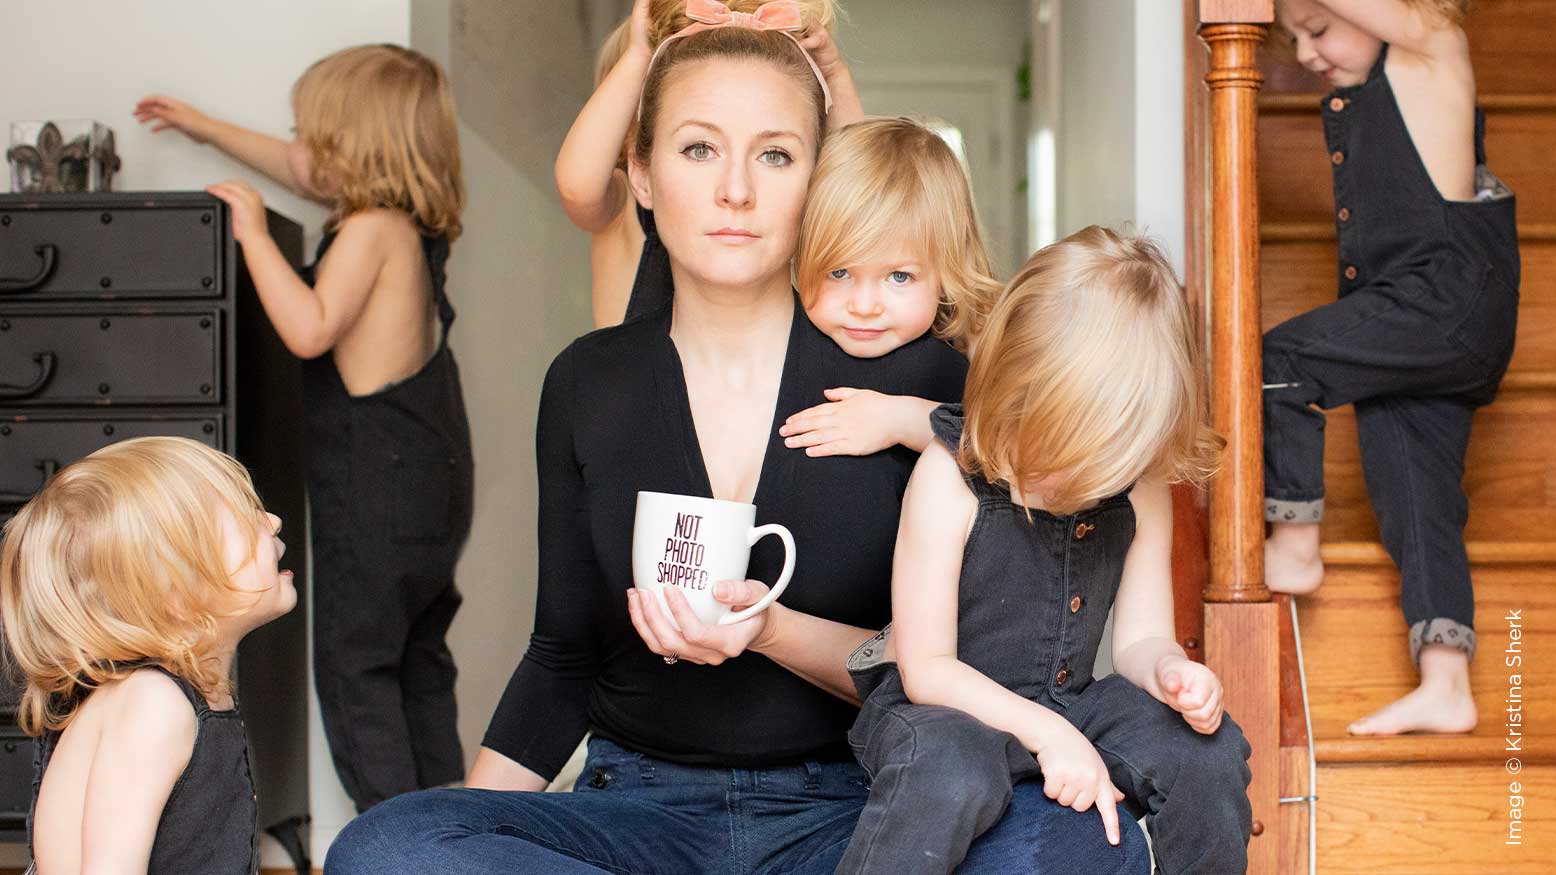
I’m not a patient, nurturing person by nature, so being at home with a 2.5-year-old and a 5-month-old is literally taking up 120% of my effort, patience, and mental capacity. I couldn’t help but feel like the moment I’d put one toy away, another one had exploded all over the floor. How is this happening?! She’s only one kid! My head was spinning from her boundless energy and short attention span. So that’s where the idea for this image was born.
Composites don’t have to be hard and daunting, and you don’t need to be a Photoshop guru to create them either. If you keep a few important concepts in mind, you’ll be shocked at how easy it is. In this article I’ll walk you through the step by step process for creating this image.
TIPS FOR CAPTURING THE IMAGE
The first step is to capture the images themselves. I put the camera on the tripod near the front door as you can see in the time-lapse video and set the focus using my husband as my stand-in model. A tripod is extremely important for this kind of composite! If you use a tripod to shoot, all of your frames will be exactly the same and you’ll thank yourself later when you get to the editing phase.
You might be asking how I triggered the camera to fire. There are multiple ways of doing this. You can use a long shutter release cable, or if you have a newer camera, there are cell phone apps that can trigger the camera to fire.
The first image you always want to have is something called a “plate” image. It’s a shot of the background without anything else in the frame. Next, you’ll want to shoot when you think your kiddo is doing something interesting that lends itself to the overall concept of the photo. I’m staying very, very still. I’m doing this for an important reason: while I want my daughter to be in lots of varied positions, I don’t want to have my body in slightly different positions in each shot. This will make the retouching process much harder once we get to the editing stage.
Shoot more than you think you need. Some images may not work perfectly. You don’t want your duplicates of your kiddo to overlap too much, otherwise it will be hard to see them. So space them out and try to give direction (as best you can since we all know kids don’t listen) as to where to stand and what to do.
I’ve hidden my one hand behind my leg in the image. That’s the hand that I’m using to trigger each photo using my cell phone app (Canon Camera Connect). This app in particular does so much. I can even switch to live view and see the preview on my cell phone to check focus. This specific app only works for iPhone, but there are Android alternatives on the market. Additionally, Nikon and Sony also have capabilities like this.
TIPS FOR ORGANIZING THE IMAGE
Once all the shots were captured, it was time to import them. I imported them into Lightroom and then picked out the ones I wanted to use, paying close attention to the placement of the little maniac and making sure to use frames where her position and location was varied enough, in hopes of making each action she was doing unique and independent within the image.
Next, I selected all of the shots I wanted, and told Lightroom to open them as layers in one document in Photoshop. The way to do this is to select all the images you want to use, then right-click on any photo selected and choose “Edit In” and then “Open as layers in Photoshop.”
The last step in this section is to label each layer what they are. Take it from me, having 15 plus layers in one document that look almost identical is basically torturing yourself. I named each layer what my daughter was doing in each frame.
TIPS FOR RETOUCHING THE IMAGE
Once they’re all in the same document as layers and named correctly, it was really easy for me to start at the bottom and build up from there. Each additional layer I added with a version of my little one had a different mask over just the kiddo. And if you stay perfectly still during all the shots, even if she/he interacts with your body, the images will line up.
Here are two of my masks shown in two different ways. Version A for each mask is previewing the mask itself, and version B is the exact same mask but shown in quick mask mode.
Since the images were all shot on a tripod and are the same exact frame, my masking could be really sloppy (thank goodness)! That’s what saved me with the time it took to create this edit. I wasn’t being extremely specific in my masking because the background in all of the different images was the same (regardless of where my daughter was) was the same. And let’s be honest —who has time to spend hours on an edit? Not this momma! In my complementary video to this article, I show a warp speed edit of the entire retouch which originally took me about an hour. I know you don’t have an hour to watch it (or maybe you do if you’re mandated to be sitting at home doing nothing but twiddling your thumbs), so I sped it up to about five minutes for your convenience.
At the end of the day, part of me had been yearning for some sort of hardship for a few years now, because that’s where my creativity stems from. But it came at an expensive cost. I hope this little case study shows you that you don’t have to be a master Photoshopper in order to make a creative portrait. So go enjoy your “forced time off” and make some cool art. I can’t wait to see everyone at Shutterfest 2020!


