
If you are a portrait photographer and edit your images at all, Evoto is an Artificial Intelligence editing tool you must check out. It includes things like skin retouching, dodge and burning, body shaping, makeup enhancements and more. Everything you need as a portrait photographer.
Use this link to download Evoto for free and get 30 EXTRA CREDITS!
Is Evoto the most powerful AI editing tool on the market today? Let's find out.
What’s up everyone, my name is Sal Cincotta. Welcome back to another video. Today we are going to check out Evoto. Now when I say check out, I’m kind of lying because I already use it. It has quickly become my favorite editing tool. So, I guess if you wanted to know you could stop watching right now, but the truth is you’re going to want to see this tool in action. Yes, they’ve asked me to review the tool and if I’m being honest, I probably never would’ve checked out the tool had they not reached out to me. Why? Because I am so tired of hearing the word AI. I don’t know about you guys, I’m just over it. Everything’s AI. I don’t even know what it means anymore.
Obviously as a full-time photographer, I’ve got a lot of images that I’m looking at and a lot of images that need retouching on one level or another. Now, don’t go out there and convince yourself that when we talk about retouching, you’re a naturalist or a purist. If somebody’s got a pimple, you’ve got to remove it. That’s retouching. Of course, there’s all levels of retouching that we can explore from just light retouching to heavy retouching. We could swap backgrounds. I have found myself using this tool on almost every single photo shoot that I’m on right now. It’s incredibly powerful and I would have to say one of the most powerful features in this tool, and I’m going to show it to you, is its ability to sync settings across multiple images. Now, at first that might not sound like a big deal. You might be thinking to yourself, well, I already do that in Lightroom. Who cares? But you don’t sync retouching.
Let’s say, for example, you go through and you’re removing or reshaping someone’s face, thinning out their jawline, or making their eyes a little bit bigger. Maybe you’re a boudoir photographer, maybe you’re doing it for your bride at a wedding and you’re going through and you’re retouching these images. In the past, I would have to retouch every single image manually because there was never software that would do that in an automated way. With Evoto, you touch one image and now you can sync those retouch settings across everything in the job. That is incredibly powerful and incredibly time-consuming. So, let’s dig into this.
Changing Backgrounds
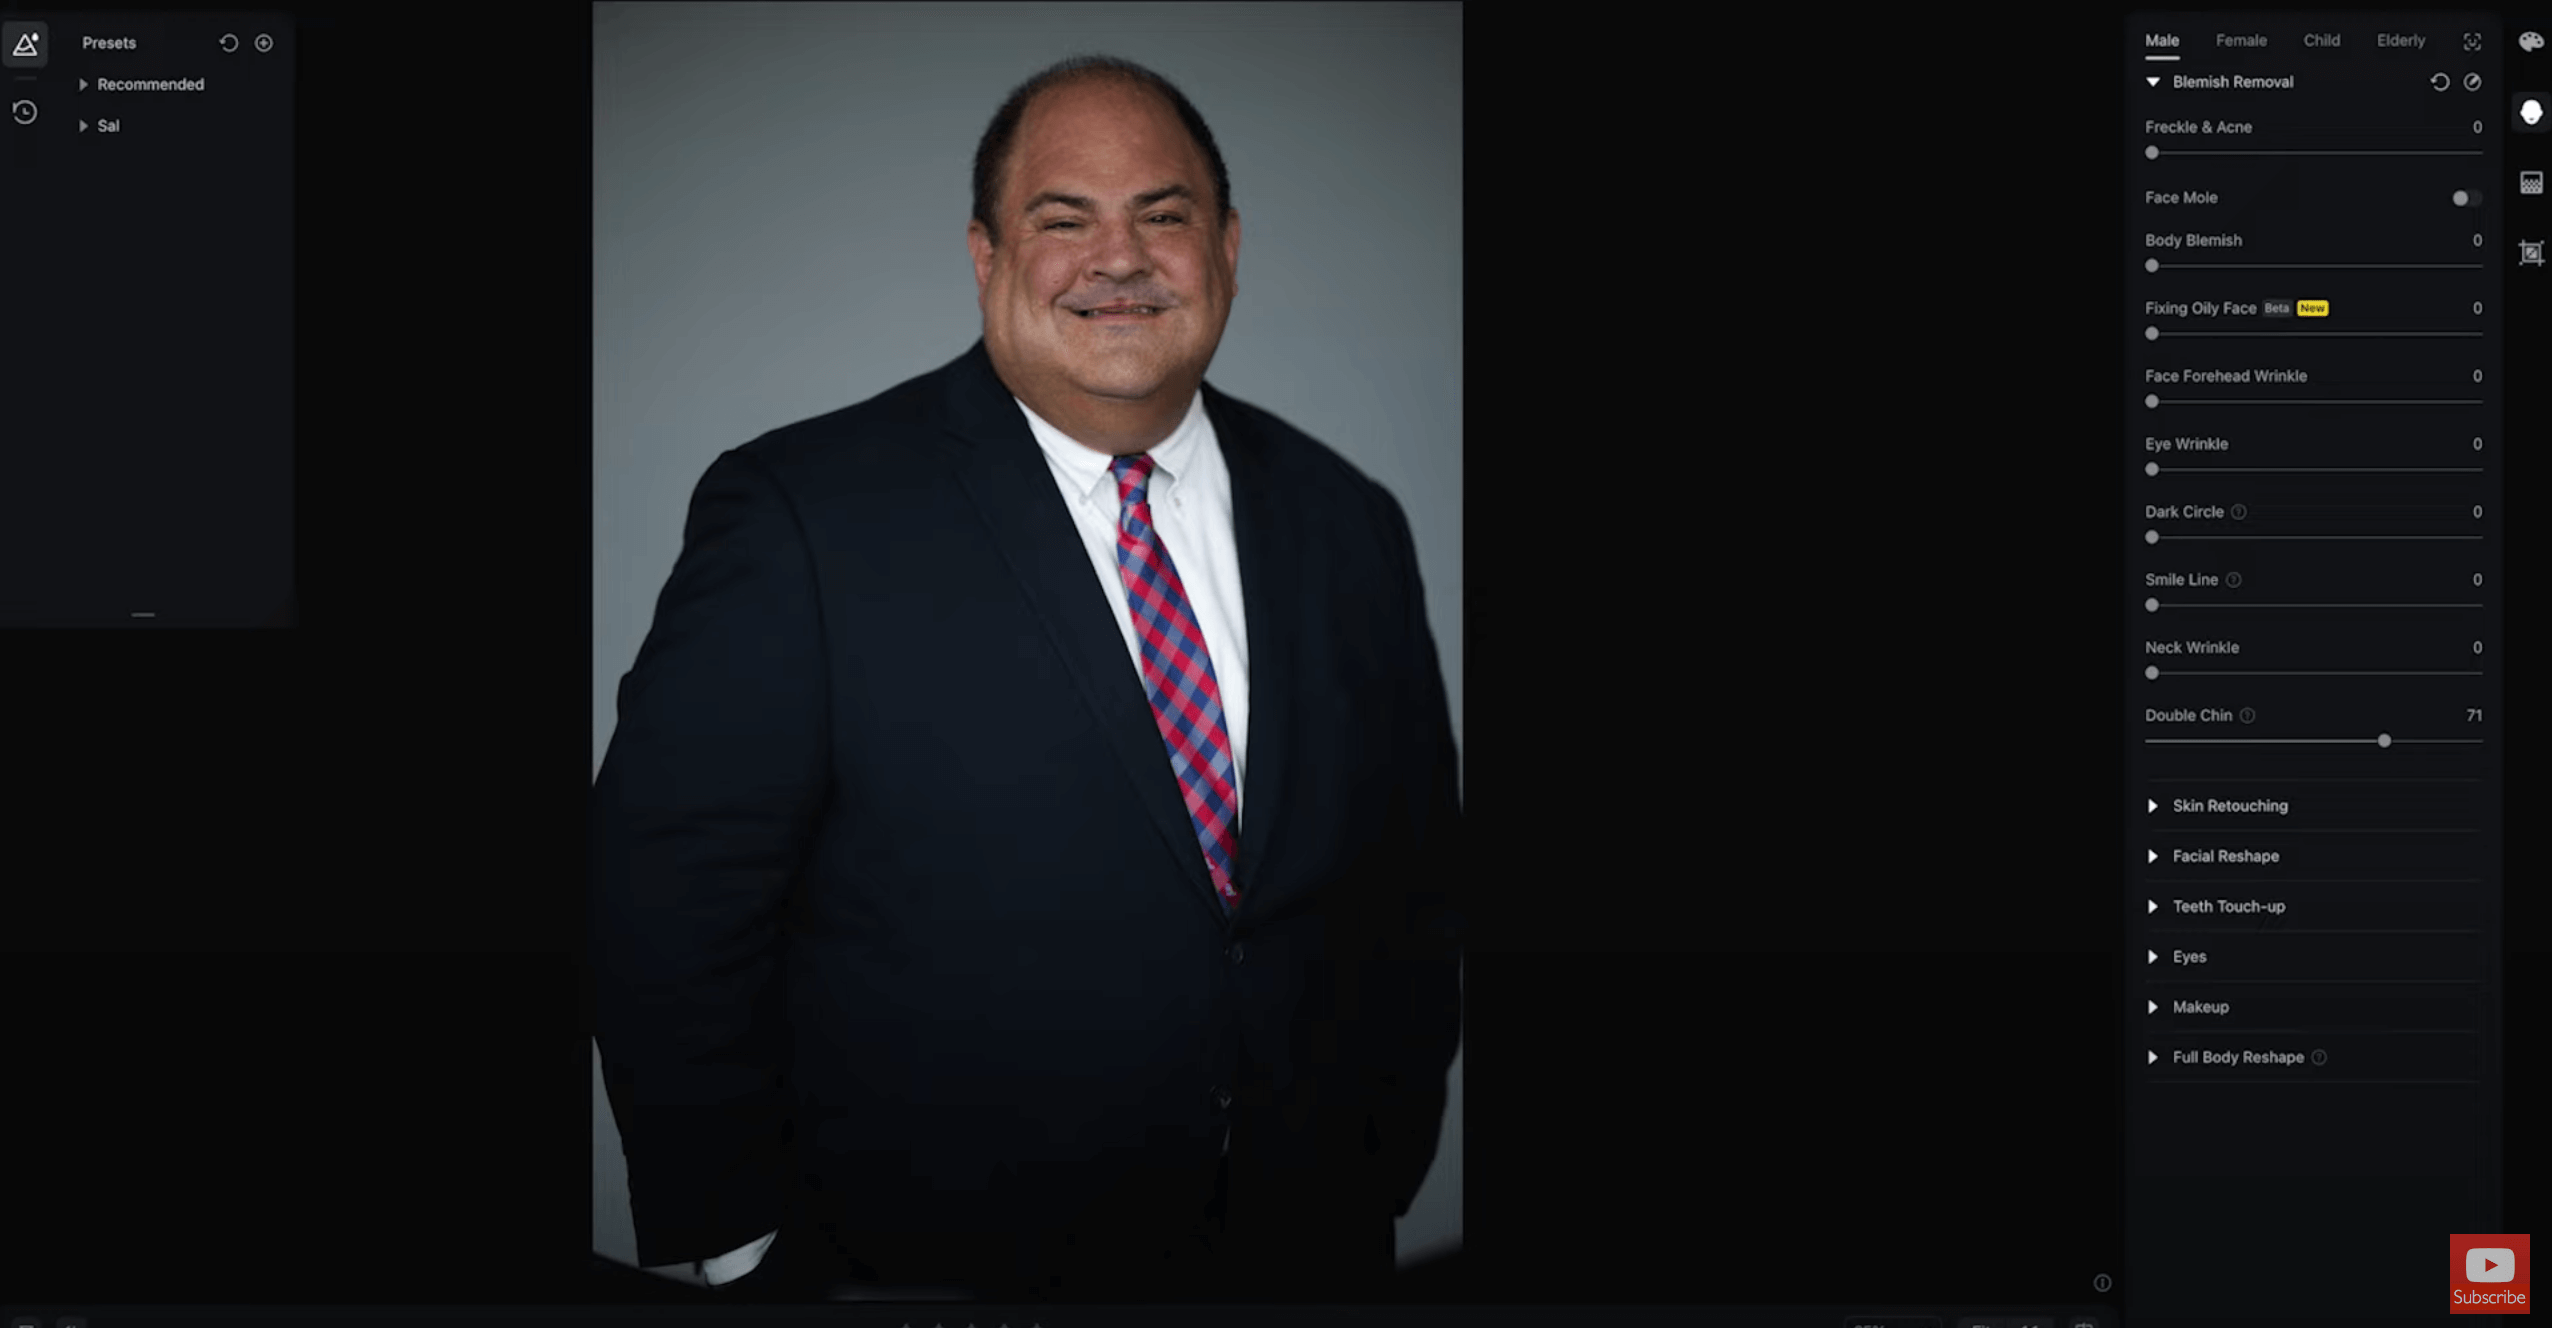
I’ve got a couple of normal jobs that I’ve shot here recently, and so we’re going to dig into this one. It’ll work on raw files, JPEG files, TIF files, and so you’ll figure out that workflow and what works for you. So these are raw files right now. This is a gentleman that came in for a headshot. This is straight out of camera, nothing’s been done to it.
Original Image
I will highlight a few new features in the product set. So this is the current version. Obviously in the future there’ll be new upgrades, but they’ve just recently added color grading and lens correction.
So the kind of color correction, if you will – like camera raw or what you’re used to doing in Lightroom – they’re working on it. It’s becoming more and more powerful and this becomes important, maybe not the lens correction as much as color grading though. In the previous version you could color correct your image, but if you wanted to grade it, the tool just couldn’t do it. Well, now they can.
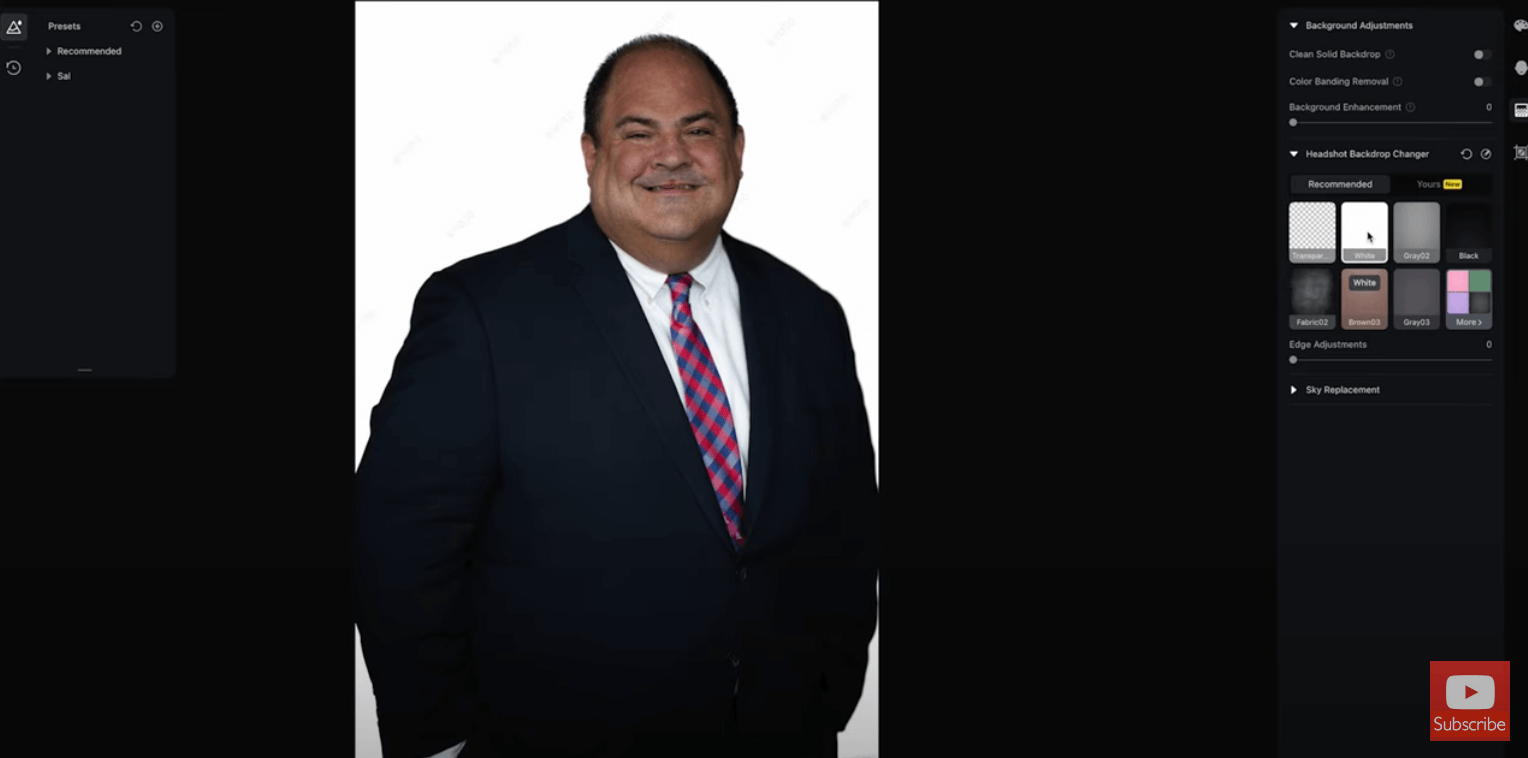
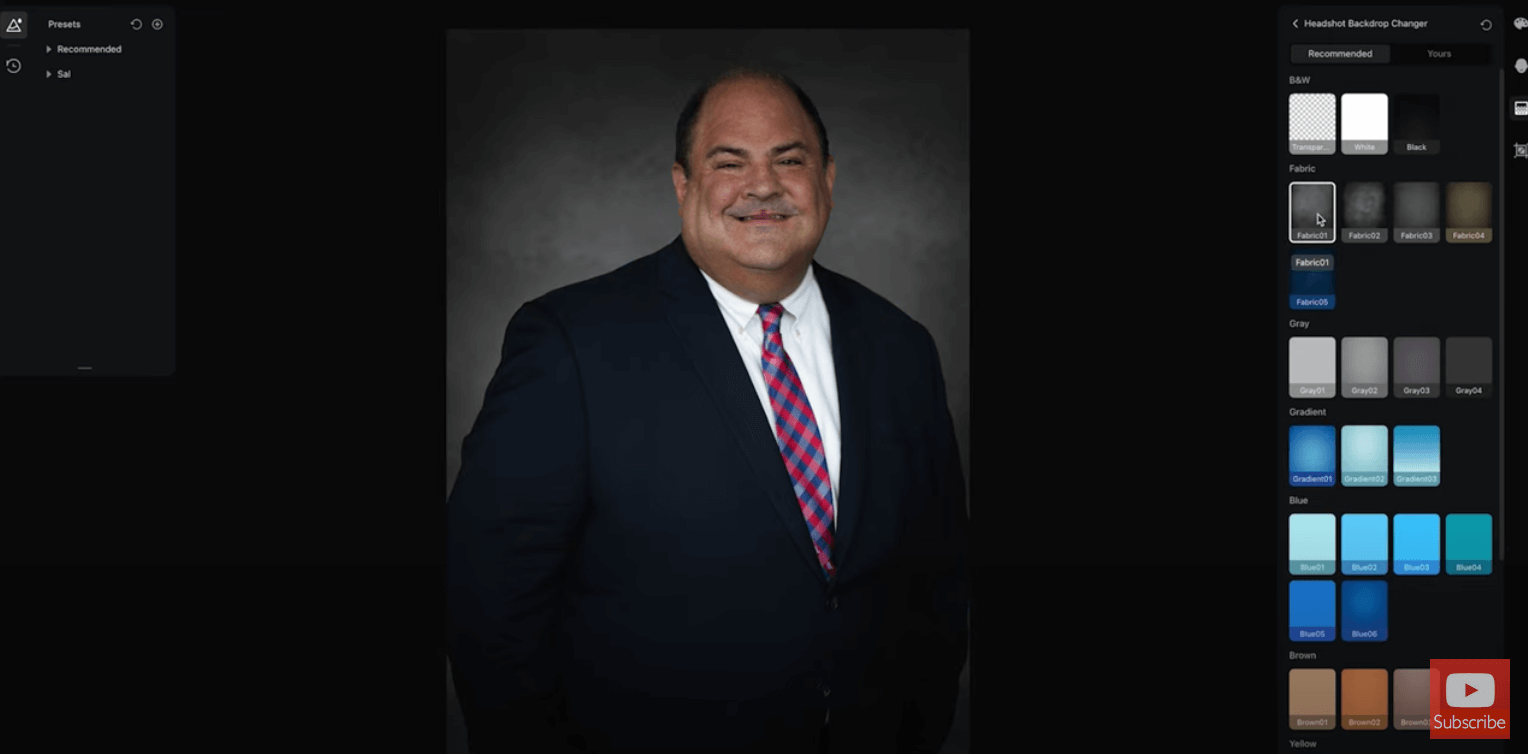
With this particular image, I’ve got a gentleman who came in for headshots. He may need to use his headshots on a variety of backgrounds like his website, his LinkedIn, or on print material. So, built into the tool is the headshot background changer. We can do something as simple as just put it on a transparent background. So he’s been completely cut out of that background and now it’s transparent, which is the same color hair. Now, I’ll show it to you on white. Look at his hair up top. That’s pretty good, pretty powerful stuff. They’ve also got edge adjustments where you can kind of bring that line in a little bit. You’re going to have to figure out what looks good for you. There’s stuff like this in Photoshop, but it’s not one click and it rarely looks good. I don’t know if you’ve ever messed with it.
Let’s throw him on a gray background now. Built into the tool is all these various colors that you can add them on, and some are going to look more natural than others. It’s hard when you put somebody just on a solid color, it always looks fake to me. That’s why you’ve got to have something that’s got a little bit of a gradient to it. Maybe it’s a fabric background. I mean this is absolutely incredible how simple this is. And, if we’re adding to the power of this feature, you can add your own.
White Background
Neutral Background
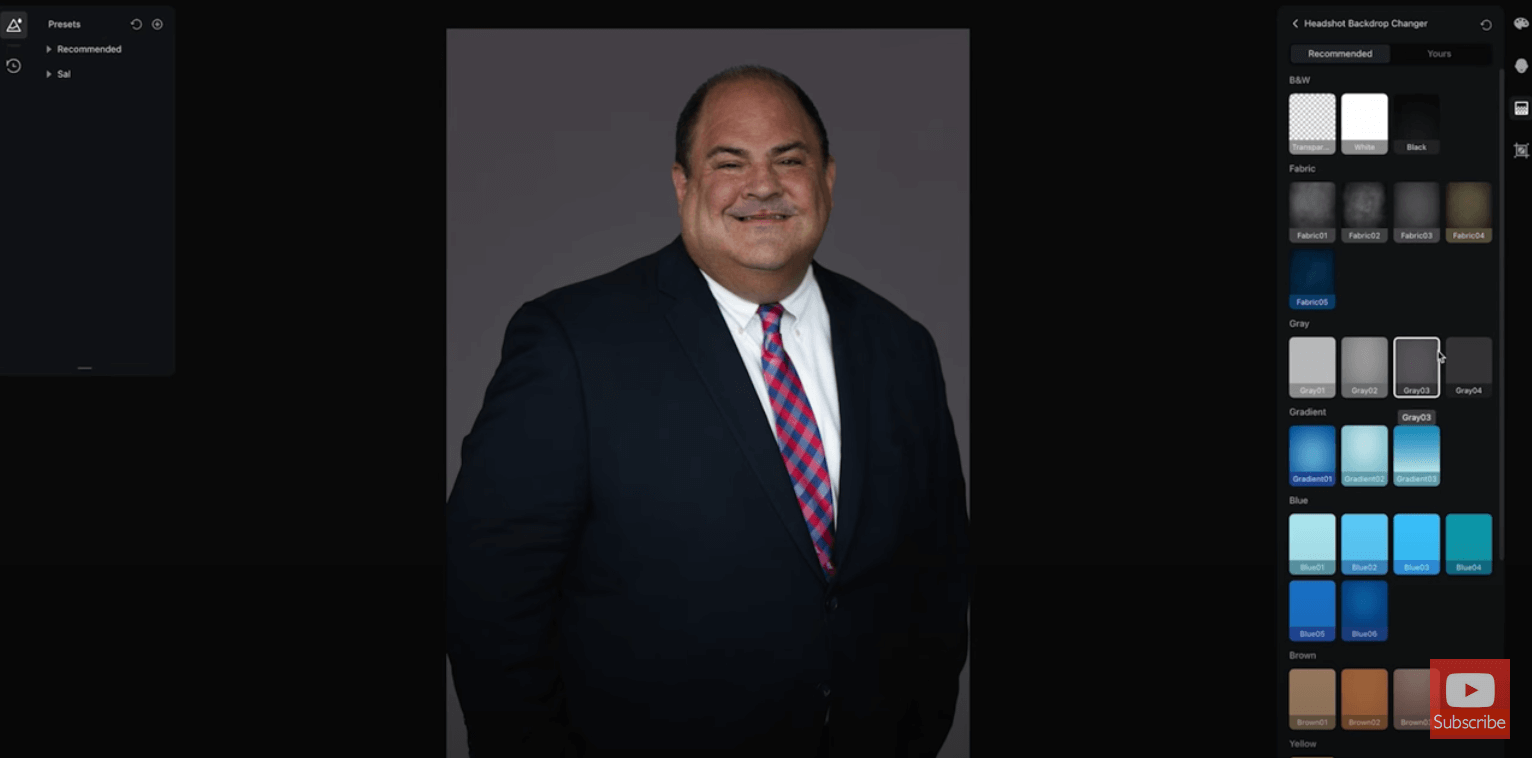
Solid Color Background
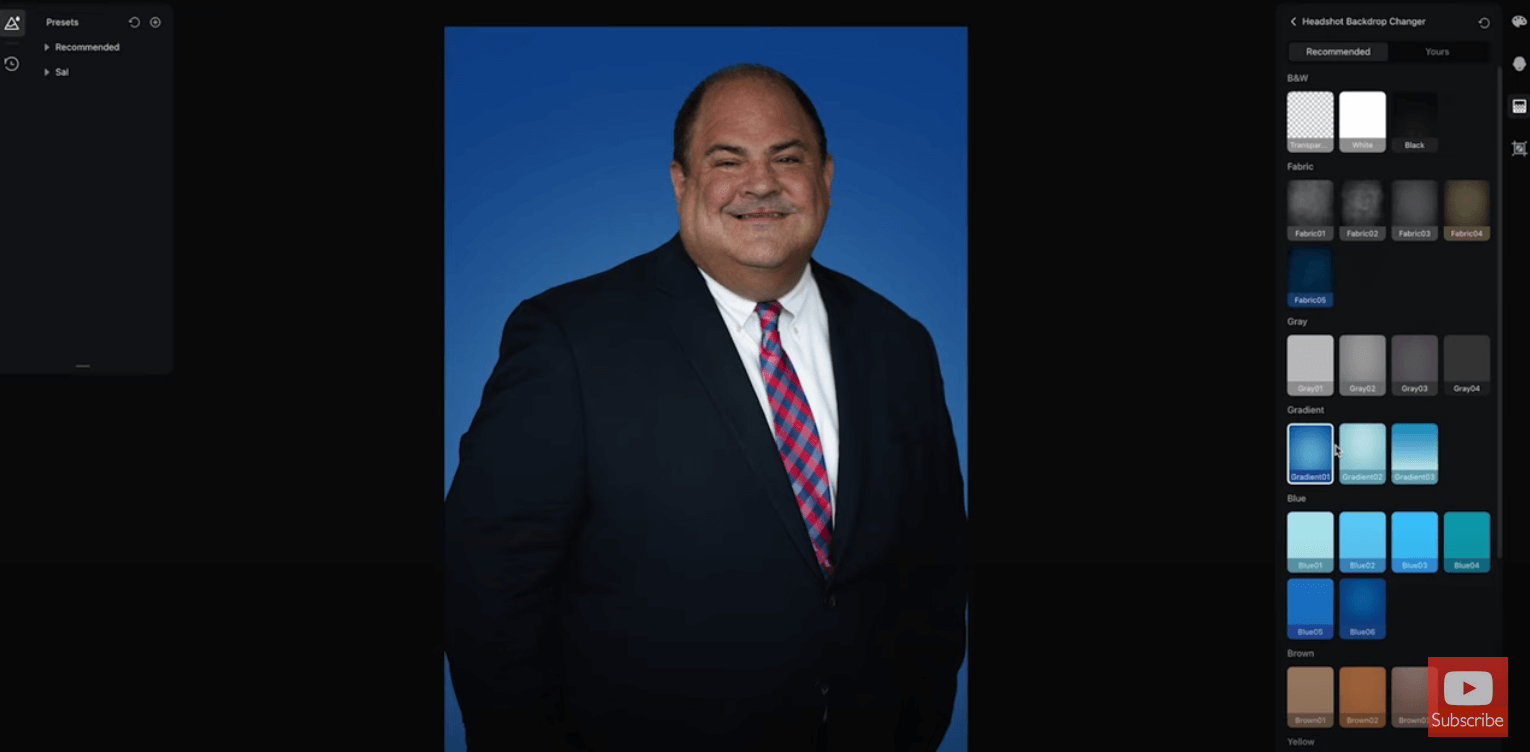
Gradient/Fabric Background
Retouching
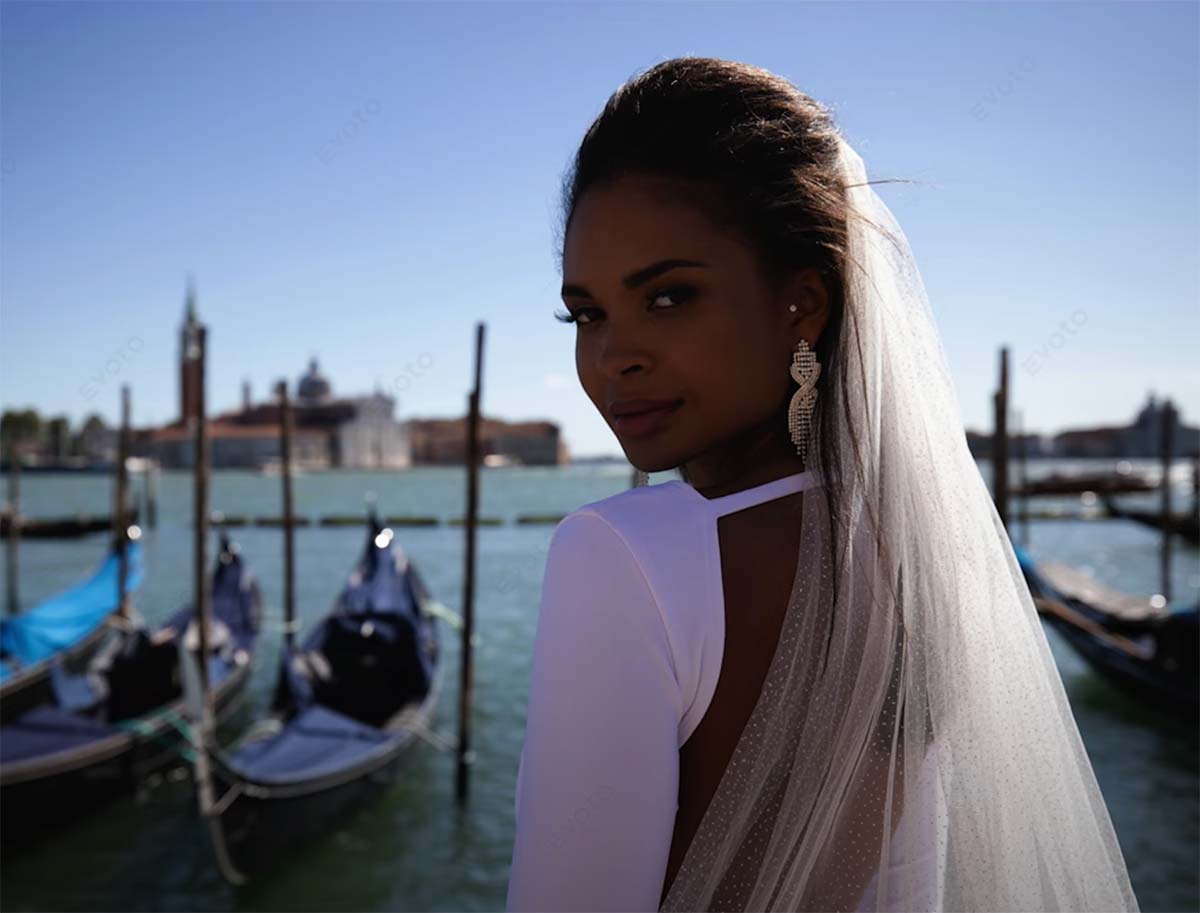
So, let’s go and look at maybe more of a portrait here. This was something I shot in Venice and now you’ve got your basic color correction setup here. So we can adjust exposure a little. She’s got a little bit of green in her skin, so I’ll add some magenta. The color temperature’s good. We can lift shadows a little bit, some blacks, clarity, all the stuff you would normally do in a tool like Lightroom. I’m not going to adjust the shadows. It doesn’t call for any real kind of color grading so I’m just going to keep this pretty simple. This is looking pretty good as a base un-stylized image.
Original Image
Now I can go here and it’s going to recognize that she’s a female and we can start going in. There’s imperfections in her skin. This to me, again, is one of the most powerful retouching tools on the market, hands down. I’m obsessed with this product. I’m using it in all my work that you’re seeing on the channel. I’m using it in work for my clients because it is so easy to use. So, let’s go through this. I can fix any kind of freckle acne and body blemishes, or fix oily skin. She doesn’t have oily skin and she doesn’t have forehead wrinkles. That must be nice. I’ll get rid of some eye wrinkles here and it’s very subtle. I’ll get rid of some dark circles under the eyes. That was a really powerful move there. We can remove or soften the smile line, so I just softened it there. Now I don’t know how this is going to work on neck wrinkles because she’s really kind of… That’s just stupid. That is just stupid.
Correcting Under Eye Circles
Smoothing Neck Wrinkles
Okay, let’s keep going here. She doesn’t have a double chin. Now we can get into some skin retouching here. This is always one of those things where it’s like how much is too much? How much is not enough? Well, that’s the beauty of this tool. You’ll figure it out and you’ll apply as much as you want. So we can crank this up all the way. If we zoom in, she’s still got that pore detail, but that’s probably too much, so let’s come back here. Here’s some face skin smoothing. Again, we want to make sure we’ve got some pore detail there. You’re not going to do the same thing to everyone. You’ve got to figure out what the right amount or what dials you’re going to pull. And that’s the whole point with a tool like this, it’s just about what knobs or levers you can pull to make an image somewhat unique.
We’ve got facial reshaping and this is really good if you want to adjust cheekbones. Someone like her, she doesn’t need that much work, so we don’t really need to do this to her. But you will have clients that need their face thinned out or their eyes made a little bit bigger. So let’s go to eyes and make her eyes just a little bit bigger. We can level her eyes. You ever get somebody who’s got wonky eyes? Well, you can… Sorry if you got a wonky eye, I mean it’s not personal, but maybe there’s tools for you. Evoto, we support wonky eyes. I don’t know, they didn’t pay me for that message.
You’re going to see me go through this and work the image. So let’s work on the eyebrows. We can make her eyebrows a little bit thicker, change the distance, and tilt the eyebrows. We can do the arch height. We made the eyes a little bit bigger. She doesn’t need any changed mouth, but we can do size, can make it a little bit bigger, and width, a little bit wider. It’s kind of the perfect version of each person that you want to put into place. They’ve got tools here for teeth, but we don’t need them here. We can enhance the brightness of the eyes here. This is the white of the eyes, so you don’t want to go too much. That’s always a telltale sign. With retouching, it’s always less is more.
Now, this is a really interesting kind of panel here where we can adjust makeup and at first it might seem silly, but it’s really not. It does make the biggest difference in the world. We can go on lipstick and just give it a little bit of pop. I’m not saying it’s going to replace makeup artists, but this is giving a little bit more life to the portrait as we go through here. We can add more to it just so her lips pop a little bit more. We can go to her eyeshadow and add a little bit more. I’m just clicking through here to see what’s looking better. I like that you can control the amount.
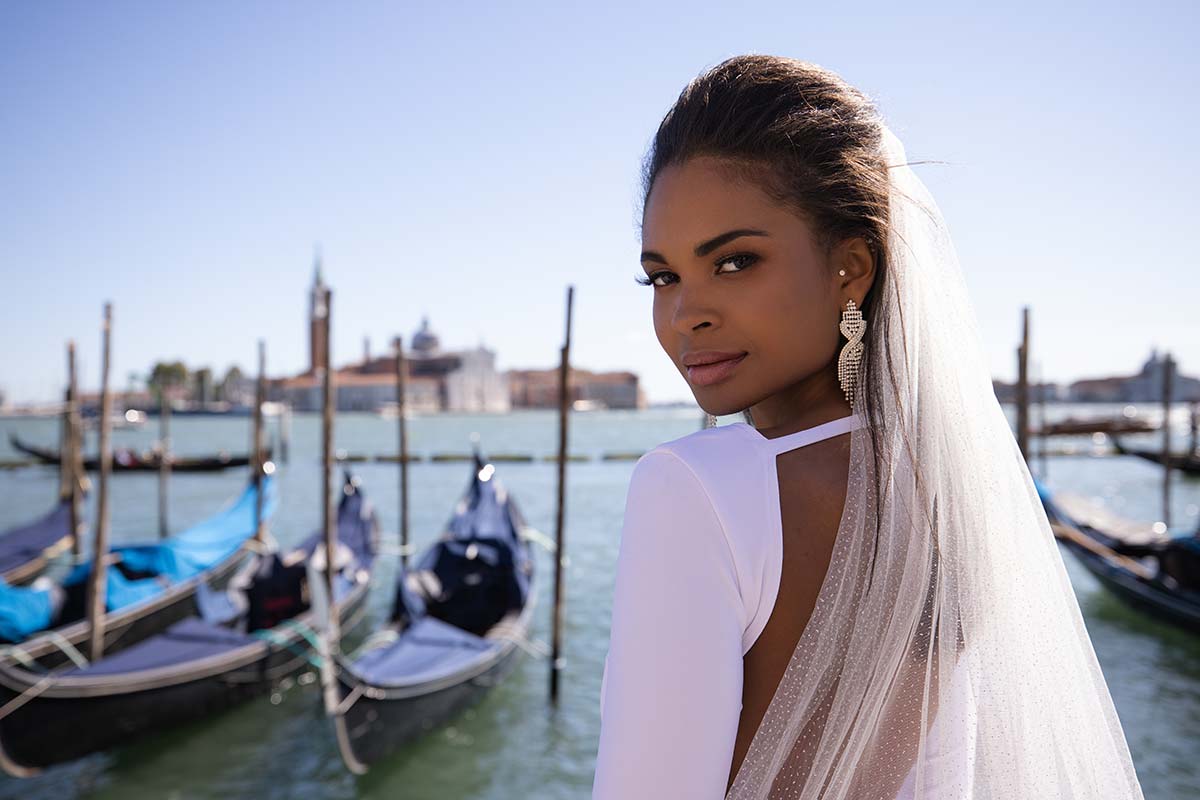
So again, this is allowing us to get to the best version of a person. They’ve got makeup presets, but I kind of like going through one at a time. Now we can change her eyes, but I’m not a big fan of that. Models wear different colored contacts and sometimes it looks good, but I love her beautiful eyes, so we’re going to leave that there. As we come through here and we look at the before and after of the image, it’s a nice version. It’s a perfect version of her now.
Before
After
Something that I think this tool is really good at is to notice the color of her face and the color of her body. Now this isn’t uncommon, this is real life actually. People have makeup and the makeup maybe doesn’t match the color of their body or they tan and maybe their face has color. I’m one of those people. I spend a lot of time on a golf course so my face has a very olive complexion, but I assure you my chest is bleach white. I don’t know if the tool can help me with that.
So that’s retouching. You can see the before and after on this, and we can see it on her skin specifically in her face and the bags. I mean that’s a really nice portrait. Now, if I had photographed her and had multiple images here, I can now select those images and sync this across.
Putting It All Together
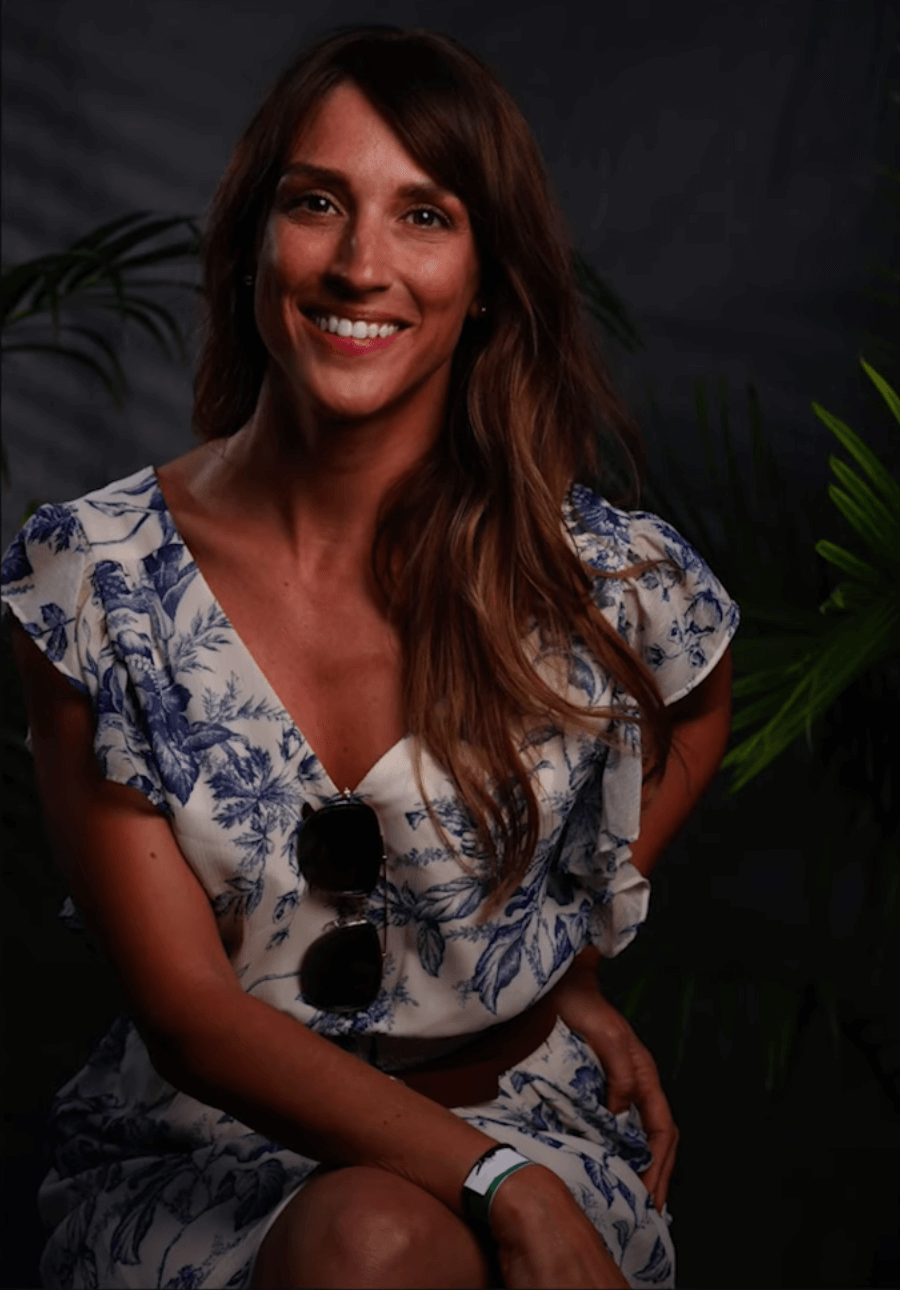
Recently, we were in Santa Monica. Canon flew us out there to do headshots for their content creators and we had the honor of photographing all these people, one of which was a good friend of ours, Vanessa Joy, who’s also a content creator. She’s got her own YouTube channel as well for photography. We had a background set up, we had studio lighting set up, but guess what? It was hot on the pier. People were coming to us after being there for an hour or two and they were shiny. Maybe their makeup wasn’t looking their best. This is a perfect way to showcase the tool.
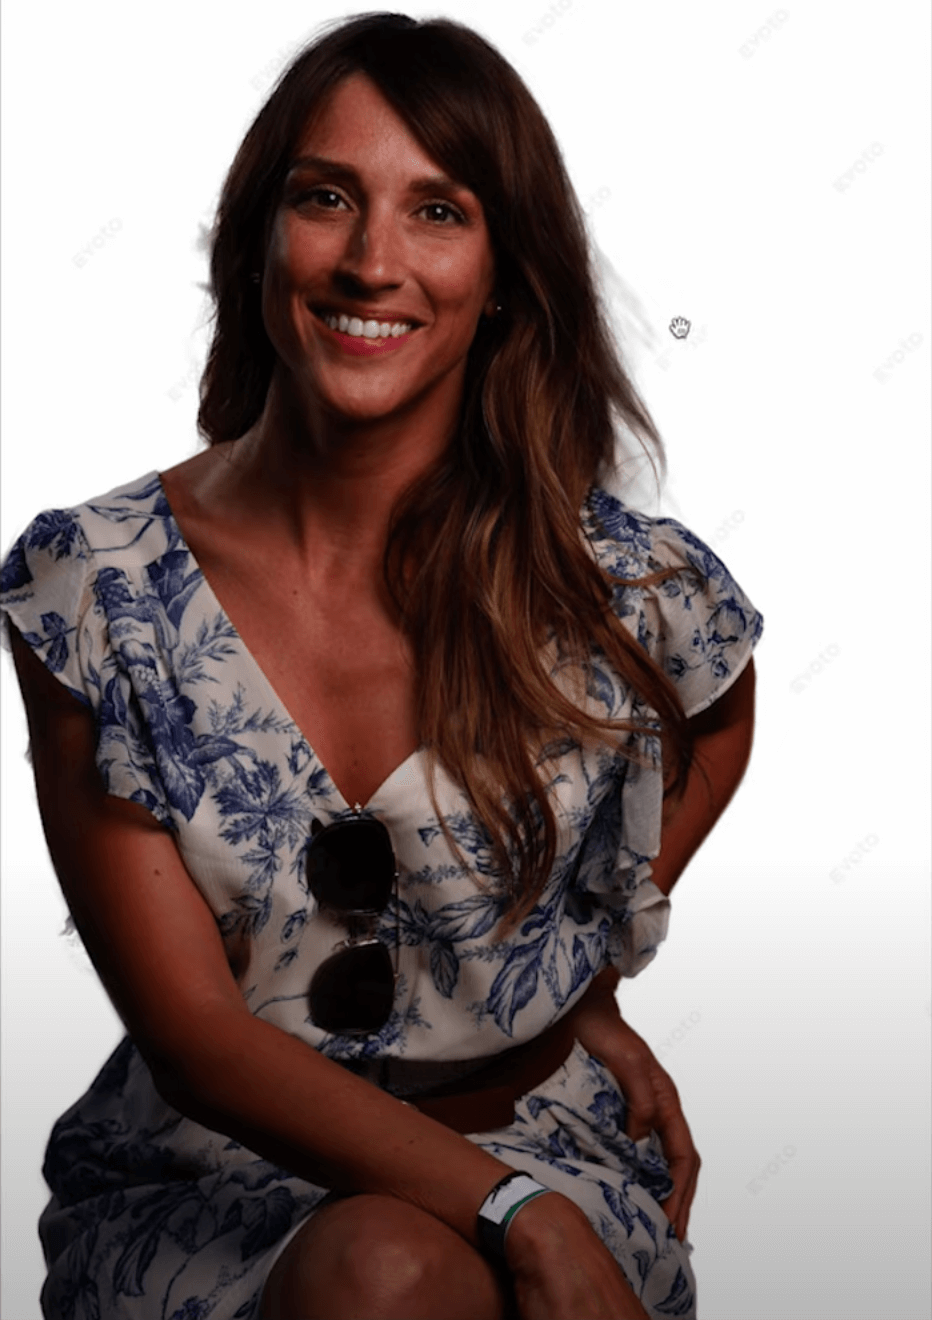
There’s a couple of things we can do here. Let’s showcase everything I’ve just shown you all at once. I’m just going to go to the background adjuster. Now, this background is kind of busy. Maybe Vanessa says, “Hey, I want to use this on business cards. I want to use this on my LinkedIn, but I don’t want the ferns and everything else there.” Great. We’re going to come in and we’re going to cut her out of that background. Evoto did an incredible job cutting her out, even these stray hairs. We can throw her on a gray or we can throw her on a studio kind of master’s cloth. We can even adjust the edges around her hair. So, you’re seeing how this will work even with a background that is busy.
Original Image
White Background
Solid Color Background
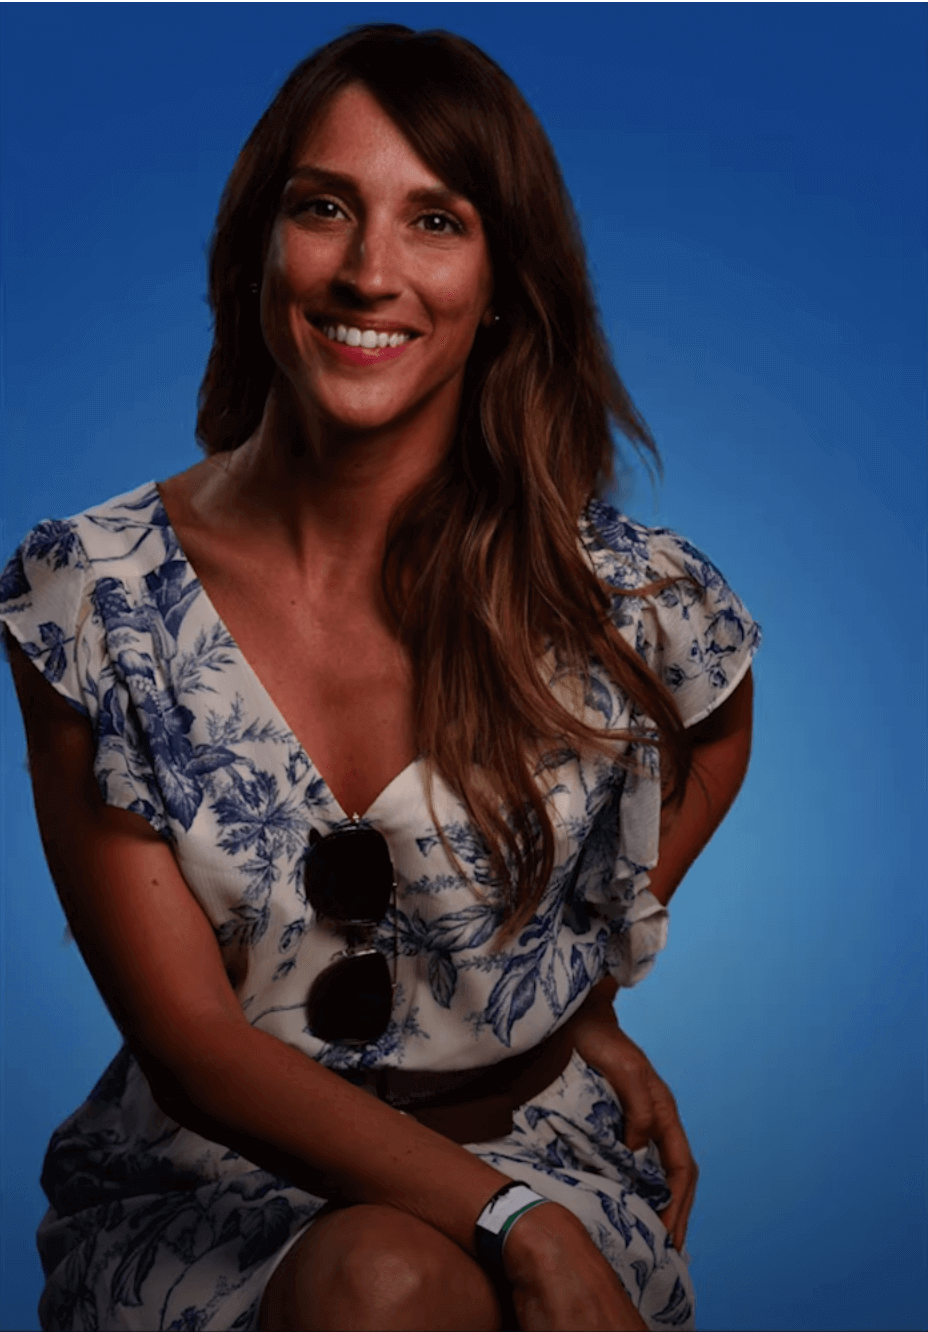
Let’s go into the tool and go through standard color correction. I’m going to say as shot, because I know I had my Kelvin right. Let’s just beef up exposure just a little bit and add a little bit of contrast. Less is more. The highlights and shadows look good. Maybe we’ll add a little bit of clarity. Now, let’s grade this. That’s the part of the tool that’s super cool. So let’s kind of cool off the shadows a little bit and let’s warm up the highlights. We’ll warm up mid-tones just a little bit. I like that, giving that kind of before and after little stylized look there. I think that looks good.
Original Image
Color Corrected Image
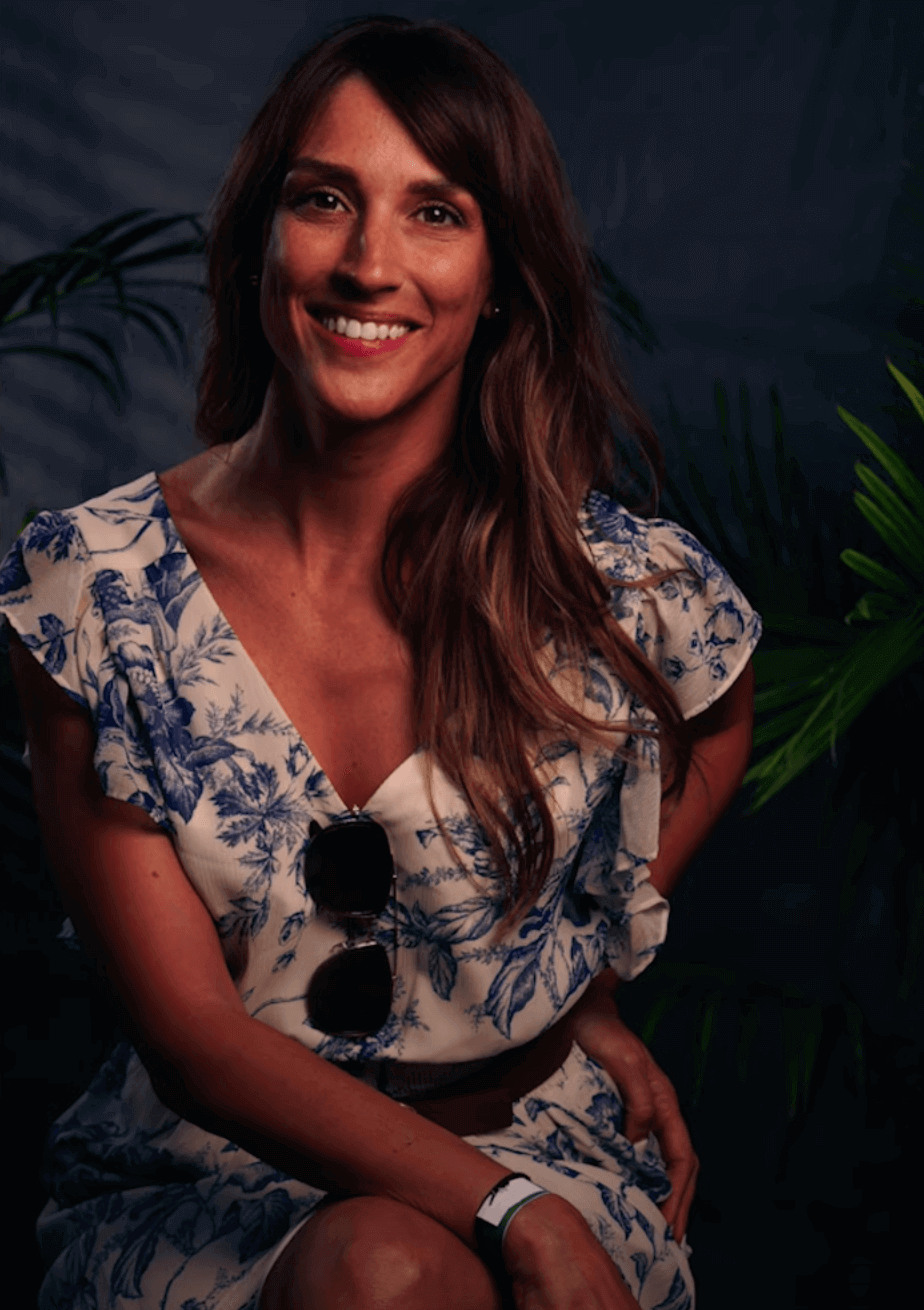
Now let’s go into the retouching part. So Vanessa has really good skin, no freckles or acne that we need to remove, but what she does have is oily skin. It was hot out. I wasn’t moving fast enough. It’s my fault, Vanessa. I accept the responsibility. But we’re going to get rid of that. So we’re going to use this tool to get rid of some oily skin and do light eye wrinkle removal.
Let’s get rid of a little bit of the smile line. She doesn’t have any neck wrinkles or a double chin. Now let’s smooth that skin just a little bit, but make sure we still have skin detail. We don’t really need to do anything to her face, but let’s just say for argument’s sake that I was going to make her eyes a little bit larger and her upper lip a little bit bigger. You don’t have to like it. This is just for demo purposes.
These are the kind of things that you would have to spend hours of time doing individually to each image. No one wants to do that. I’d rather go through, get one image looking perfect and then sync that across. So let me finish with this example. I do see some neck wrinkles under there, so let’s soften those up a little bit.
Now you have teeth touch up here, but again, Vanessa has very white teeth, kind of obnoxious white teeth, honestly. I drink a lot of coffee. Clearly Vanessa doesn’t. That’s a problem. I can’t even use the teeth whitening demo because her teeth are too damn white. If I give it to her she’s going to look like one of those news anchors that just have perfectly like… Okay, Vanessa, whatever.
All right, let’s keep going. Let’s brighten the eyes just a little bit. Don’t overdo it. She doesn’t really need anything to do with makeup, but if we go to eyebrows it darkens them, which I really do like a darker eyebrow. But, what I really want to do is touch on lips. If we go to lipstick here, we’re going to stick with a normal color for her. She knows her colors. Eyes look good. So now if we look at this before and after, this looks so good. It’s much more polished. It’s much more representative of how her makeup probably looked when she left the house. These are the kind of things that we have to consider for our brides and boudoir clients to really put the best of them out there.
Original Image
Retouched Image

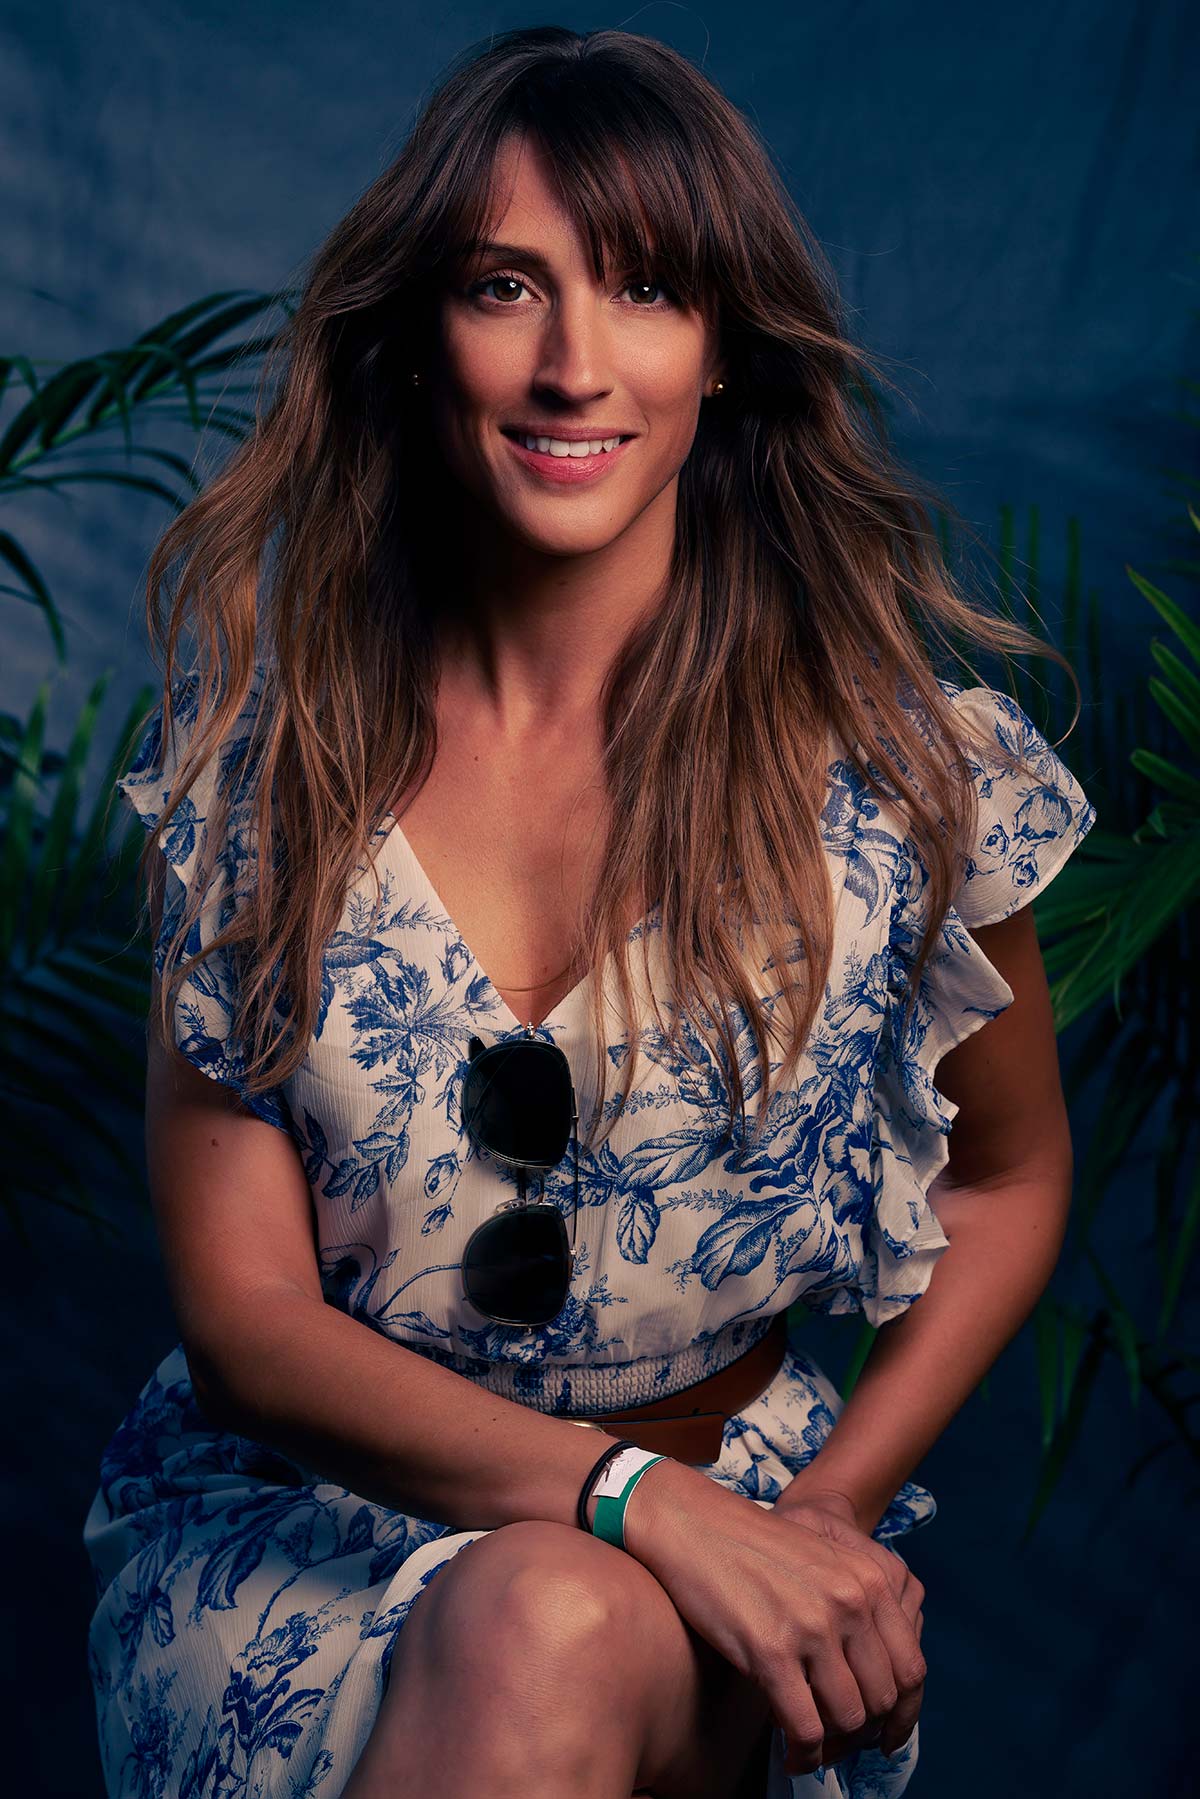
But now I’ve got a problem. I’ve got two images of Vanessa and they don’t match. If I’m working on a retouching job, I’m thinking to myself holy smokes, I spent 40 minutes on this first image. Now the client wants four images, so I have to spend 40 minutes per image because they have to look the same. You can’t make someone’s eyebrows darker on one image and not the other.. This is what makes this tool so incredibly powerful. Now I can select both images of Vanessa, hit sync, and now that secondary image matches flawlessly with the first one. And her teeth are still too fricking white. I’m just kidding. You have beautiful teeth, Vanessa.
In retouching, we start focusing on the face and then arms, legs, and chest don’t match to that. Well, they’ve got a cool feature here called unify. So you’ve got body skin smoothing. So we’ll apply that and it’ll hit her knee and her arms. That was very subtle, which is how we want it. I’ll crank it all the way up so you can kind of see it. That’s a little too much smoothing, but you get the point. You don’t want the face to be smooth and then you get to the chest and the arms and they just don’t look the same. And that happens to all our clients, so that’s maybe more of a global approach to it. Then unified body complexion is going to try and get the skin to all kind of match a similar light, and it’s just subtle with it, adding it to that.
Image #1
Image #2
Guys, the way Evoto works is it’s charging you per image. It’s pennies per image. And so you might think to yourself, why would I pay pennies per image? But, the truth is that with the amount of time this is saving you, I wouldn’t pay pennies per image. I would pay dollars per image. That’s the part here where you might have trouble wrapping your head around it, but it is completely worth it. Again, I’ve been using this on client jobs since I got my hands on this tool. So it’s been a couple of months now and I’m absolutely obsessed with it. I wouldn’t tell you I was if I weren’t. I think it’s an incredibly powerful tool. Yeah, it might cost you pennies per image, but you can buy in bulk and burn that credit or you can pay as you go. It’s definitely well worth the investment of the tool.
I’m going to give you guys a link to the tool. Download it, the download’s free. Mess around with the tool. You have nothing to lose if you don’t export any of the images. Watch this video again to see what I’m doing and how I’m doing it, and then give it a try. I think you’re absolutely going to love it. If you like this video, like, comment, subscribe. For more content like this, look at that channel. We’re growing it, man. We’re over 360,000 subscribers. Thank you to all of you who’ve been watching these videos. We appreciate you and love you. We’ll see you in the next video.
CLICK THIS LINK to download Evoto for free & get 30 FREE CREDITS!


