Editing Workflow for Painterly-Style Portraits with Jen Hargrove
When it comes to creating my painterly-style images, I wouldn’t really say I have a crystal ball. I generally have no clear vision of what a finished product will look like exactly when I’m done with it – an idea, yes, but a clear vision? No. The finished image could be an award-winner, or it could be a train wreck. Some artists, like my mentor in this style, Richard Sturdevant, visualize their finished product, or they diagram the process or even create a flowchart to map out their progress towards a finished image. My style, by contrast, is a bit of a Zen journey, much like an unscripted road trip – I know I’m there when I get there. If this sounds familiar to you, perhaps this painterly style of editing is for you.
THE SETUP
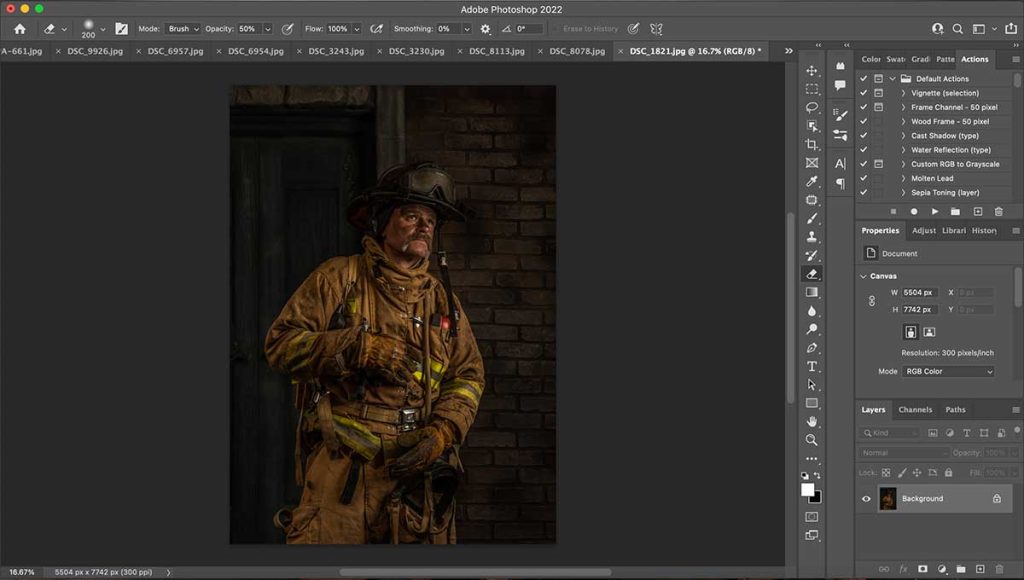
I begin my painterly images before I press the shutter button. The subject matter of my images varies widely, from the cute and cuddly to the old and grizzly (literally…although, I guess, technically, she was a brown bear). I photograph animals, children, teens, and eclectic subjects like firemen and sailors. With each image, posing at the moment of capture is critical. I look for the details that will set the image apart. I light my subjects with purpose and intentionality. Since we tend to view images from left to right, at least in the Western world where my work is generally viewed, I light my scenes in that fashion – left to right. None of the capture is an accident.
In camera, I create my photographs as JPEG images, as opposed to RAW images because I tend to photograph dark – exposing for the shadows in my subjects. Darker, slightly underexposed images allow me to make an image without losing detail in the highlights while keeping enough detail in the shadows that I’m able to begin my painterly workflow, bringing out the details even more as I go.
THE PRE-PAINTING PROCESS
With a photograph or series of photographs now captured, I start the initial, pre-painting editing process in Photoshop. I start with the basic cropping and straightening, if necessary, and then begin to eliminate any obvious distractions in the image. My method for getting an image ready for fine tuning begins on a duplicate layer of the background image. I change the blend mode of the duplicate layer to “Screen” in my Layers Pallet, and then use the Eraser Tool on the duplicate layer to revert to the background layer if the “Screen” mode has made the image overly bright. Since I’m working on a duplicate layer, I’m not bothered by the fact the Eraser Tool is destructive – I still have the original background layer if I need it. I use the Eraser Tool at this stage primarily to eliminate distractions, to brush light back away from the skin and hair and from any other spot that draws the viewer’s eye away from the subject.
Once the light is right on the duplicate layer, I combine the two layers. I rarely work with more than three layers open on my pallet at a time.