
How to Face Swap in Photoshop with Dustin Lucas
When it comes to portraits of children, we all struggle to balance capturing their energy and personality while getting in-focus images. Not to mention ones with kids with eyes open, looking and smiling at the camera. Of course, the parents are going to love almost every image, and this makes the photographer’s job easy, right? Well, you need to get the safe image they expect with their kids somewhat facing the camera, eyes open, and smiling. That moment isn’t easy to capture in one shot, so what we are going to create is the perfect portrait by swapping heads in Photoshop. Doing a bit of Photoshop does not mean you aren’t a good photographer. We can only control so much and are still required to deliver a somewhat perfect portrait.
It all starts with culling and basic editing in Lightroom for consistency, then we can open the images in Photoshop. Once you find the first face to swap, select with the Lasso tool and copy and paste into the plate or main shot. Adjusting the new layer opacity and using the free transform tool helps align and position your selection in place. Depending on the complexity of the swap, you may need to use the clone stamp tool to fill in the background. Once we have all the swaps in place, we can use adjustment layers to blend the images together. Boom, that’s it. And now you have the perfect portrait to deliver to the parents. Let’s jump into Lightroom and get started.
Select & Edit RAWs for Consistency
To get started, import your images into Lightroom and adjust the build previews to 1:1. Once this is completed, Lightroom will run faster while you cull and zoom into your images. The first image I want to choose is the plate shot or main image. This will be the frame I will paste all of the swapped faces into. I recommend the ones with a pleasing composition and where feet aren’t cropped out and the background is complete. This image I will 5-star and add a blue label. Since this portrait has 3 kids in it, I will scan all the images for the best expression of each. Using color labels I can distinguish who I am selected for in each frame. Starting with the child on the left I will red label all images I like. For the middle child I will be using yellow labels and if any of these overwrite the previous red labels, that will not be an issue. Green labels can be applied to the child on the right and this will complete selection.
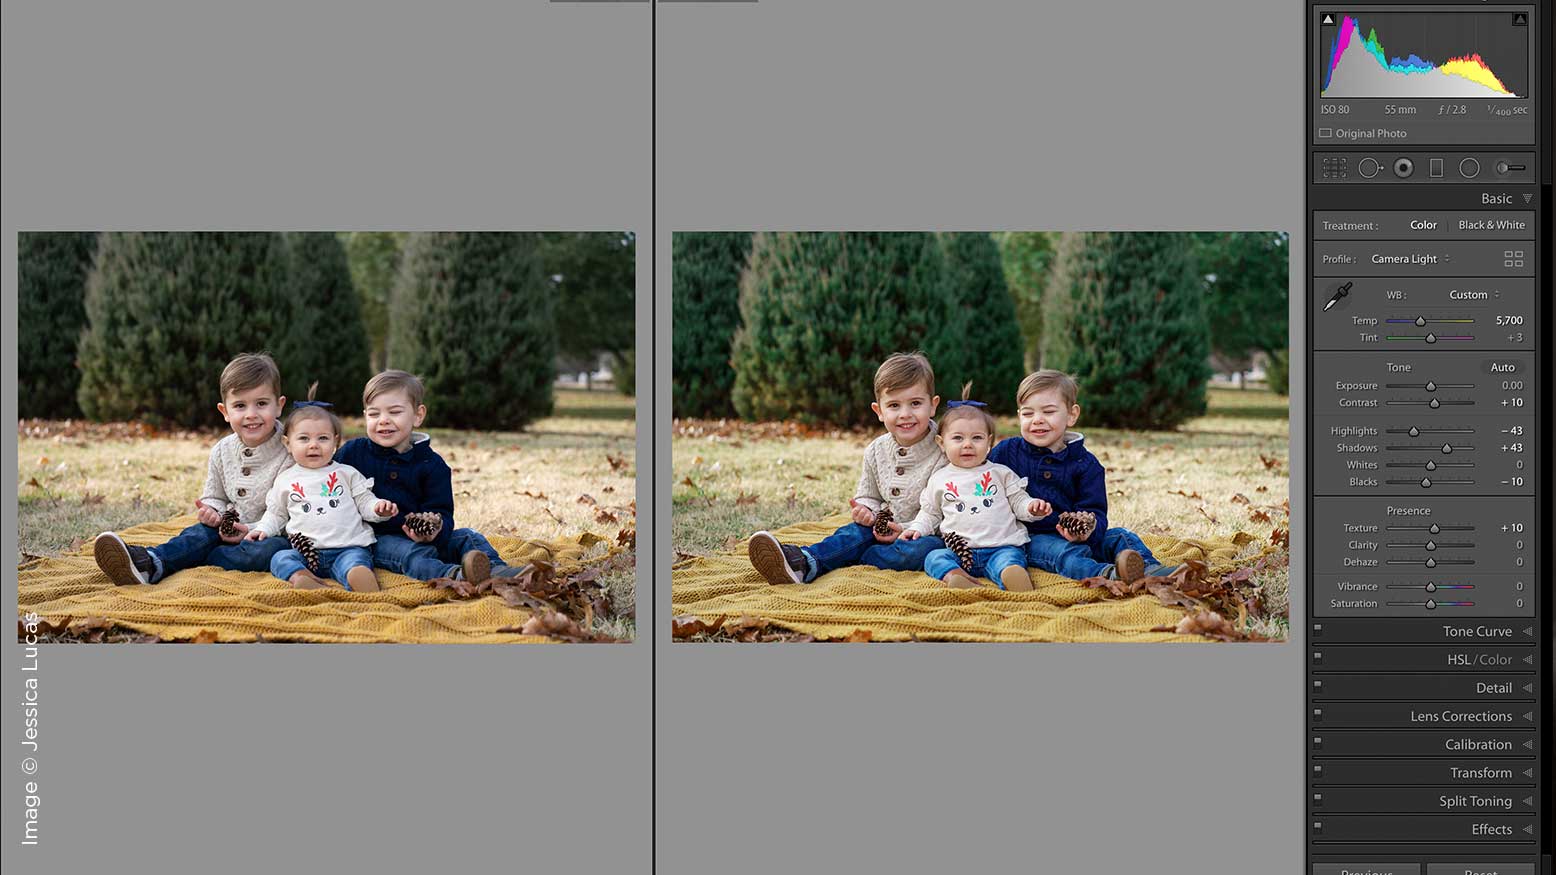
Next, we can move on to basic color correction to get our images ready for swapping. I usually choose the main image to edit with. I use a preset to get started and then tweak the colors and brightness to my liking. Once I am done I can sync these develop settings to all the color labelled images. Before we open the main image into Photoshop we need to check our preferences for external editing. Open Lightroom preferences and go to the External Editing tab to review these settings. Typically I keep these settings the same as the default, except in this case I want to reduce the bit depth to 8-bit. To open directly into Photoshop, I can select the image in Develop mode, hold command and strike the E key. Once opened in Photoshop, I can save it by holding command and striking the s key so the new edited .tif file appears in Lightroom.
Back to refining my selection. Since I have 21 images chosen, I need to narrow down the final ones I’d like to use per color label. For the final selection per child, I will add a flag and then open directly into Photoshop as well. In order to distinguish between these swap images and the main one, I will not save them in Photoshop. This will keep the file extension as .arw instead of a .tif. This isn’t required, but it helps to stay organized while in Photoshop.
Use Lasso Tool for Swapping Faces
Toggle between images in Photoshop by holding command and striking the ‘ key. This will be handy as you will want to review each face to swap and compare the results. Once we are ready to use the lasso tool, strike the L key and draw around the face you’d like to swap. Be sure to leave a little room around it in case you need to blend with the background as well. Then you can copy the selection and paste it in the main .tif image. You can use command and the C key to copy and command and the V key to paste. Yes, it’s really that simple to bring in a new face. To quickly move the newly pasted face, you can hold command while clicking and dragging.
From there, you’ll need to align, move, and resize the face into position so it’s a more realistic composite. This requires a bit more work using layer opacity, the free transform tool, and masking out the unwanted areas.
Adjusting Opacity, Transforming, and Masking
I like to start by zooming in at 100%. To do that, simply hold command and strike the 1 key. Then, by lowering the new layer opacity to around 70%, I can see both faces to start aligning them. By holding command and striking the T key, I can use the free transform tool to resize. So far things are aligning pretty well, however, if I want to match more closely, I can toggle the warp tool to move the eyes independent of the mouth. This becomes more useful on the child to the far right where I need to do a full head swap.
Once I copy and paste the preferred selection, I will have a lot of clone stamp work to do. First, I will need to reduce the opacity to 70%, resize and move the selection with the free transform tool. The best way I align a more difficult image like this is by using the shoulder to start. Then I will resize the image to scale with the area I am replacing. This process takes the most time and the closer I align here, the less cloning I will ultimately have to do. Once I am finished, I will need to create a blank layer, grab the clone stamp tool, sample all layers, and start painting in any areas I can’t fix with masking. You can also use the healing brush if you need to blend areas, however, stay away from hard edges with this tool.
Now we are ready to do some quick adjustment layers to tie everything together.
Add Adjustment Layers to Blend
The first thing I like to do is apply a quick dodge and burn layer to level out the brighter tones and recover shadows on faces. To perform this adjustment, I make a new layer, set the blending to overlay, fill with 50% gray, and use a brush to paint on the layer. Typically I set the brush opacity to 10% and a very soft edge to paint white for dodge and black for burn. This is a one-layer technique and it’s simple to work from. I also use a highlight recovery curve to tone down brighter spots. Burning those down can make them gray so this helps to not dull the image.
The last changes I made were to the saturation of some areas and sharpening. Using the Hue & Saturation tool I can quickly drop the saturation, invert my mask and paint in the areas in the trees that were overly warm. This does the trick. Fixing the dead spots in the grass can be done with a Color Balance adjustment layer. I like to sharpen a bit in Lightroom, however I do most of my heavy lifting in Photoshop. Using the High Pass technique, I make a new layer and apply a filter called High Pass. Typically, I set the radius between 3–10 pixels depending on the sharpness already and click ok. Then I can double click the new layer to change the layer style to an opacity of 75% and the blending mode to soft light. To intensify this effect, I can change the blending mode to overlay or hard light as well as lift the opacity. Boom, I am done!
The Results
Getting the perfect portrait of children doesn’t always have to be daunting. I hope these steps help you when you need to swap faces. Always start in Lightroom so you can stay organized through the entire process. It also doesn’t hurt to quickly select and edit your images. Once you are ready to composite, open each image directly from Lightroom into Photoshop with the Edit In feature. For swapping faces and heads, the Lasso tool really is the best choice to keep things simple. Copy and paste selections directly on your plate or main shot.


