
How to Photograph the Details at a Wedding with Vanessa Joy
The wedding details, such as the ring, accessories, invitations, and other little elements, come together to make the big day as special as it is. The ceremony is important, of course, but it is often the photos of these little details that allow the bridge, the groom, and their friends and family to really revel in the awe and beauty of the wedding.
Personally, one of my favorite parts of photographing a wedding is capturing all of the details before it begins. Focusing on the details first gives the bride and her bridesmaids an opportunity to get used to a photographer being in the room.
While I do like to get a few behind-the-scenes shots of everyone getting ready, I tend to wait until the bride and her bridesmaids are done getting all dolled up to stage the shots. That way, no one is being photographed with their hair or makeup half-done.
Photographing the Details
Taking the Photos
Before taking any photos, you have to make sure all of your equipment is in order. Getting great pictures all starts with a great foundation, after all. It also helps pull the album together beautifully by having a ton of little details.
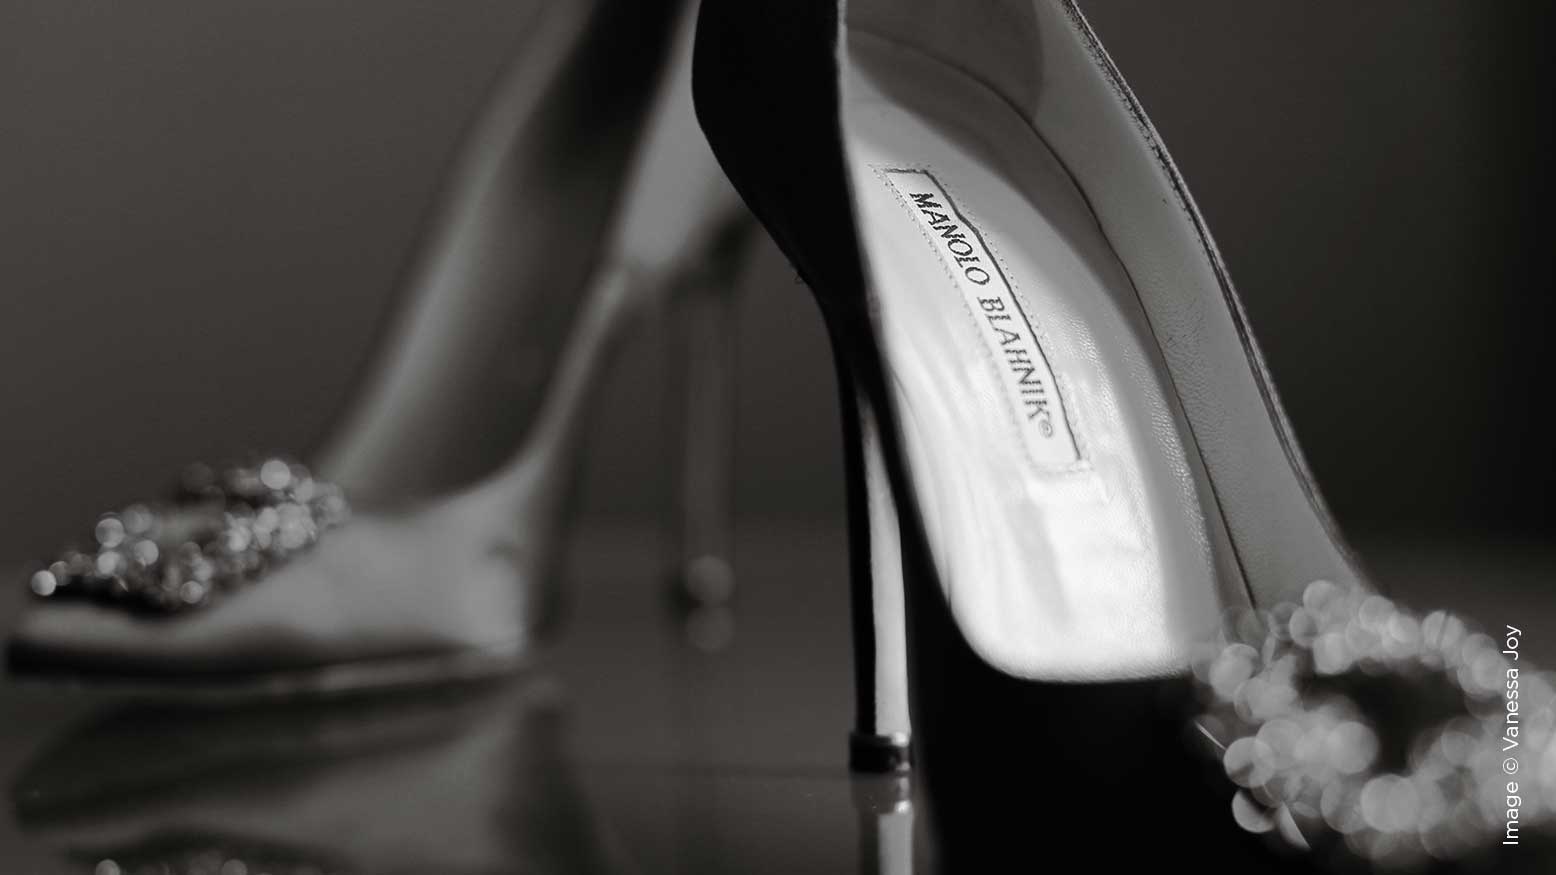
When I’m photographing the little details, I prefer to use my Canon 50mm F/1.2L lens because it allows me to get close enough to an object without it going out of focus, but still gives me the option to pull back my camera for wide-angle shots.
I try not to switch lenses a whole lot in order to save time and to prevent any unnecessary hassles. Opting for versatile lenses that I know I’ll need for the type of pictures I intend on taking spares time and keeps my camera bag light.
Most of the time, I am taking my photos fairly wide open, with my aperture set to F/3.2L or a bit lower, depending on my subject. I do this to keep most of the details in focus while still creating that soft look most of my images typically have.
Macro Photos
For smaller objects like jewelry (the ring, earrings, etc.) I’ll switch to a Canon 100mm F/2.8L macro lens. It does a beautiful, sharp job compressing the image and capturing all of the little details.
Although you are shooting at a higher aperture, the point of focus is incredibly small while taking macro pictures. One of my biggest pet peeves is not having the ring in focus, particularly the diamond, which is the very centerpiece of the ring. To get everything in focus as much as possible, shoot at the highest aperture you can, taking the lighting conditions into account and not letting your ISO get too high.
Reflectors
A reflector can be your best friend while taking these detailed shots.
I tend to take most of these wedding photos by the window of the bridal suite, which means the light source is coming in from one side. A reflector allows me to really bring out all of the little details from a side-lighting pattern because the light and shadows are going across my image.
I have two different-sized reflectors I liked to use. My larger reflector is 42 inches, which is great for portraits. My smaller reflector is 4 inches, which does a phenomenal job of giving the wedding ring a little extra sparkle. It also fills in any shadows in detail pictures that I don’t want in the final images.
Staging the Wedding Detail Photos
Contrast is Key
When staging the photos, a good bit of contrast, creativity and consistency will really make the details pop, truly capturing the essence of the day.
First, I’ll find an area with a fairly simply background, preferably one that contrasts with what I’m photographing. For example, if I’m photographing lighter-colored items (peach-colored shoes, white pearls, etc.), I’ll choose a dark background to contrast with the subjects of the photo, allowing them to truly pop.
Get Creative
Another aspect of photographing the details at a wedding that I really enjoy is how creative you can get with your shots.
When I’m photographing the wedding invitation, for instance, I like to incorporate other elements that really draw all of the details together. I might decide to include the ring, jewelry, or the shoes. It’s nice to have the invitation alongside other elements from the wedding so that it isn’t just a photograph of a pile of papers.
Finding some foliage or perhaps some flowers from the wedding florist to incorporate into the images is another favorite trick of mine that breathes life into the photos.
Stay Consistent
Consistency keeps your photos on brand and in style, ultimately enhancing the quality of the shots as a collective whole. I also enjoy consistency in the detail images because these photographs will generally be on the same spread in the bride’s photo album. While taking the photos against different backgrounds may make for a creative spread or arrangement, it may not mesh very well.
Staying consistent allows for a cohesive album spread, as all the pictures will match one another.
To achieve this kind of style and consistency, I try to take all of the photographs of the wedding details in the same place with the same background, whether it’s the invitation, ring, shoes, or flowers. Having consistent lighting is also another important part of the aesthetic.
Choose to either contrast or blend what you’re photographing with the background to make all of the little, most important details pop. Using layflats is another great way to ensure a consistent look. Layflats allow you to control the color of the background, and they also keep the images consistent.
I have been using layflats from KISS albums lately, and they’ve recently come out with entirely redesigned styling kits that have been a lot of fun to use. Here’s a helpful hint: Don’t just use layflats at weddings. Use them in your studio to photograph albums and other products you offer to your clients. Making them look appealing will help you sell them, and creating them on a consistent background will make them look more branded and cohesive on social media and your website.
In Conclusion
There are a variety of factors that will ultimately enhance the quality of your photographs. When taking the photos, it’s important to make sure you have the right lens and equipment. In my case, the small reflector and macro lens are crucial for those detail shots.
Staging the photos is your time to get creative, and for me it’s my time to breathe and get in the zone before having to photograph people. Don’t be afraid to mix and match different elements, such as capturing the invitation next to the heels and the ring or using the veil as part of the background. You can also use what’s around the room (or even someone holding the details), such as foliage or flowers from the wedding florist, to add a very unique touch and fill in any empty spaces that are in the shot. Whatever it is, bring your creativity and brand into the mix and have a little fun.


