5 Tips for Faster Creative Editing From Photoshop to Lightroom

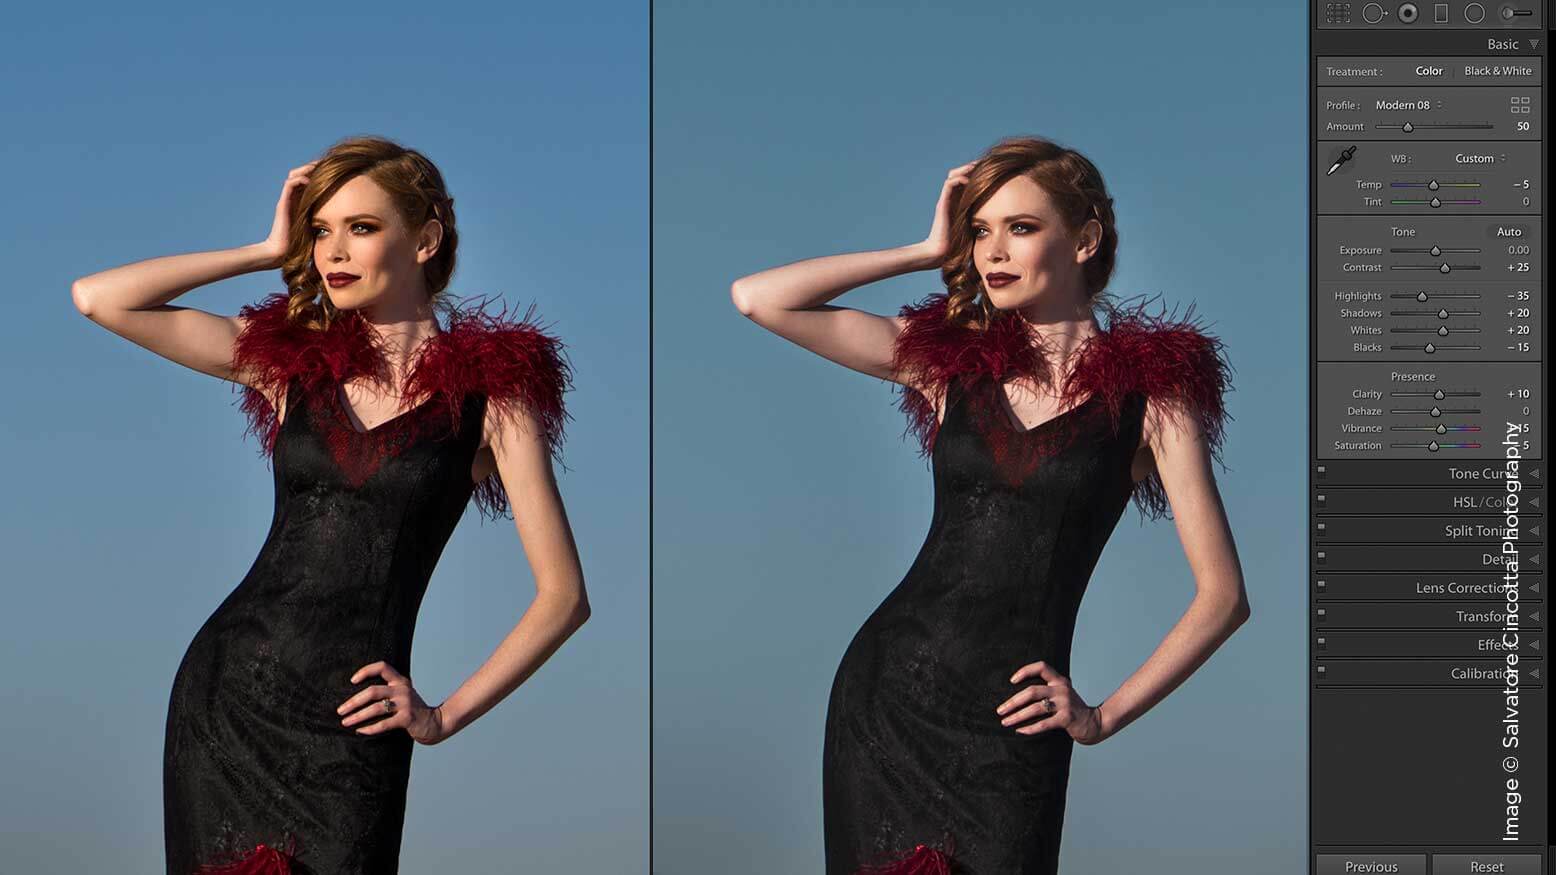
If an image needs heavy composite work to swap a sky or clip out a subject, of course it’s Photoshop to the rescue. But what about the creative editing of tones, color grades, dodge and burn, HDR, sharpening, etc.? Can we really work in Photoshop to prep and go back into Lightroom and get good results?

Continue Reading5 Tips for Faster Creative Editing From Photoshop to Lightroom

Photoshop to Lightroom: How to Turn Custom LUTs Into Color Profiles

Adobe Camera Raw is the solution for nondestructive editing from Lightroom to Photoshop using Smart Objects. This is useful for Lightroom to Photoshop, but what about Photoshop actions into Lightroom? Adobe’s recent improvements give us the ability to create Custom Color Profiles in Camera Raw, so we can flex our creativity with Photoshop actions and Custom Color Profiles by exporting Look Up Tables, or LUTs. Th­is is a massive overhaul for Photoshop that makes our Lightroom workflow even more powerful.

Continue ReadingPhotoshop to Lightroom: How to Turn Custom LUTs Into Color Profiles

Managing Your Raw Files in Lightroom Classic

There is nothing simple about digital asset management. It is easy to get hung up on equipment, shooting and editing, but managing Raw files is the most neglected part of my workflow. I feel like I always rush to import my Raw files, bypass backup and fail to organize my photos in Lightroom so I can start editing immediately. That has to stop.

Continue ReadingManaging Your Raw Files in Lightroom Classic

How to Create Color Profiles With Adobe Camera Raw

I continually try to push creative image editing to its limits. There are so many ways to tweak an image, to get that dialed-in look and feel that you envisioned when you photographed it. Since the change from Camera to Color Profiles in Adobe Camera Raw and Lightroom, the creative possibilities expanded and became so simple to use, adding them to the Basic panel and allowing users to adjust the amount it’s applied.

Continue ReadingHow to Create Color Profiles With Adobe Camera Raw

Top 10 Tricks to Edit in Lightroom Faster

You know that feeling you get when you finish a shoot and realize how many hours you now have to work in post? Wouldn’t it be nice to just import in Lightroom, click a few presets and export files? That’s the point of Lightroom’s efficiency, but there is some additional finessing required to ensure your images are consistent while maintaining your look and feel. Here are 10 tricks to help you get through this grueling season and edit faster.

Continue ReadingTop 10 Tricks to Edit in Lightroom Faster

Post-Production That Packs a Punch

As creatives, it is in our blood to break out of the box and try something new. If you are not pushing yourself and developing your photography, where’s your growth as an artist? In this article, I give you the tools to try something new and pack a punch with your images. We will dive into corrective adjustments and how to direct your viewer. These are the basics you may already be doing today, but we are going to mix things up a bit.

Continue ReadingPost-Production That Packs a Punch

Using Presets & Profiles in Lightroom Classic CC 7.3.1

Lightroom Classic CC 7.3.1 has restructured the tools in the Develop module to get us exactly what we need and faster access. Along with the new layout, there is a ton of new presets provided by Adobe and a greater supply of creative options with a single click. After reading this article, you will be ready to pivot to Lightroom Classic CC to fully experience the changes Adobe offers. Let’s dig into the new Develop module layout and get our editing bearings.

Continue ReadingUsing Presets & Profiles in Lightroom Classic CC 7.3.1

Image Sharpening: A Complete Raw Workflow with Lightroom and ON1 Photo RAW 2018

The biggest fear when shooting is losing the peak focus on the subject’s eye and having an unusable image because you shot them at such a thin aperture. We’ve all been there. Even with full-frame digital cameras and the best glass, there is a chance for failure. That’s where editing programs can save the image and bring back the sharpness you intended to capture. There are different processes and programs we can use to sharpen our images. Knowing when and how to get the most out of sharpening is where I am going to focus in this article. I will be working strictly in Lightroom and ON1 RAW 2018 to demonstrate a complete Raw workflow. Let’s get started in Lightroom.

Continue ReadingImage Sharpening: A Complete Raw Workflow with Lightroom and ON1 Photo RAW 2018

4 Steps to Reimagining Your Reality With Photoshop

To make a beautiful composition in Photoshop, a photographer needs time and the necessary skills, to be sure. But perhaps the most important piece of the puzzle is to have vision for the image. What’s the story you want to bring to life? Who are your characters? Where do they come from? Here are five steps to creating alternate realities in Photoshop. By following these suggestions, you can bring other worlds and characters into focus (and possibly inspire other up-and-coming composite artists).

Continue Reading4 Steps to Reimagining Your Reality With Photoshop

Make Your Mark with Masking in Lightroom Classic

With the new year approaching, I finally found time to explore more of what Adobe has released in Lightroom Classic. So what’s all the hype with the new masking feature? Much like the addition of the Auto-Mask added in the brush panel, there is a new innovative and more accurate method called Range Masks. Instead of your mask’s edge being analyzed for hard edges and somewhat similar tones, you have more control in choosing the range of Color and Luminosity. Like many of us, we fear Photoshop because of its complexity and inefficiency with hundreds of images. In this article, I show you how to keep things simple, how to move fast and, above all, how to create quality edits.

Continue ReadingMake Your Mark with Masking in Lightroom Classic