Self Portrait Composites in Quarantine

I’m not a patient, nurturing person by nature, so being at home with a 2.5-year-old and a 5-month-old is literally taking up 120% of my effort, patience, and mental capacity. I couldn’t help but feel like the moment I’d put one toy away, another one had exploded all over the floor. How is this happening?! She’s only one kid! My head was spinning from her boundless energy and short attention span. So that’s where the idea for this image was born. Composites don’t have to be hard and daunting, and you don’t need to be a Photoshop guru to create them either. If you keep a few important concepts in mind, you’ll be shocked at how easy it is. In this article I’ll walk you through the step by step process for creating this image.

Continue ReadingSelf Portrait Composites in Quarantine

How to Face Swap in Photoshop

When it comes to portraits of children, we all struggle to balance capturing their energy and personality while getting in-focus images. Not to mention ones with kids with eyes open, looking and smiling at the camera. Of course, the parents are going to love almost every image, and this makes the photographer’s job easy, right? Well, you need to get the safe image they expect with their kids somewhat facing the camera, eyes open, and smiling. That moment isn’t easy to capture in one shot, so what we are going to create is the perfect portrait by swapping heads in Photoshop. Doing a bit of Photoshop does not mean you aren’t a good photographer. We can only control so much and are still required to deliver a somewhat perfect portrait.

Continue ReadingHow to Face Swap in Photoshop

How to Get Consistent Color Between Cameras in Lightroom Classic

When it comes to using multiple camera models and manufacturers, images photographed in the same place and time look different. As photographers, we focus on controlling this variance of brightness and color of light in a multitude of ways. Whether that’s using Auto, Priority Modes, or Manual settings in-camera, we constantly worry how this will look on the computer screen as well as images side by side. Regarding exposure specifically, we have standardized ways to keep this in check in-camera using blown highlight preview mode or showing the histogram on the display screen while shooting. Color consistency between multiple cameras is a whole other monster.

Continue ReadingHow to Get Consistent Color Between Cameras in Lightroom Classic

5 Steps to Brush Up on Retouching in Photoshop

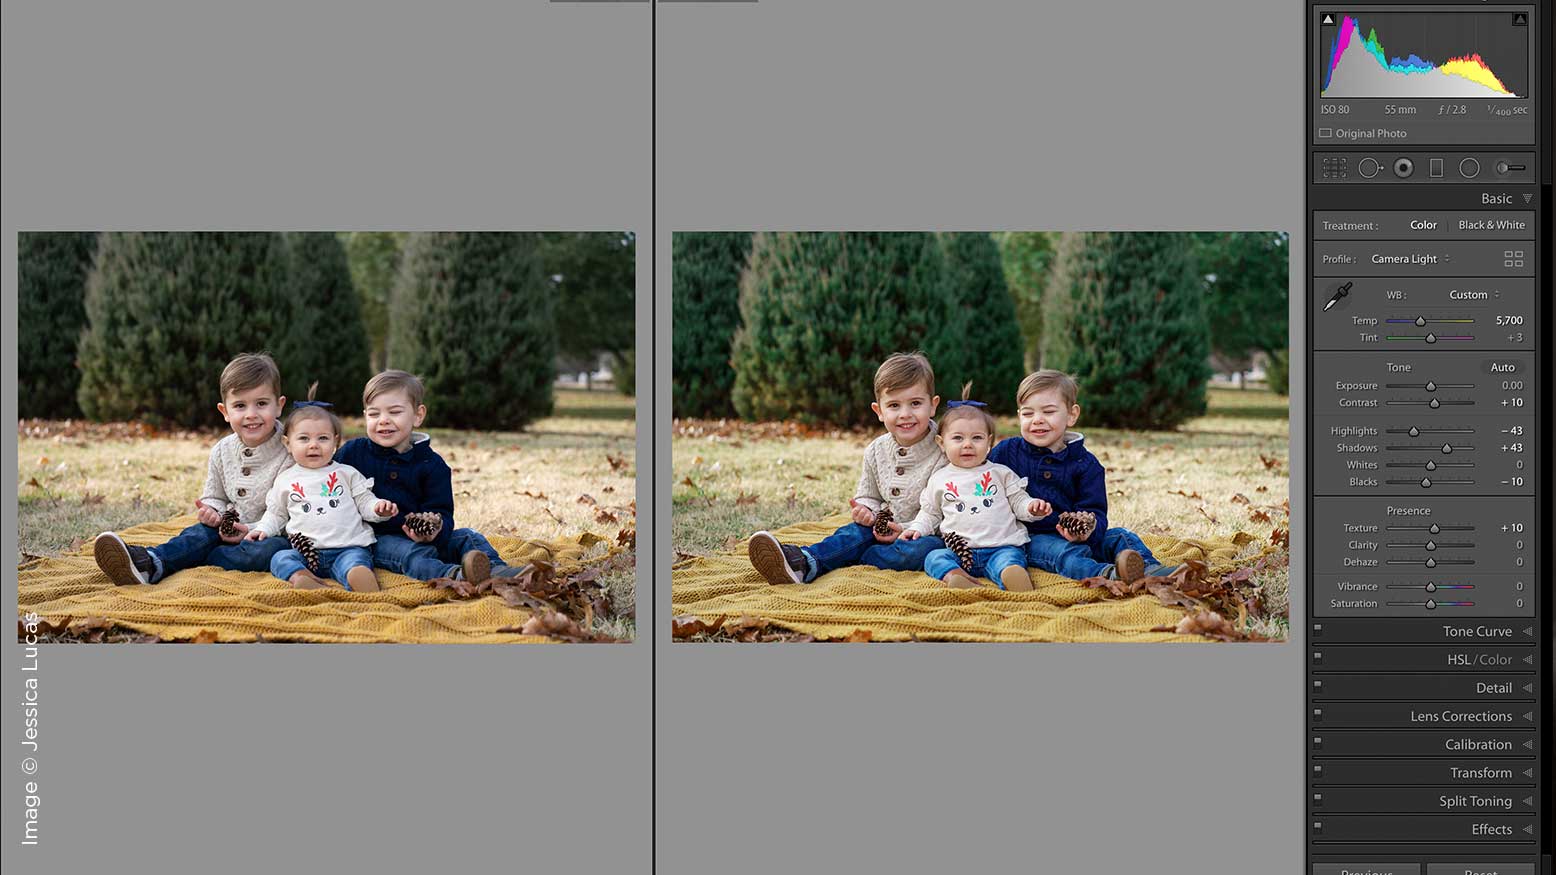
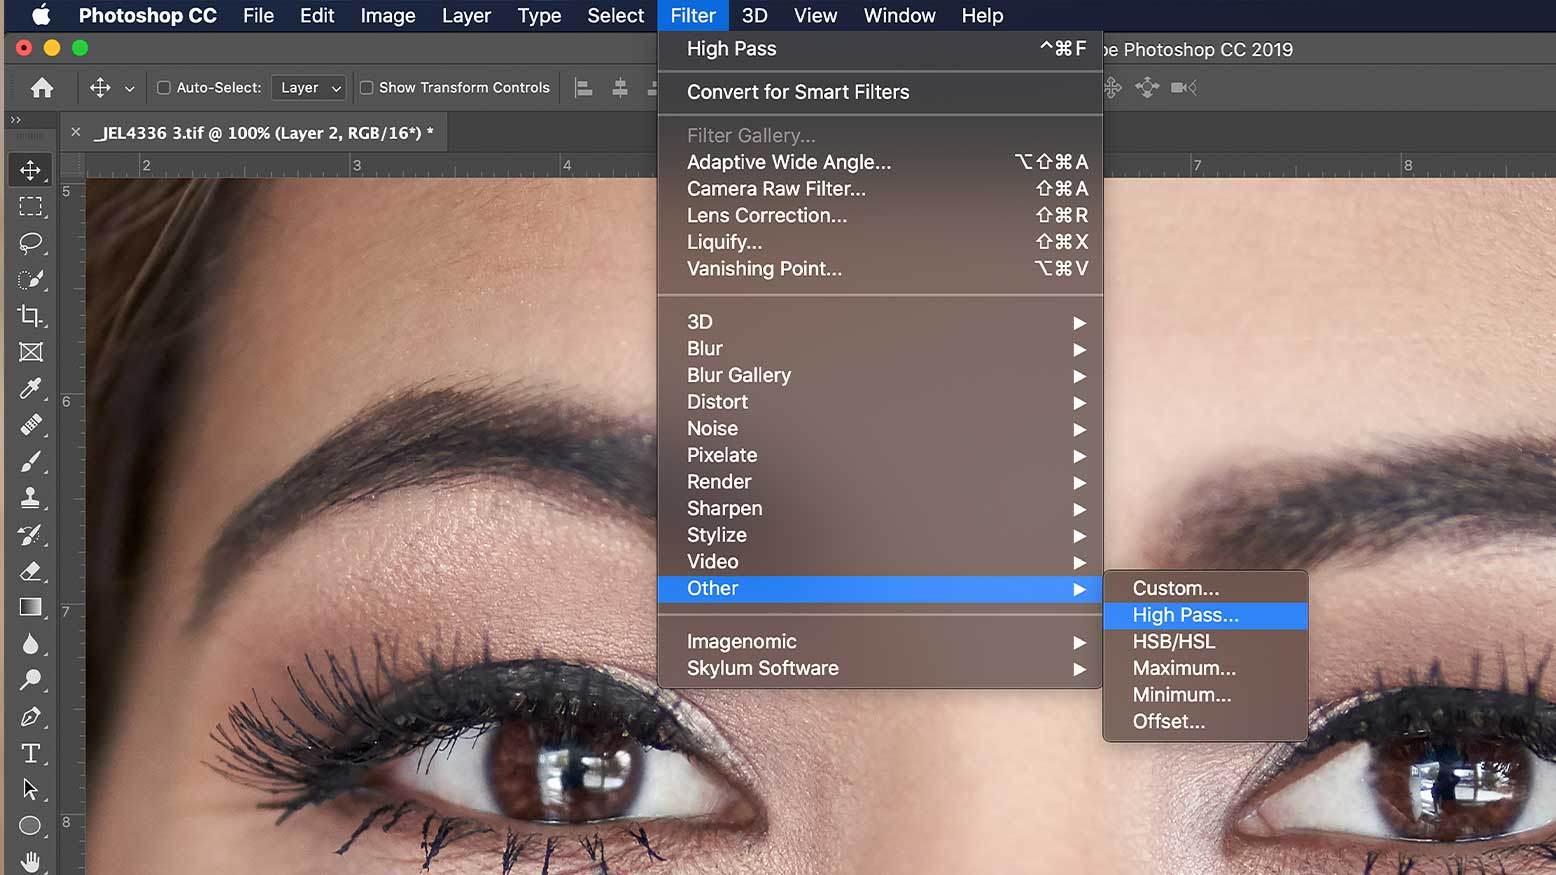
As photographers, you should focus on making your client look their best, but do not transform them into someone they won’t recognize. The rule of thumb with retouching is to be subtle enough that it’s not even noticeable that you did it. For this level of editing, I find myself starting in Lightroom or another RAW processing program, then retouching in Photoshop. In my opinion, there is no other comparable tool, and with actions, using a tablet for pressure sensitivity, and using a non-destructive post-production workflow, I can run through multiple images with ease. So if you need to dust off your editing skills, these are the five steps to brush up on retouching in Photoshop.

Continue Reading5 Steps to Brush Up on Retouching in Photoshop

3 Quick Ways to Creatively Tone Your Images With Adjustment Layers

Between all the tools, filters, layers, and even 3D capabilities, Photoshop can be an intimidating program to approach for those new to photo editing. However, Photoshop offers plenty of powerful tools that can transform your images quickly and effectively. Here, we will focus on three different methods for utilizing adjustment layers to create fun and beautiful toning for your images. 

Continue Reading3 Quick Ways to Creatively Tone Your Images With Adjustment Layers

Retouching Responsibly

My wife couldn't watch me edit photos of her. She told me that it reminded her of how much older she was getting. As I would work on a picture, she would point out marks she wanted me to remove, or tell me how to handle things that the tiny amount of makeup she wore didn't cover. For her, even though she had great skin and an athletic body, it was a process she didn't enjoy watching, but she did love the resulting images. Now, this happened years ago, and it was an excellent lesson for me in terms of thinking about how clients would potentially look at their resulting images. It also created a set of guidelines I now use when retouching, and I wanted to pass those on to you, so you can avoid the same pitfalls I did.

Continue ReadingRetouching Responsibly

5 Steps to Enhance Your Post-Production

I am well aware that post-production can be intimidating and sometimes even overwhelming. That is exactly how I felt at the beginning, when I first started learning about Photoshop and practicing my skills. On the other hand, it is a great tool for unlocking your creativity and bringing your photography to the next level. After I realized the difference post-production can make, I never looked back, and spent days exploring new ways to improve my work and my skills. Still, all those skills can be futile if you do not think about the post-production process before you even take the photo. That is why the next section is an extremely important step in my creative process.

Continue Reading5 Steps to Enhance Your Post-Production

Outsourcing Post-Production to Enhance the Client Experience

Over the last two-and-a-half years, we have built a luxury brand in a small market. We are by far the most expensive photography option in our area—I am talking three to ten times more expensive than others. To be honest, we don’t think we are five times better than the other photographers in our town, and we don’t think our end product is five times better than their products either. However, we are able to charge ten times what they are, and still fill our calendar, because of the time we have spent making sure from start to finish that our clients are getting an incredible experience.

Continue ReadingOutsourcing Post-Production to Enhance the Client Experience