
One-Light Headshots with Michael Corsentino
Headshots come in many flavors, from clean and commercial to more nuanced, moody affairs. Different kinds of clients need different kinds of headshots. An actor or model’s needs are very different from those of a Realtor or executive. Sometimes you need to create a variety of looks for the same client, especially actors and models.
In last month’s tutorial, I walked you step by step through an awesome four-light headshot setup with three accent lights that produced killer results. While working with multiple lights is preferable in many situations, allowing maximum flexibility with independently controlled lighting zones, it’s not realistic for everyone’s budget. This month, I take a different approach, showing you how much you can do with just one light.
When I’m shooting with agency models, as I did for this shoot, I prefer lighting that’s clean and even and backgrounds ranging in tone from white to gray. Sometimes I add in shadows by simply moving my keylight to the right or left of my camera position—it really is that easy. It all depends on what my clients need, the type of work they do and how much time I have with them. Providing a variety of looks gives my clients the range of options and combinations they’ll need for the comp cards and websites they use to market their services.
Whether you’re working with one light or a dozen, it comes down to the keylight and the modifier used to shape and control the light. In any scenario, the keylight is your dominant light source that sets the overall tone for the quality of light in the image. The role of the keylight is important because it is the sole source of illumination. When you’re working with only one light, its position and angle in relationship to the model and camera position, and the modifier selected to use along with it, are all important choices.
My go-to light source for headshots is strobe. I recommend at least 500 watt-seconds to provide the power necessary for shooting with the smaller apertures you’ll likely want in the studio. Smaller apertures increase depth of field and provide more sharpness from the foreground to the background of your images. If you don’t have a strobe, you can get by with a speedlight as you grow your business and acquire additional tools.
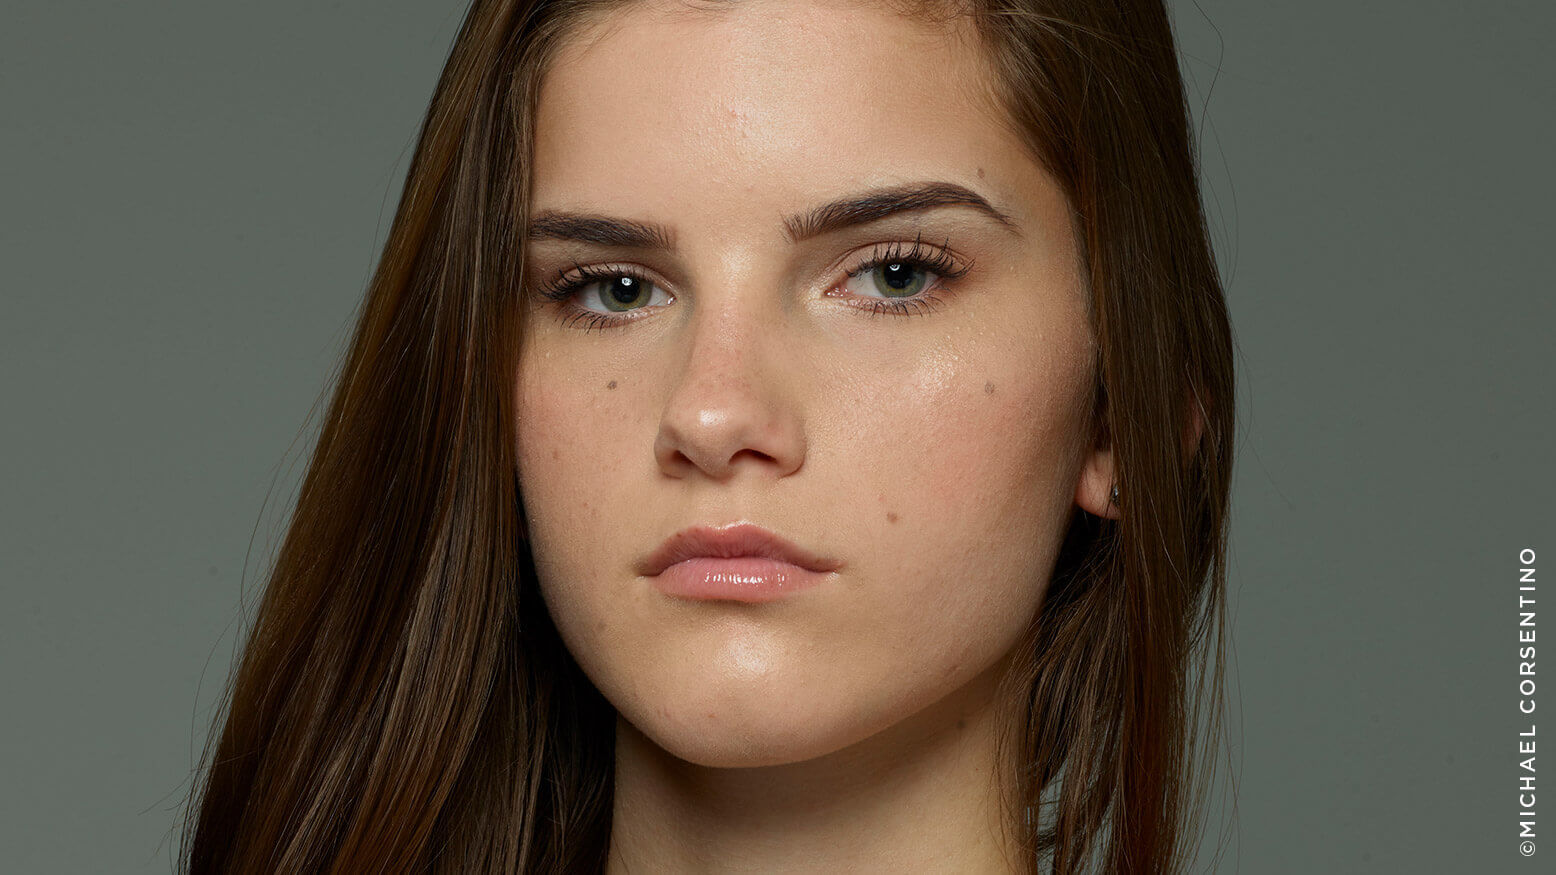
For most studio headshots, my preferred f-stop falls between f/11 and f/16. I pair the strobe with a beauty dish, my other go-to tool for portraits and a variety of other subjects. The beauty dish, a reflector, is an extremely versatile modifier. I recommend the Mola Demi 22-inch beauty dish. These reflectors create a quality of light that strikes a balance between soft and specular, delivering just the right amount of contrast or sparkle. A beauty dish can be used bare or with a diffusion sock over its face to further soften its light and lessen contrast.
I start with the beauty dish bare and work from there. For the final lighting setup with this model, I got the most pleasing results for her complexion using the diffusion sock. I’ve included an image captured using bare strobe alone as a starting point to illustrate the before and after impact of a beauty dish. If you don’t have a beauty dish, no worries: You can get great results with a shoot-through or bounce umbrella in a pinch.
The first step in great-looking headshot lighting with one light is setting the position and angle of the keylight and beauty dish. To create even lighting with very few shadows, I placed the beauty dish directly in front of the model and above my camera position using a light stand with a boom arm, which is known as Paramount light. I angled the light and modifier 45 degrees down toward the model’s face, which is a good starting point. Next, fine-tune the angle of the keylight by stepping behind your subject, looking at the angle of the beauty dish relative to their face and adjusting the angle as needed so they both line up. You want the center of the beauty dish pointed down and lined up with the center of your subject’s face.
Now let’s look at the techniques and tools we can use to squeeze every last drop of nuance from our single light. Just as I used additional strobes as accent lights in last month’s portrait tutorial, now I’ll use reflectors to accomplish the same. When you use reflectors rather than additional strobes, the changes from one step to the next may appear subtle. As you can see here, the final lighting result is greater than the sum of its parts.
After the keylight is set up, it’s time to move on to fine-tuning with reflectors. Just like strobes, I like to work one reflector at a time and slowly build as I go. Working this way allows you to accurately assess the impact each reflector is making rather than throwing in everything at once.
I add the first reflector to create fill light under the subject’s chin and inside her sockets. I put it directly under the keylight and below the model’s face. The height of the reflector depends on your framing, how much fill light you want from the reflector and the intensity of the fabric used on the reflector. Sometimes it’s chest level, sometimes waist level. You’ll need to season to taste.
Adding this reflector turns what was previously Paramount light into an over and under lighting pattern know as clamshell lighting. I start with white reflectors and add additional contrast and intensity by switching to silver as needed. My favorite tool for this is the Lastolite Triflector. It has three adjustable reflector panels on articulating arms, which allows you to fine-tune the amount of reflected light under and around the face. Panels are reversible, with white on one side and silver on the other. I started with white for all three panels, then tried silver on the left and right panels and white in the center, and finally settled on silver for all three panels. This was the sweet spot for this model. Your mileage may vary depending on your subject’s complexion.
Once I’d dialed in the keylight and fill reflector, I wanted to create fill on either side of the model’s face. This serves two purposes: It heightens the bright, even lighting I wanted for these headshots and it throws more light onto the background when I move the model closer to it for images with a white-ish background. To accomplish this, I added two white V-flats, one on either side of the model’s face. These squeezed even more illumination from our keylight and created subtle fill on both sides of the model’s face. Adding fill below and on either side of the model stepped up the lighting.
The next step was to vary the distance between the model, lighting and the background. By moving the light and reflectors closer to or farther away from the background, you can control how bright it is and vary its tone from gray to nearly white. I started at about 8 feet way from the background for the images with a gray background. Once satisfied with a set of gray background images, I moved the keylight, reflector and V-flats as close to the background as I could. I shot some test captures to assess the tone of the background and illumination on the model. To create an even brighter background and a more specular look, I replaced the white V-flats with 4×6 Sunbounce silver reflectors on each side of the model. This threw even more light onto the background and gave the images the extra punch I wanted on white.
I again moved everything away from the background and finished the shoot with a set of gray background images, this time using the silver reflector panels for side fill light. I had created the variety of images my client needed, and the shoot was a wrap.
With just one light and a little knowhow, I created images on gray, images on white, punchy images and softer images. I’ve only scratched the surface in this article, but hopefully it shows you that one-light headshots rule.


