Top 10 Tricks in Lightroom Classic with Dustin Lucas
Over the years, some of my favorite tricks in Lightroom Classic have saved me seconds per image, minutes per job and hours in a week. Saving time is vital for my workflow and sanity when I have dozens of jobs piling up. To get to a place where you can cull and color-correct a job fast, you have to be open to tips and tricks. Be teachable! In this article, I am going to give you my Lightroom settings, plus tools and techniques I use daily. These are standard for me in Lightroom and you may be familiar with many of them!
First tip, import with Smart Preview and then disconnect your original files. Second tip, change your Catalog Settings to lower Standard Preview quality and size. Third, use Lights Out for culling or selecting images. Fourth, enable hover preview of presets to quickly see different effects. Fifth, turn off the graphics processor for most computers. I have yet to see a computer get performance with this turned on. Sixth, edit in bulk in Quick Develop. Seventh, use the Match Total Exposure to quickly sync images in the same lighting sequence. Eighth, dial in color and tone with Target Adjustment tools. Ninth is how to use auto settings the right way. The last tip is using Reference Mode to match edits in Develop. Let’s dive in!
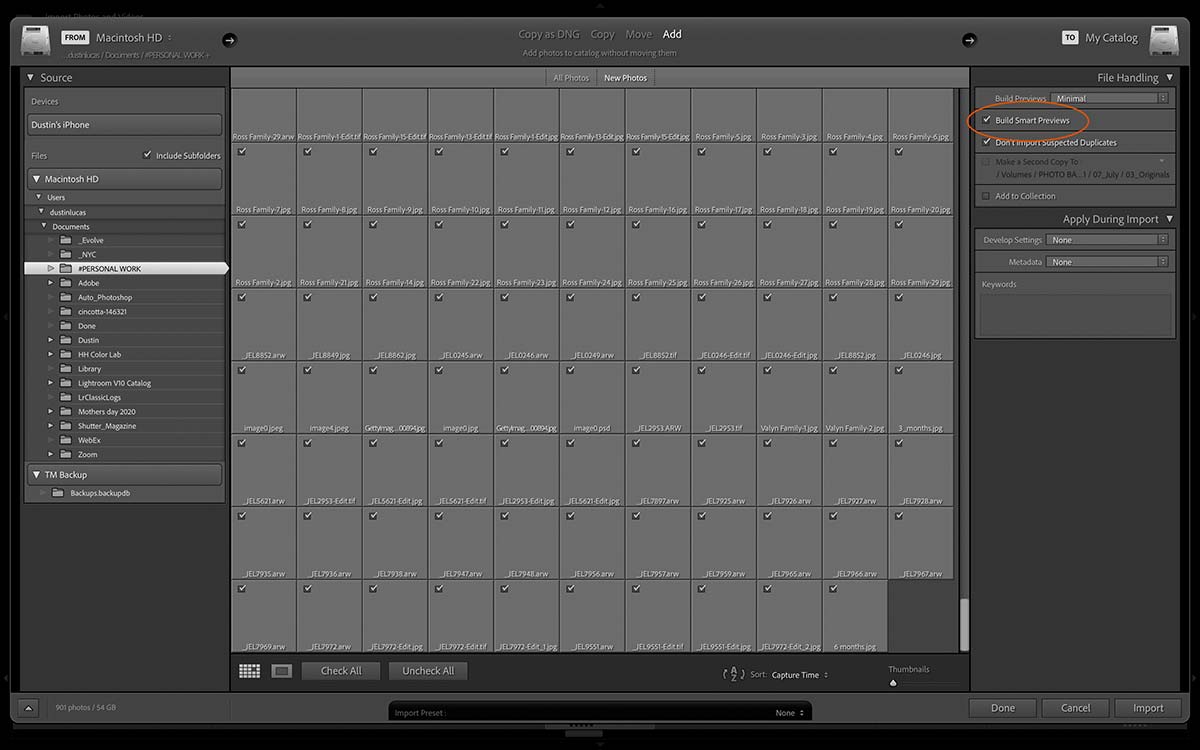
Tip 1. Import with Smart Previews
Smart Previews are a godsend in Lightroom because they allow you to work on your images without having the original files connected to the computer. Not only that, but the speed and performance of editing is 10x compared to being connected to the Originals. Next time you import raw files into Lightroom, check this box and I swear you’ll never look back. Then you can physically disconnect your external hard drive or virtually change the location of your files in Lightroom. Either way you will immediately see the difference in the editing.